This post may contain affiliate links. As an Amazon Associate I earn from qualifying purchases. If you click and buy, I may receive a small commission at no extra cost to you. Read our Disclosure Policy
An outdoor kitchen is the perfect way to level up your backyard—whether you’re grilling for the family, hosting weekend get-togethers, or just enjoying a peaceful cup of coffee outside. But let’s be honest, store-bought outdoor kitchens can be ridiculously expensive! That’s where wooden pallets come in. They’re budget-friendly, easy to work with, and let you create a custom kitchen setup that fits your space perfectly.
If you’re dreaming of building an outdoor kitchen with pallets, I’ve got you covered! Below, we’ll go beyond the step-by-step build instructions and dive into how to choose the best pallets, weatherproofing tips, storage solutions, and more.
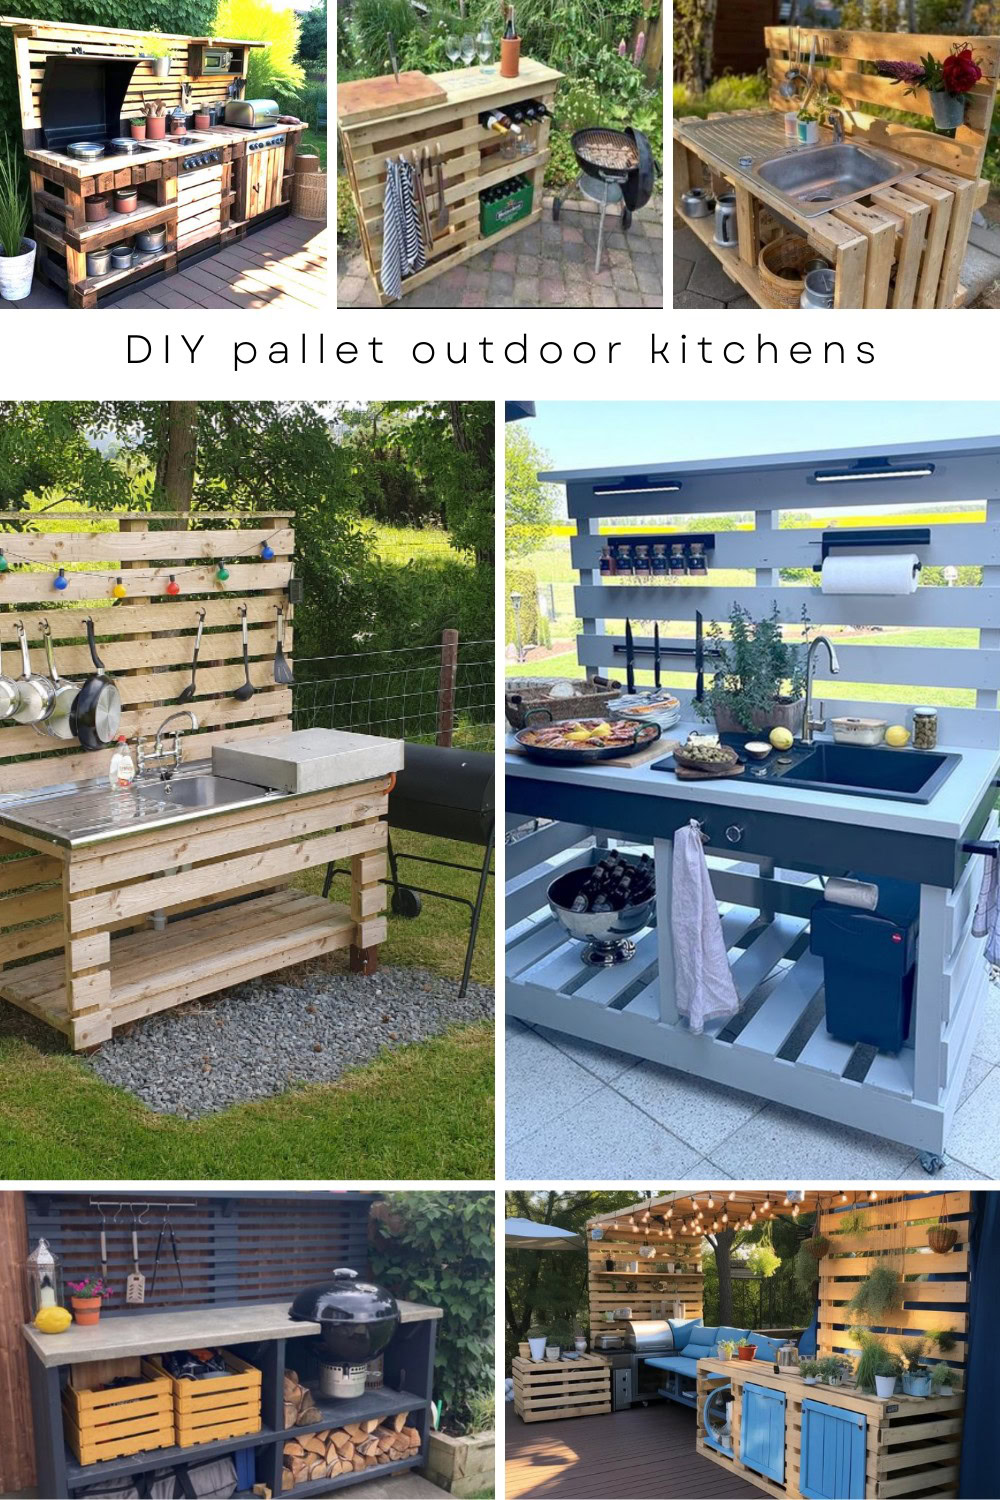
Thinking about sprucing up your backyard for entertaining friends and family Why not consider building an outdoor kitchen using wooden pallets It’s a fun, budget-friendly DIY project that will not only elevate your outdoor entertaining game but also impress your guests at your next BBQ or garden party. With some creativity and elbow grease, you can transform simple pallets into a stunning outdoor kitchen that’s perfect for any occasion. Plus, we’ve got video tutorials and tons of pictures to spark your imagination and guide you through the process. So grab your tools and get ready to create something amazing!
DIY Outdoor Kitchen Made from Pallet Wood
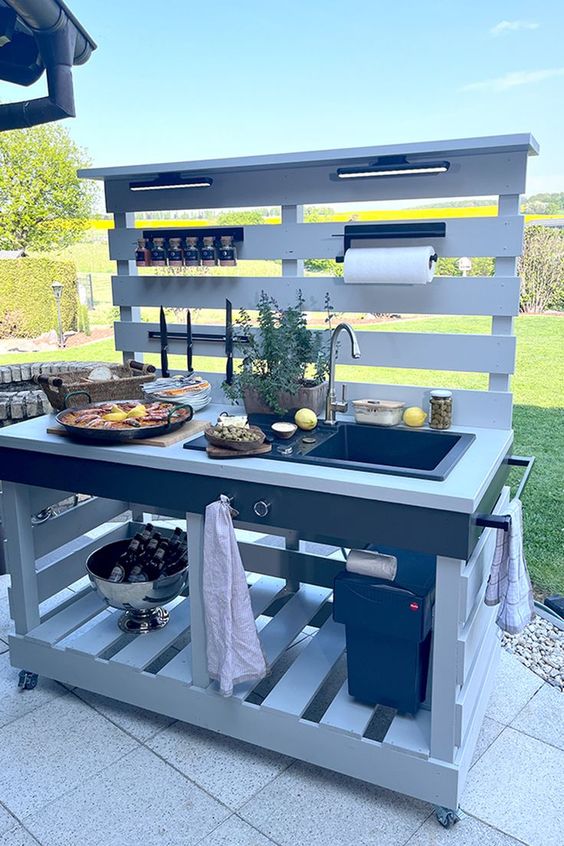
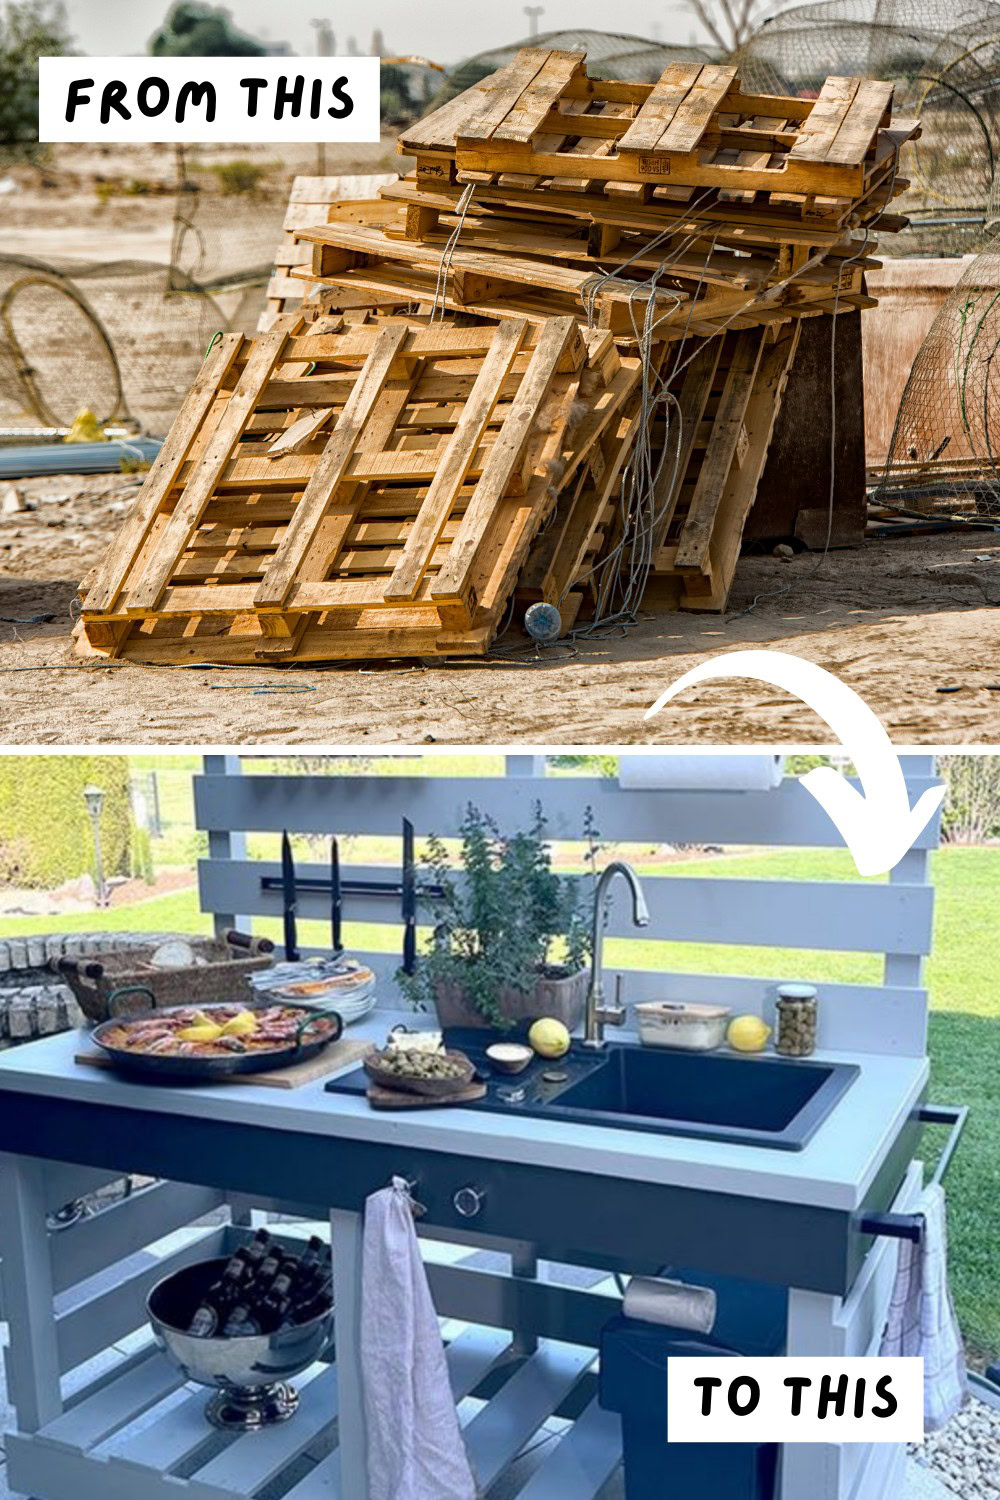
Watch the video above to see how to turn pallet wood into a stylish outdoor kitchen for entertaining and parties. Don’t worry if you don’t speak German, we’ve outlined the steps below.
DIY Supplies
Materials
- Pallet Wood Boards
- Heavy-Duty Castor Wheels with Brakes
- Worktop for Counter
- Sink with Faucet
- Garden Hose
- Water Canister
- Flexible Plumbing Pipes
- Screws and Nails
- Wood Glue
- Paint or Wood Finish (optional)
- LED Lights with Touch Function
- Magnetic Knife Holder
- Spice Rack
- Towel Holder
Tools
- Drill with Drill Bits
- Jigsaw
- Screwdriver
- Measuring Tape
- Spirit Level
- Sandpaper or Electric Sander
- Clamps
- Water Pump
Build the Frame
Step 1: Create the Back Panel Frame
- Start by constructing the frame for the back panel. Use pallet wood boards to build a sturdy structure.
- Secure the boards with screws, ensuring that everything is aligned and level.
Step 2: Construct the Front and Side Panels
- Build the frame for the front of the kitchen.
- Attach the side panels securely using screws.
- Ensure the front and side frames are strong enough to support additional weight.
Step 3: Install the Back, Side, and Bottom Panels
- Attach pallet boards to cover the back, sides, and bottom of the structure.
- Make sure to leave space for installing the sink and other features.
Step 4: Add the Worktop and Upper Shelf
- Securely fasten the countertop to the top of the frame.
- Install a shelf above the countertop for additional storage.
Make it Mobile
Step 1: Add Wheels for Mobility
- Choose heavy-duty castor wheels with a brake function for added stability.
- Attach the wheels under each corner of the frame using screws.
Note: Having a mobile kitchen allows you to move it around easily, perfect for when you need to shelter it from rain or relocate it for a party.
Step 2: Ensure Stability
- Double-check that the wheels are securely attached.
- Test the brake function to prevent any unwanted movement.
Add Running Water
Step 1: Install the Sink
- Decide on the sink’s position, leaving enough space at the back for additional storage or decor.
- Mark the dimensions on the countertop and cut the opening with a jigsaw.
- Sand the edges smooth to prevent splinters.
Safety Tip: When using power tools like the jigsaw, always allow the machine to stop completely before lifting it from the workpiece to avoid injury or damage.
Step 2: Connect the Water Supply
- Use a garden hose to supply water to your sink. Connect it to the outdoor water outlet at your house.
- Install flexible plumbing pipes to direct waste into a water canister.
Step 3: Install the Faucet
- Attach the faucet securely to the sink.
- Ensure all connections are tight to prevent leaks.
Step 4: Set Up the Drainage System
- Instead of a traditional S-bend, connect the sink’s drain to a canister to collect wastewater.
- This eco-friendly solution ensures no waste goes into the garden or lawn.
Finishing Touches
Step 1: Install Lighting
- Attach LED lights with touch function above the countertop.
- These lights can be magnetically mounted for easy adjustment and recharging via USB.
Step 2: Add Accessories
- Install a magnetic knife holder for safe and convenient storage of kitchen tools.
- Add a spice rack and kitchen roll holder for additional organization.
- Consider installing a towel holder that doubles as a handle for easy mobility.
Your DIY outdoor kitchen is now complete! It’s not only functional but also a stylish addition to your outdoor living area. With running water, lighting, and mobility, it’s perfect for entertaining family and friends. Enjoy cooking in the open air and make the most of your new kitchen!
Final Tip: Always perform a final check for any loose screws or fittings before using the kitchen, ensuring safety and durability.
More DIY Outdoor Kitchen Inspiration
Best Pallets for an Outdoor Kitchen✅
Not all pallets are created equal—some are perfect for building furniture, while others might be unsafe or too fragile. Here’s how to choose the best ones for your outdoor kitchen project:
1️⃣ Look for Heat-Treated (HT) Pallets
Pallets are either heat-treated (HT) or chemically treated (MB). Always use HT pallets—they are kiln-dried, making them more durable and free from toxic chemicals.
Check for the HT stamp on the pallet’s wood. If it says MB (Methyl Bromide)—skip it! These pallets have been chemically treated and aren’t safe for outdoor kitchens.
2️⃣ Pick Sturdy, Untreated Wood
- Look for hardwood pallets (oak, maple, or pine) for strength.
- Avoid pallets with cracks, excessive splinters, or mold growth.
- If possible, choose pallets with thicker wood slats—these will last longer.
3️⃣ Where to Find Good-Quality Pallets
- Local businesses & warehouses – Many give away pallets for free!
- Grocery stores or garden centers – Often have clean, sturdy pallets.
- Online marketplaces (Facebook, Craigslist) – Great for finding bulk pallets.
Pro Tip: Always inspect pallets for nails, staples, or rough edges before using them. Sanding and sealing will make a world of difference!
Design Ideas & Layout Inspiration ✨
Before you start stacking pallets, think about how you’ll use your outdoor kitchen. Do you want a simple grill station A full outdoor bar A compact prep area with storage Here are a few design ideas to get your creativity flowing:
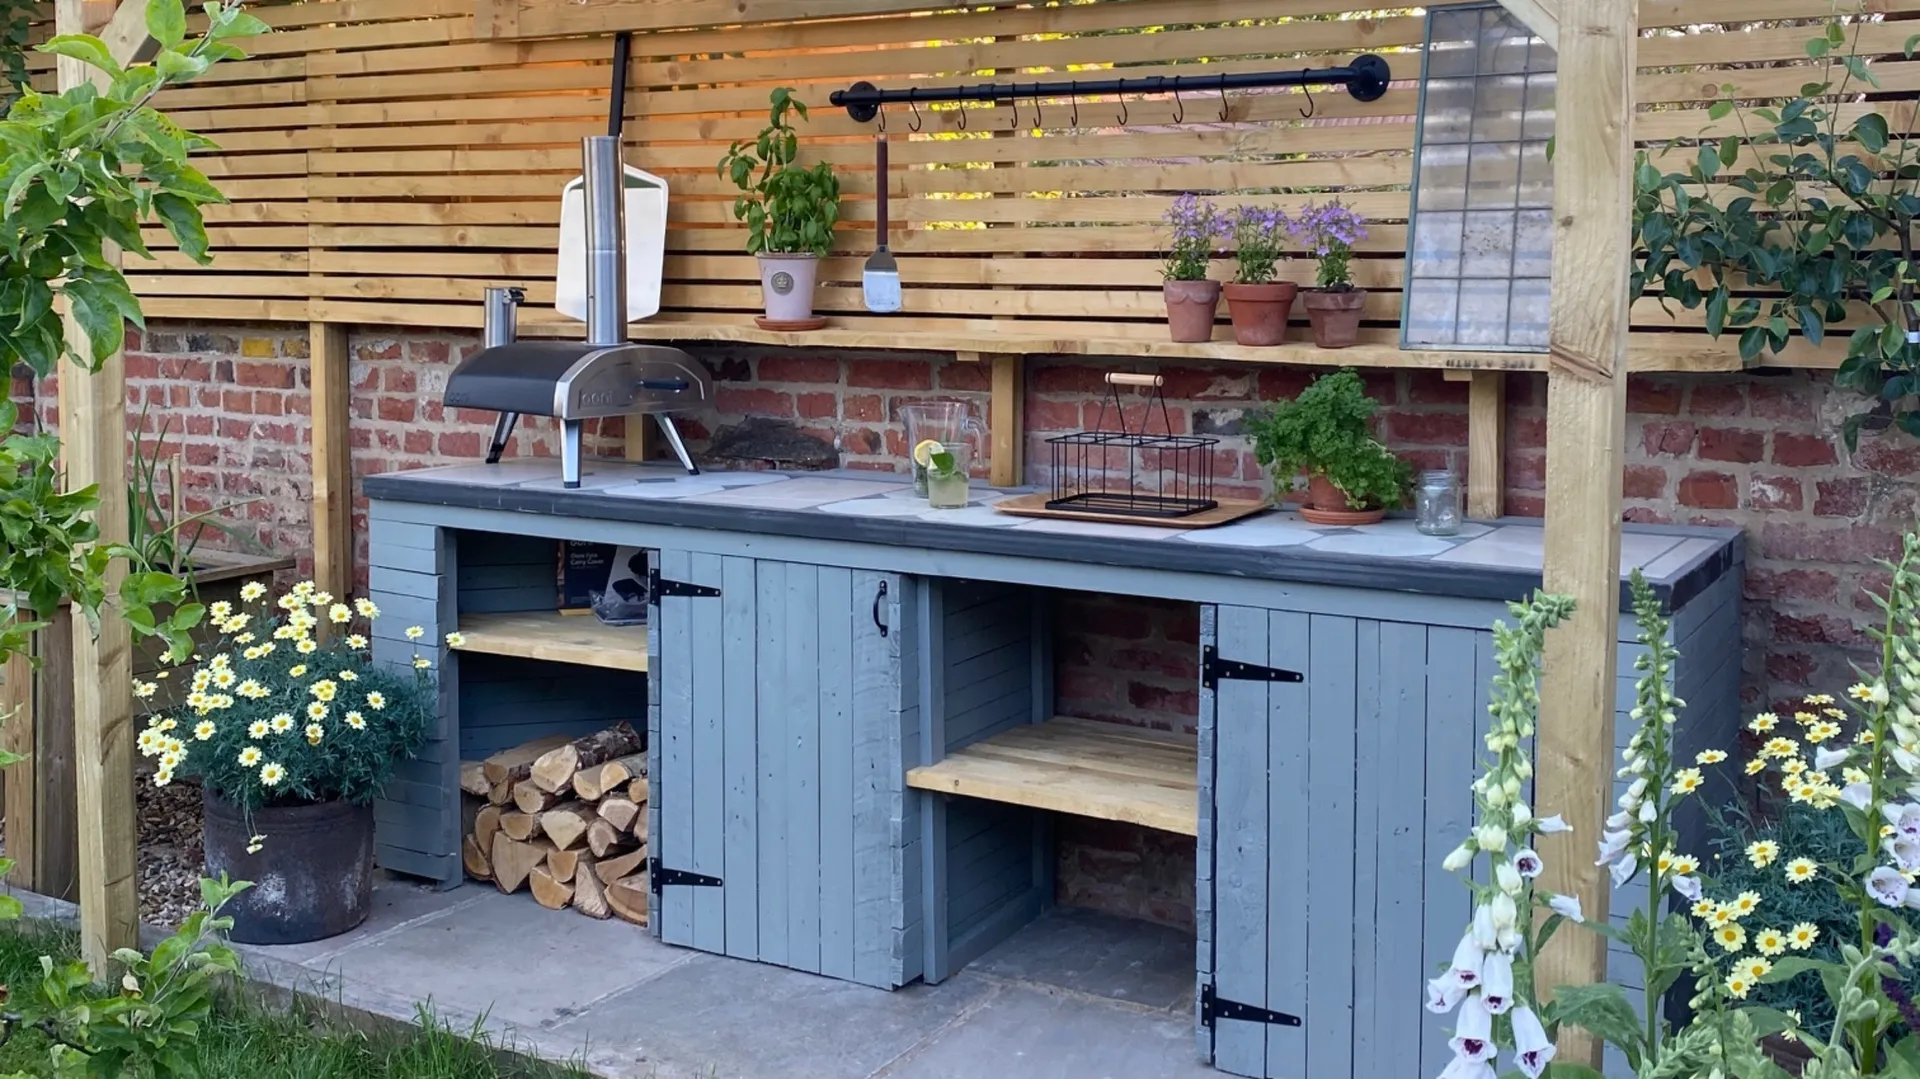
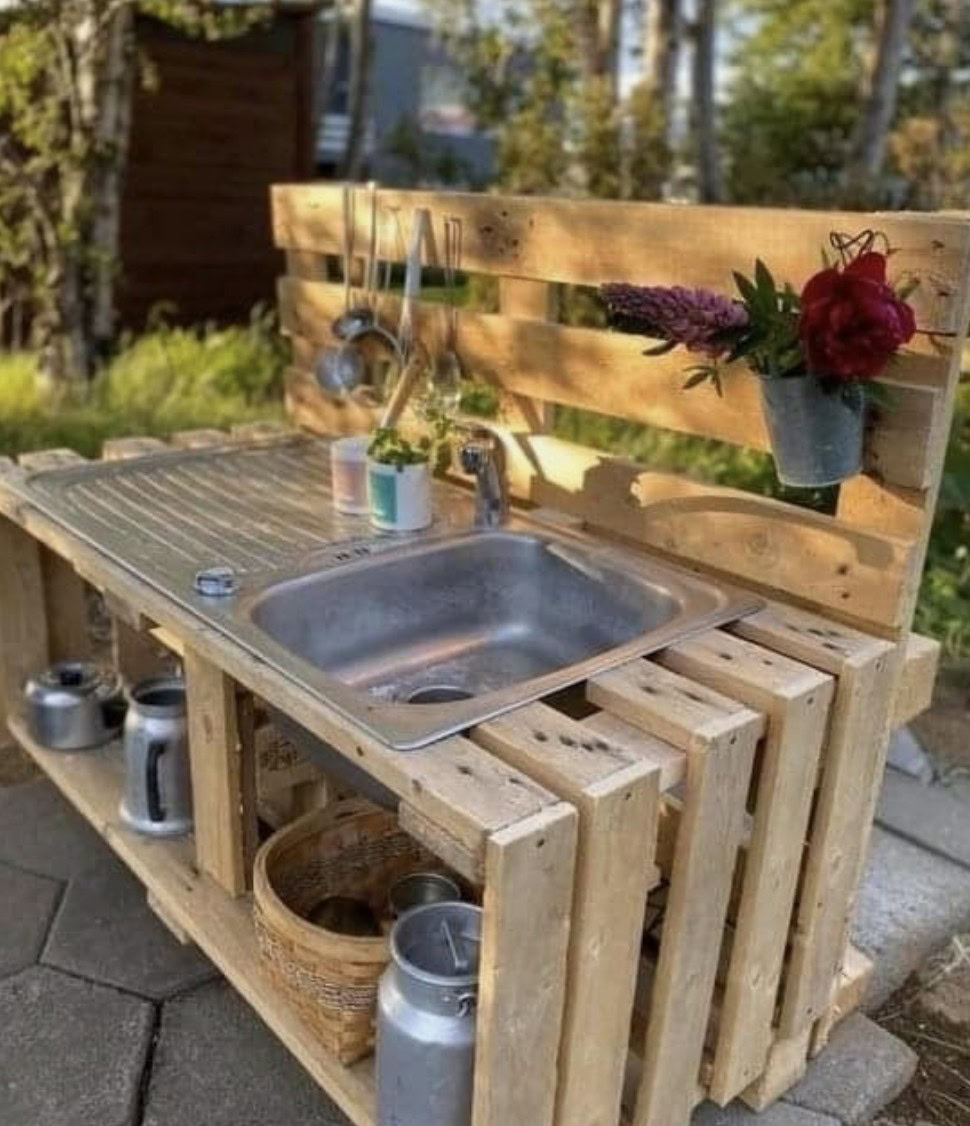
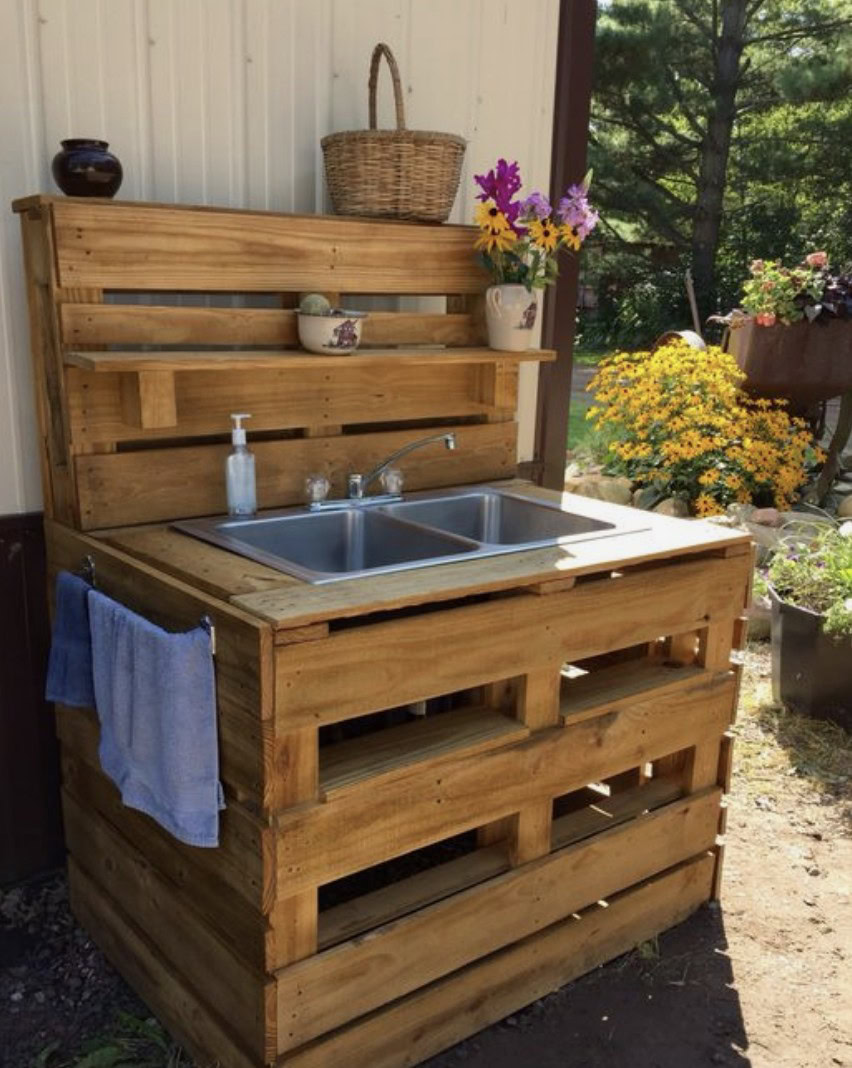
1️⃣ Rustic Farmhouse Outdoor Kitchen
- Use weathered pallets for a natural, rustic vibe.
- Add a butcher block countertop for food prep.
- Install hooks and shelves for hanging utensils and spices.
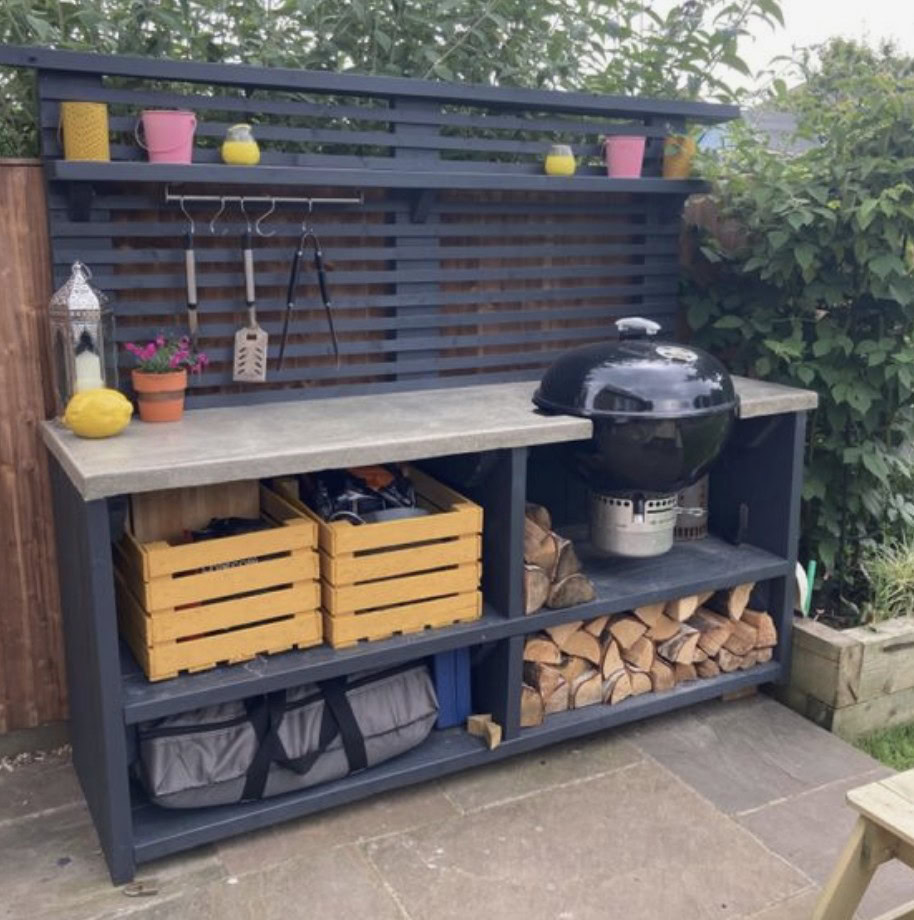
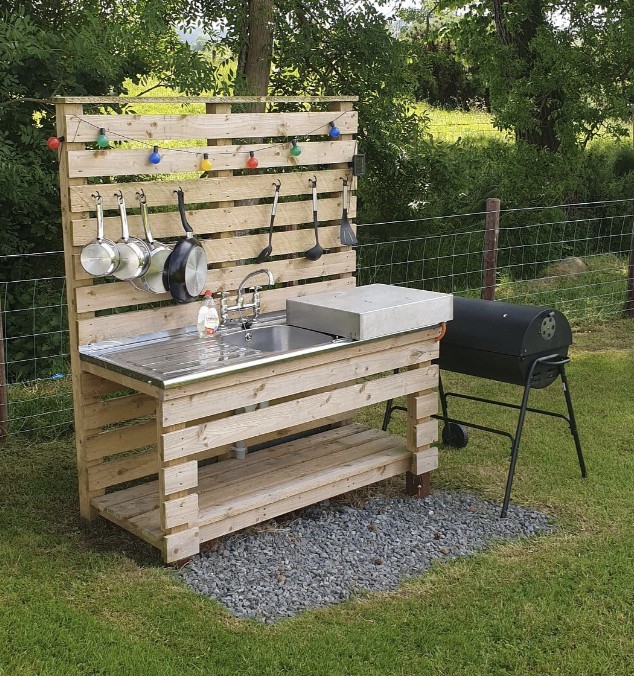
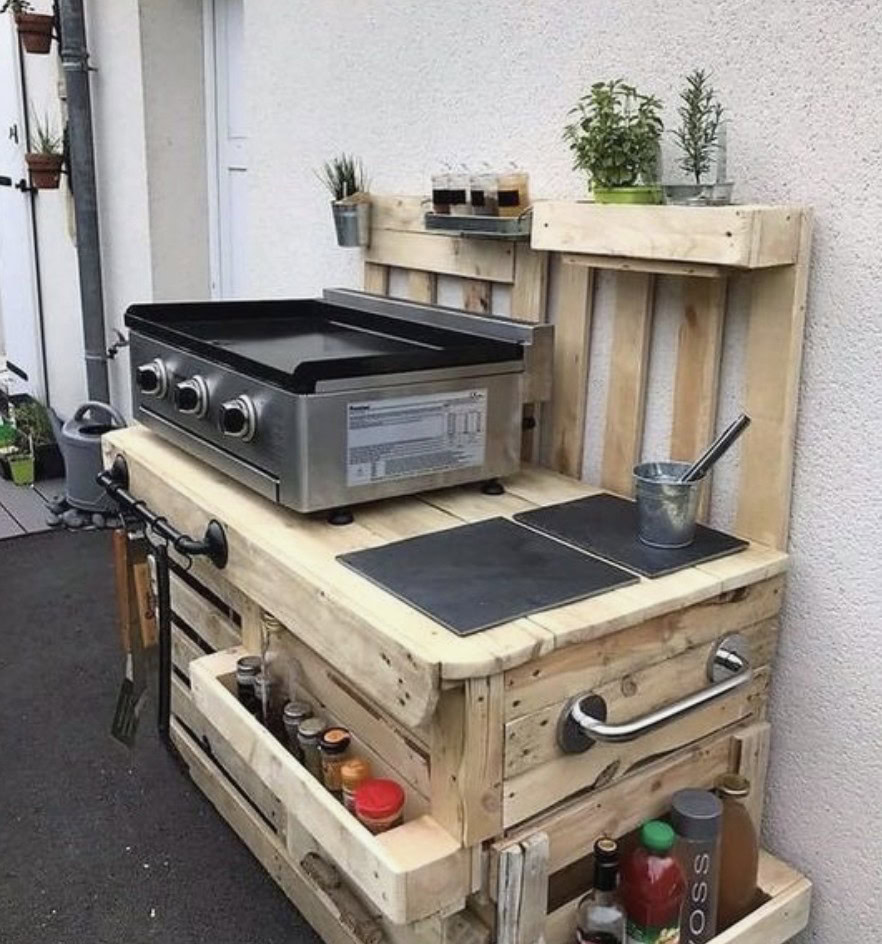
2️⃣ DIY BBQ Station
- Build a grill surround using pallets.
- Create a built-in storage rack for charcoal, wood, or propane.
- Attach a fold-down prep table for extra workspace.
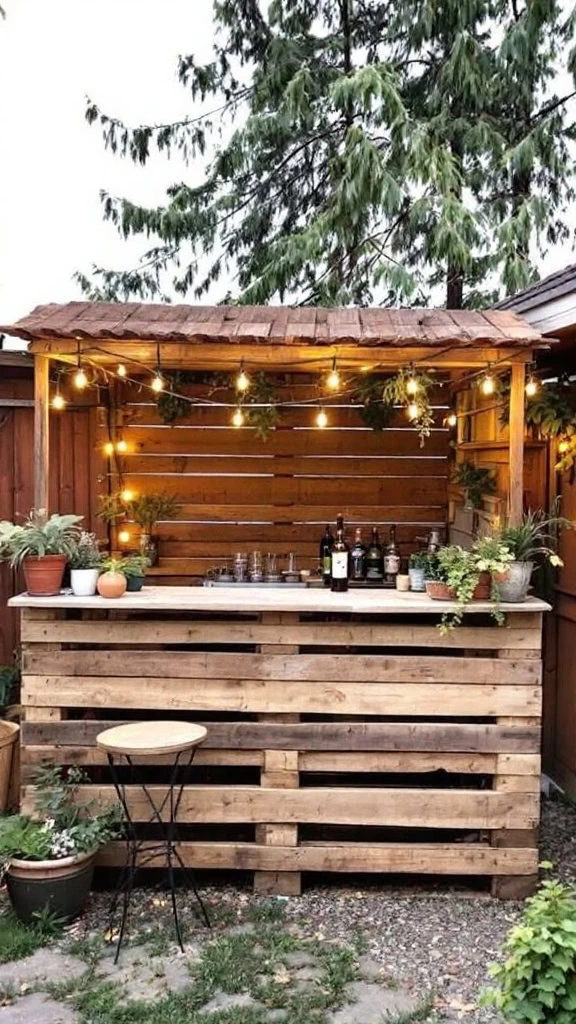
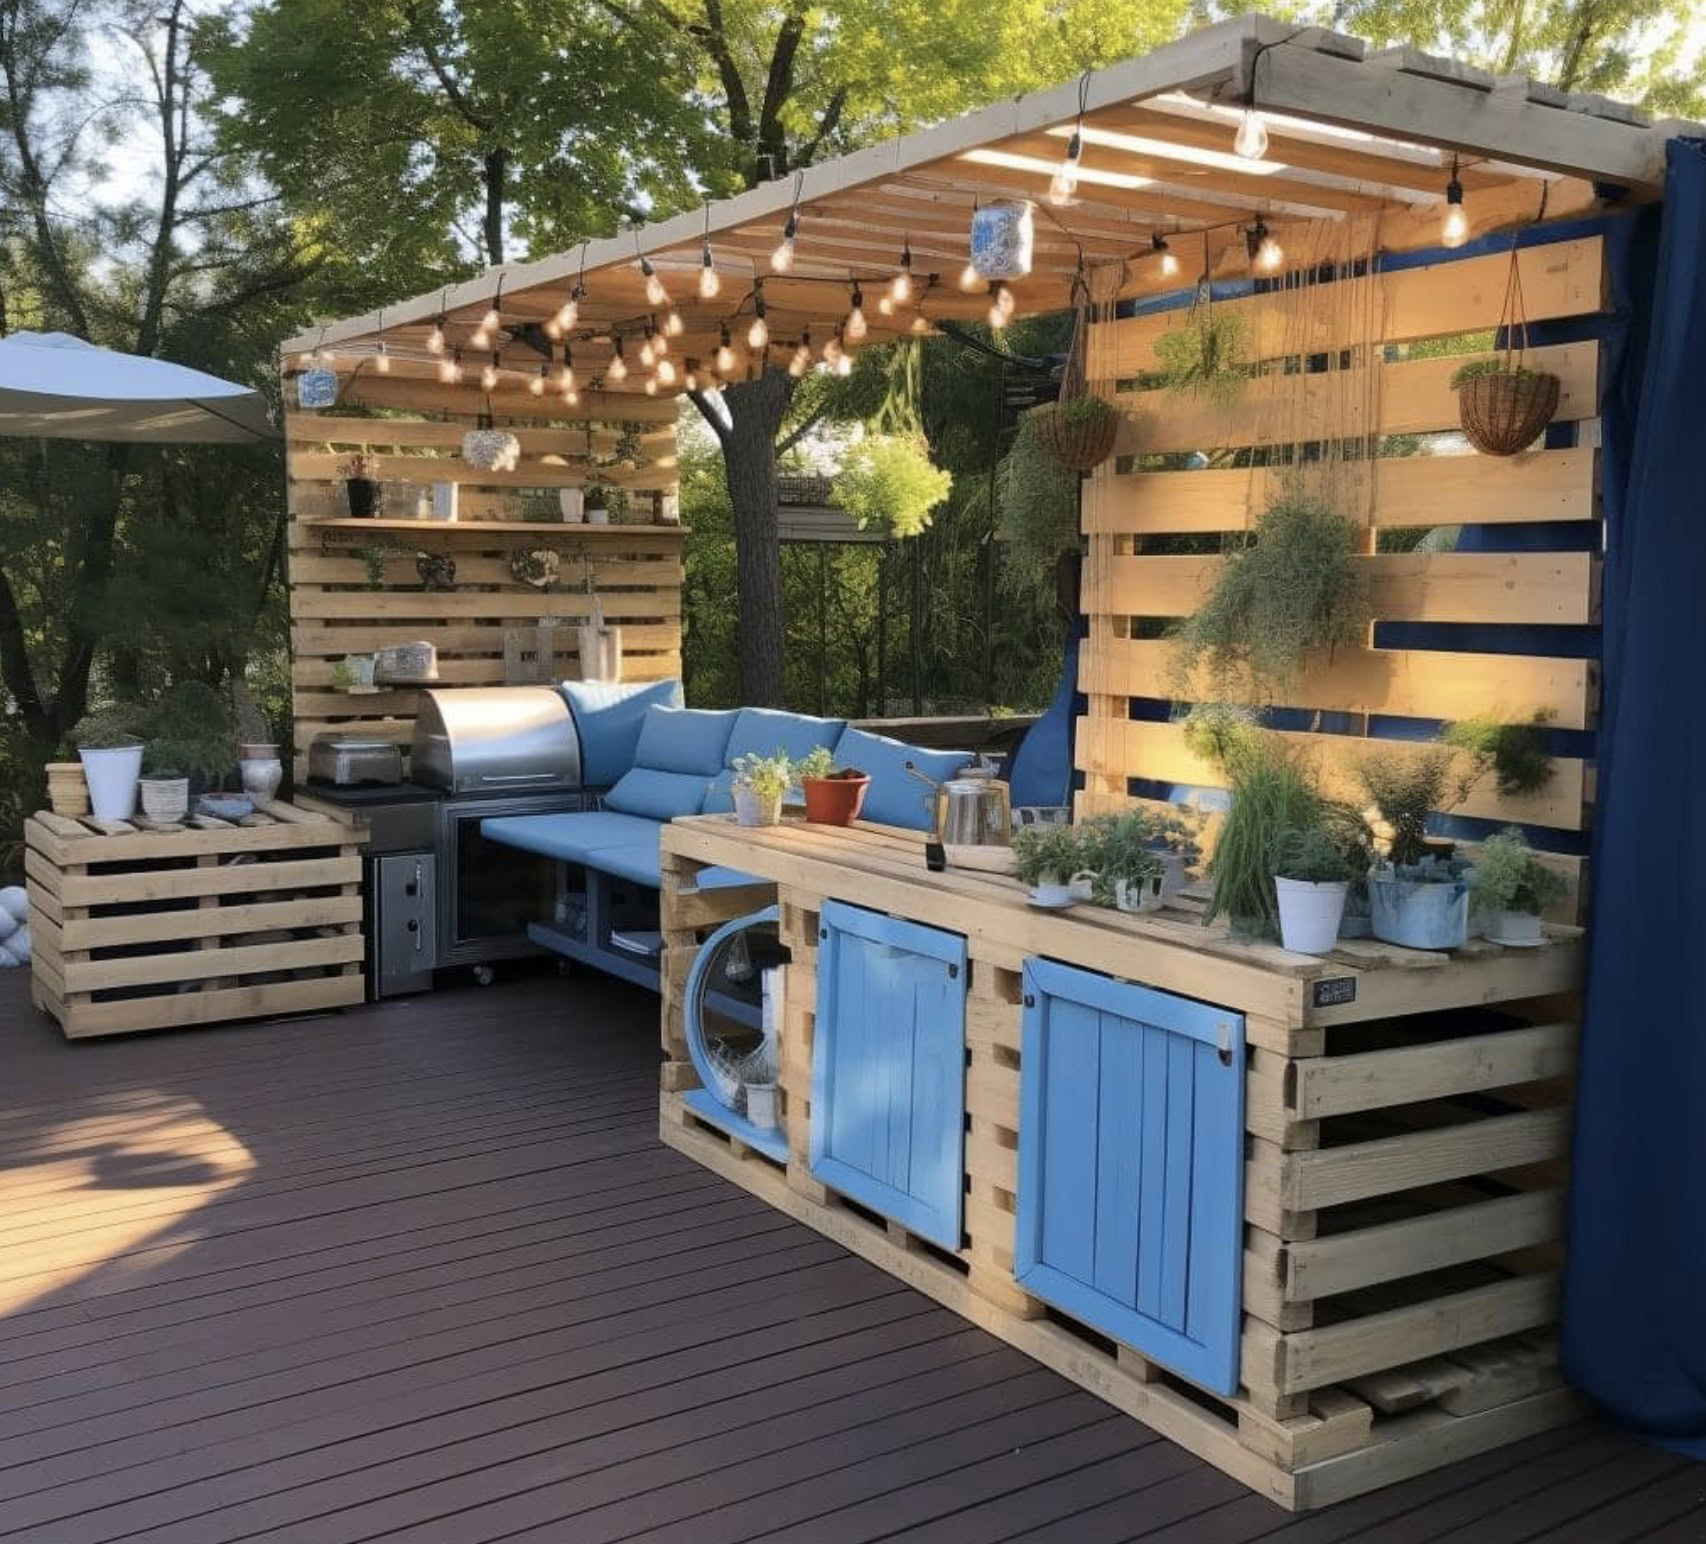
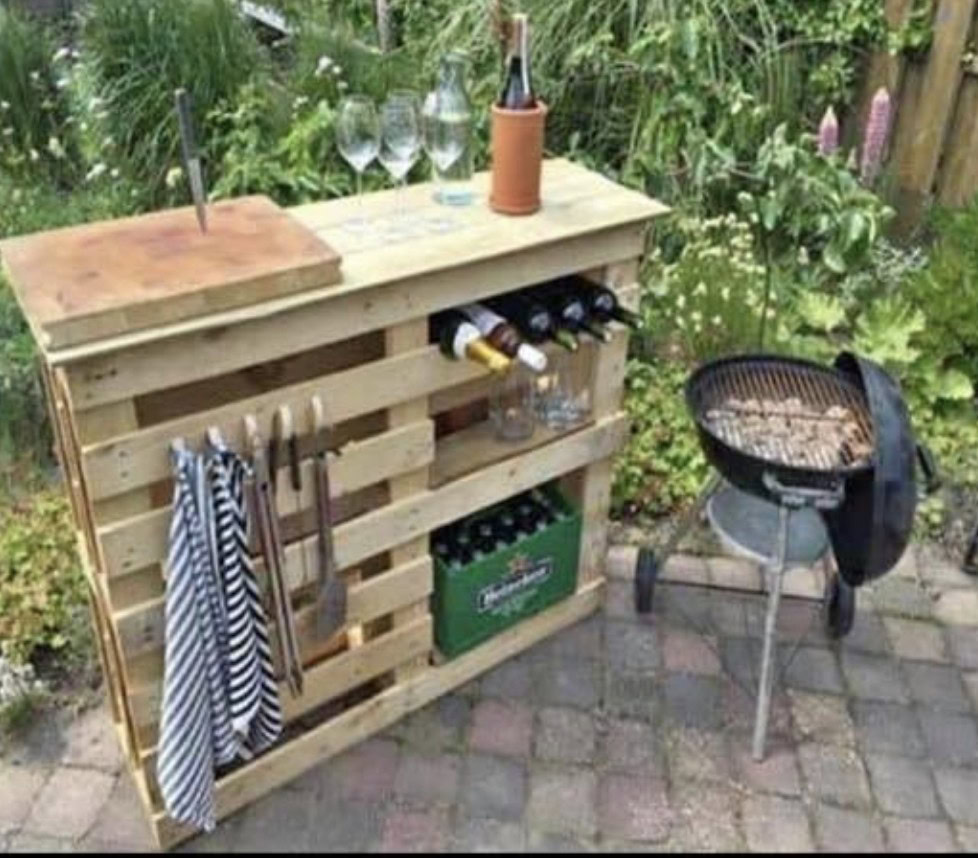
3️⃣ Pallet Outdoor Bar & Serving Area
- Use pallets to make a bar counter with high stools.
- Add hanging glass racks for wine glasses.
- Install string lights or LED strips for a cozy atmosphere.
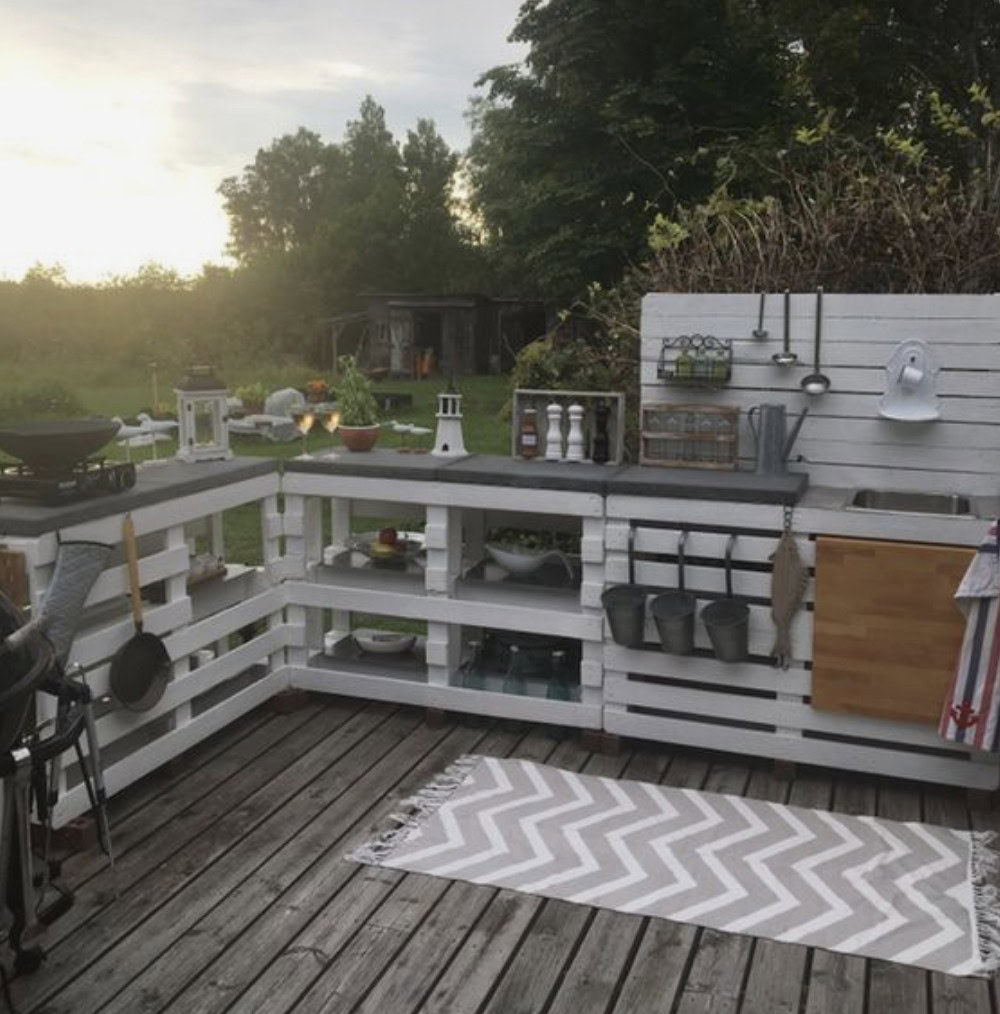
4️⃣ Small-Space Kitchen Setup
- Use vertical pallets to create a wall-mounted mini kitchen.
- Include a fold-down shelf for space-saving.
- Add a compact prep area with storage baskets.
Weatherproofing & Sealing Your Pallet Kitchen ☔
Since your outdoor kitchen will be exposed to the elements, protecting your wood is essential! Here’s how to make your pallet kitchen last:
1️⃣ Sand & Seal️
- Sand down the wood to remove rough edges and splinters.
- Apply an outdoor wood sealer or stain (look for UV-resistant and waterproof options).
- For a rustic look, use a clear sealant to keep the natural wood grain visible.
2️⃣ Raise It Off the Ground ⬆️
- Prevent moisture damage by placing your pallet kitchen on pavers or bricks instead of directly on the grass.
- Add rubber feet or outdoor sealant to the bottom for extra protection.
3️⃣ Add a Cover or Roof
- Use a simple pergola, tarp, or tin roof to shield your kitchen from heavy rain.
- If adding a pallet backsplash, seal it well to prevent water damage.
Creative Storage Solutions for Your Outdoor Kitchen
One of the best things about using pallets Built-in storage! Here are a few clever ways to keep everything organized:
1️⃣ DIY Hanging Utensil Rack
- Attach S-hooks to a metal rod and mount it on the pallet wall.
- Perfect for spatulas, tongs, and grilling tools.
2️⃣ Open Shelving & Crates
- Use stacked wooden crates to store plates, cups, and seasonings.
- Add removable baskets to keep things neat.
3️⃣ Built-In Pallet Cabinet
- Flip a pallet sideways and add hinged doors for a simple storage cabinet.
- Great for hiding propane tanks, BBQ supplies, or cleaning tools.
4️⃣ Hidden Cooler Compartment
- Cut a rectangular hole in the countertop and drop in a plastic tub or cooler.
- Fill it with ice and drinks for easy outdoor entertaining!

Must-Have Features & Add-Ons️
Want to make your outdoor kitchen even more functional and stylish Here are some ideas:
DIY pizza oven – If you love homemade pizza, why not add a pizza stone setup
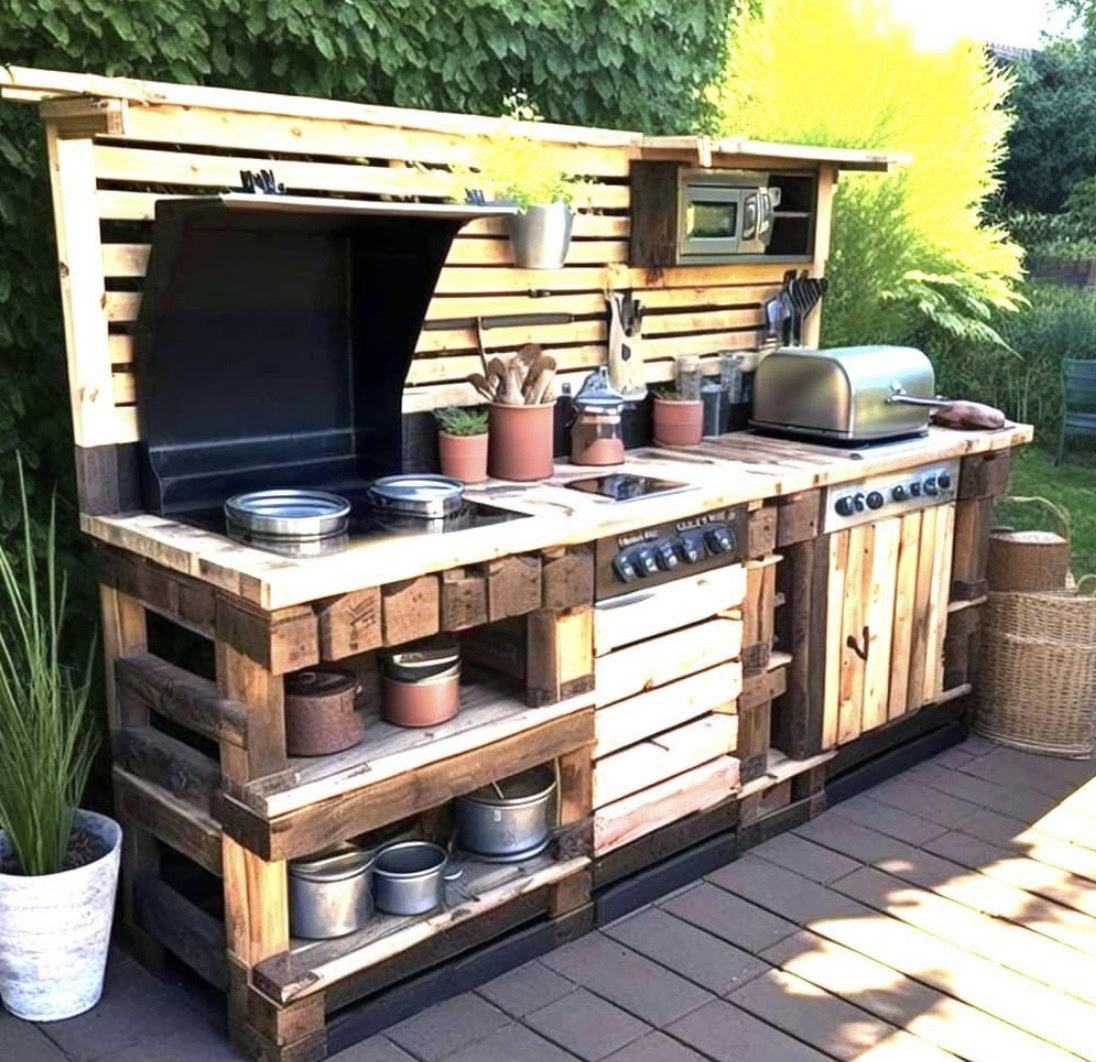
Built-in grill station – Secure a grill into the pallet frame for a seamless look.
Outdoor sink – Connect a simple hose system for washing hands and dishes.
Herb garden wall – Grow fresh herbs right next to your prep area!
Decorative lighting – String lights, solar lanterns, or LED strips for a warm glow.
Pros & Cons of Using Pallets for an Outdoor Kitchen
✅ Pros:
✔️ Budget-friendly – Free or low-cost materials.
✔️ Customizable – Build to fit your space and style.
✔️ Eco-friendly – Repurpose and recycle old wood.
✔️ Beginner-friendly – No advanced carpentry skills required!
❌ Cons:
❌ Needs weatherproofing – Pallet wood requires sealing for outdoor durability.
❌ Not as smooth as store-bought materials – May need extra sanding and finishing.
❌ Weight limitations – Can’t hold extremely heavy appliances without reinforcement.
Budget Breakdown: How Much Does It Cost
A store-bought outdoor kitchen can cost $1,500 – $10,000, but a DIY pallet kitchen can be built for a fraction of the price!
- Free – If you source free pallets and use reclaimed materials.
- $50-$150 – If you buy pallets, stain, and some basic hardware.
- $200-$500 – If you add countertops, a sink, or extra features.
A DIY pallet kitchen is one of the most affordable ways to upgrade your outdoor space while adding a cozy, custom feel!
Building an outdoor kitchen with wooden pallets is a fun, budget-friendly way to create a stylish and functional cooking space. With the right pallets, weatherproofing, and a few creative touches, you can design a one-of-a-kind outdoor kitchen that’s perfect for grilling, entertaining, and enjoying the outdoors.
Ready to get started Grab some pallets and start building your dream outdoor kitchen today!