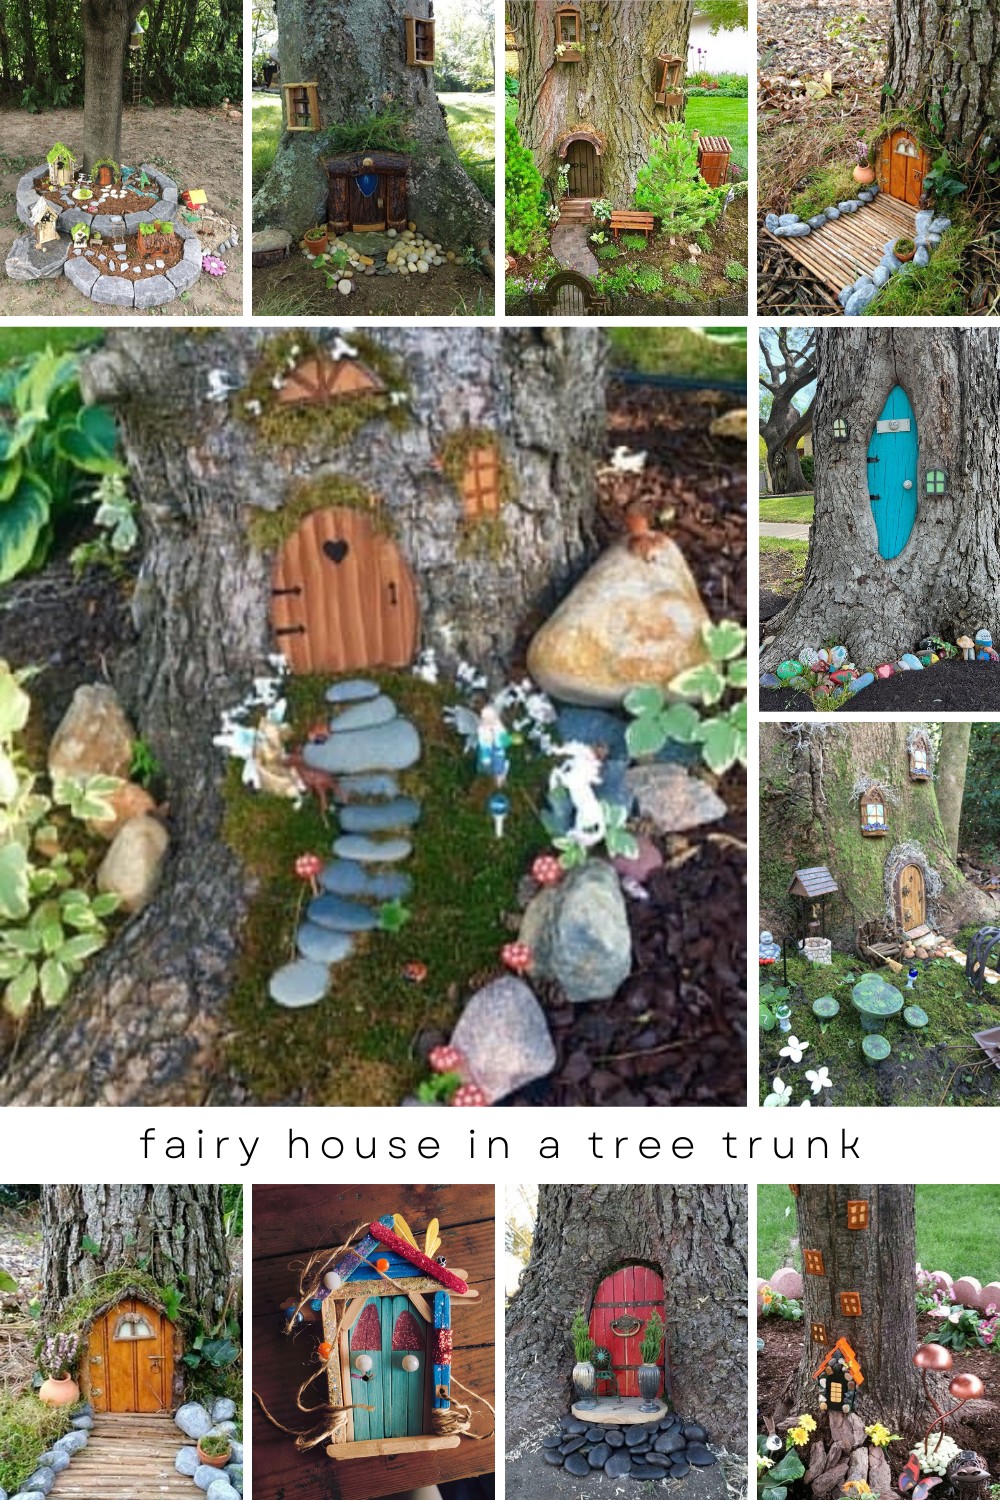
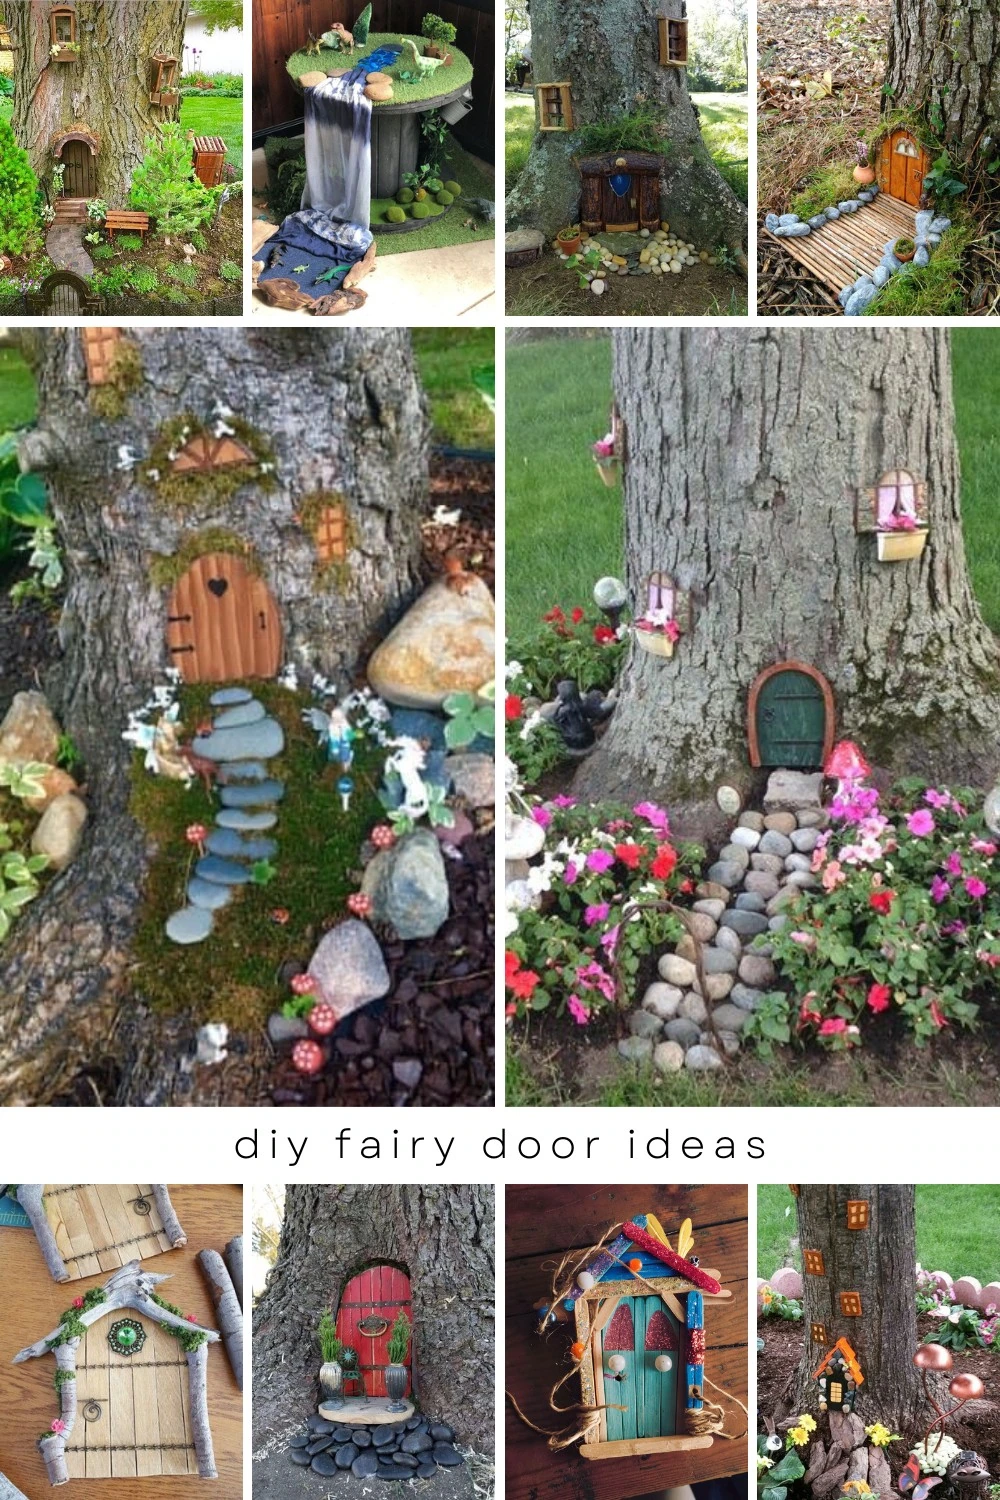
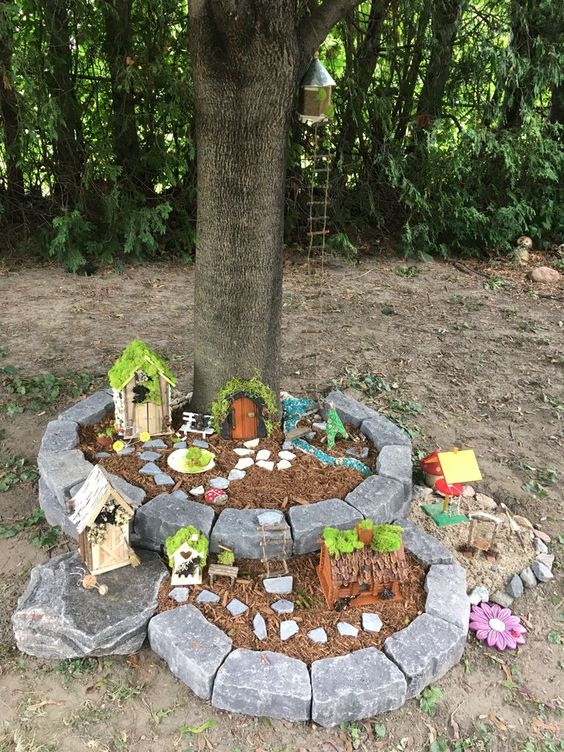
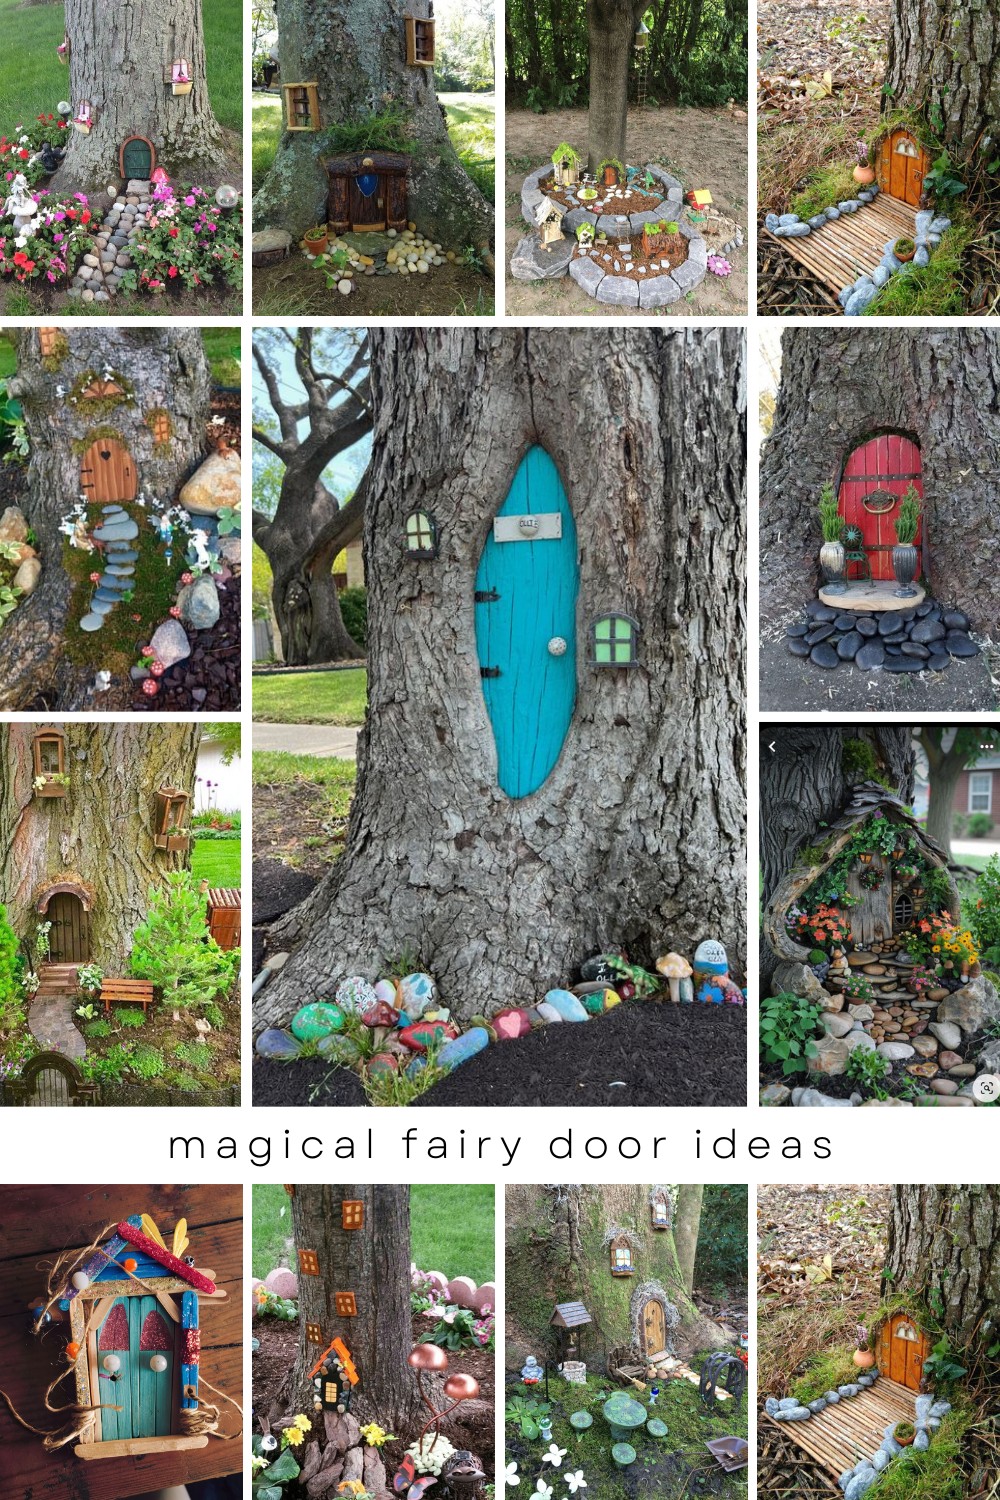
Unlock a world of magic with these DIY fairy door projects! Discover how to make a whimsical fairy door using popsicle sticks and add a touch of enchantment to your garden. Explore various fairy door ideas, including DIY fairy windows and fairy garden doors. Perfect for creating a charming fairy house in a tree trunk or adding fairy doors on trees. Get creative with your DIY fairy home decor and transform your outdoor space into a magical haven!♀️✨ #FairyDoorDIY #FairyGarden
The Whimsical World of Fairy Lore
Have you ever felt a gentle breeze brush past you and wondered if it was a fairy fluttering by Or perhaps you’ve spotted a tiny glimmer in the corner of your eye and thought it might be a fairy waving hello Welcome to the enchanting world of fairy lore, where magic is always just around the corner!
This post may contain affiliate links. As an Amazon Associate I earn from qualifying purchases. If you click and buy, I may receive a small commission at no extra cost to you. Read our Disclosure Policy
Fairies have captured our imaginations for centuries. These tiny, ethereal beings are often depicted as guardians of nature, bringing good fortune and mischief in equal measure. In folklore from around the world, fairies are said to live in the lushest forests, the most vibrant gardens, and sometimes even in our own homes! It’s believed that they possess magical powers, like the ability to heal, grant wishes, and even control the elements. Who wouldn’t want to invite a little magic into their life
The Magic Behind Fairy Doors
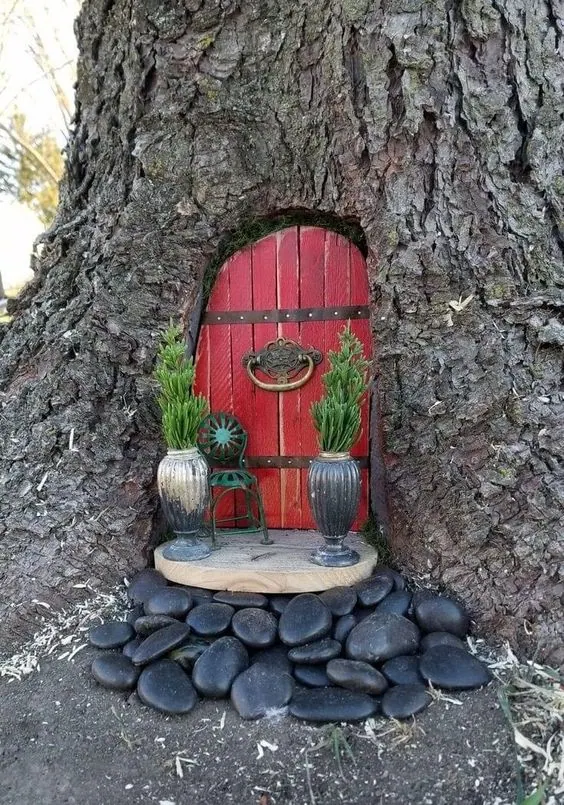
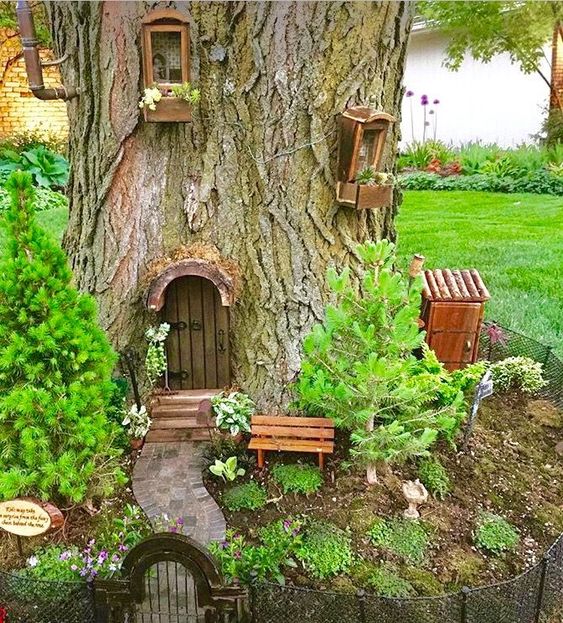
So, why do people put fairy doors on trees and in their houses It’s simple: to invite the magic in! Placing a fairy door at the base of a tree or against a wall creates a portal to the fairy realm. It’s an open invitation for these mystical creatures to come and go as they please, spreading enchantment and wonder wherever they tread.

Fairy Doors in Nature:
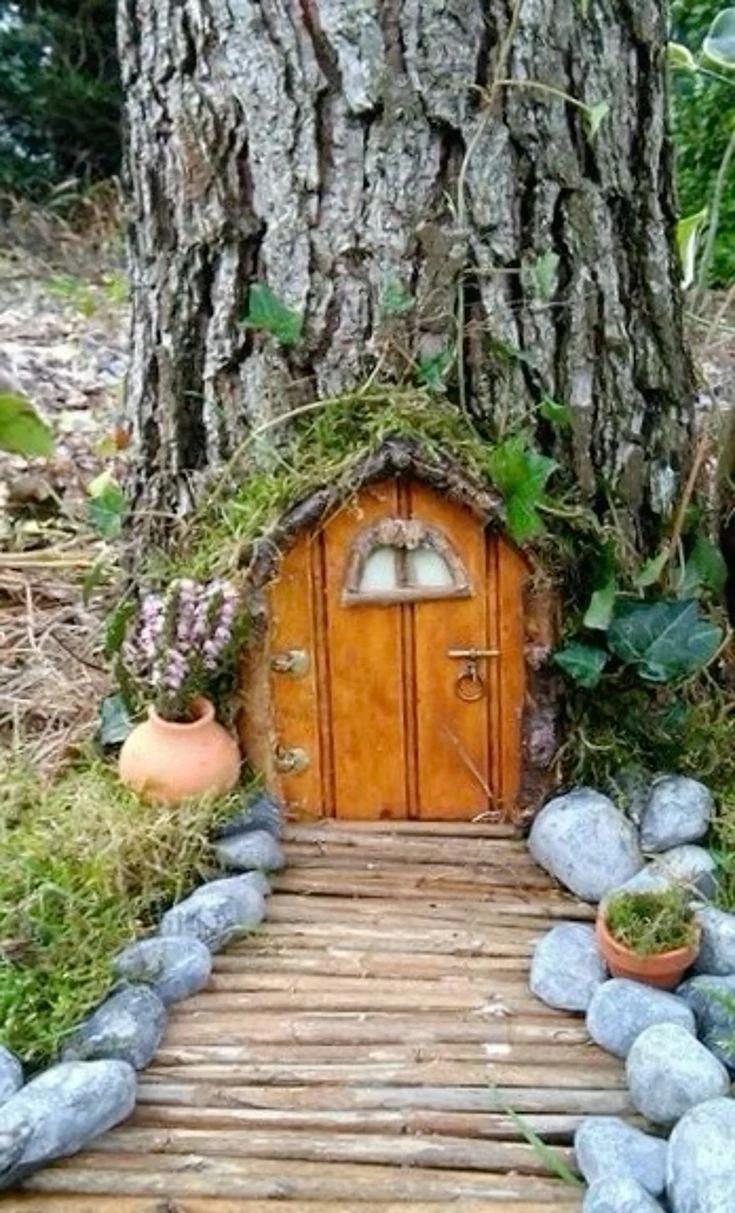
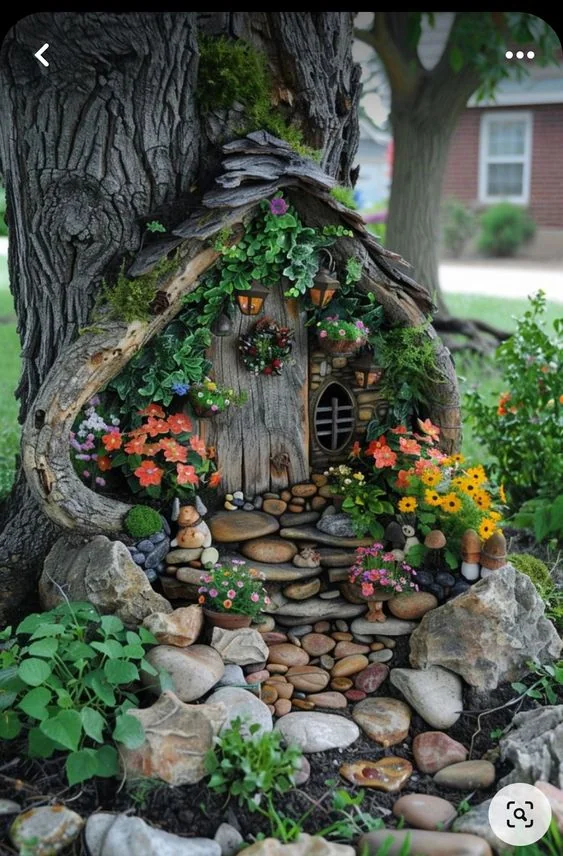
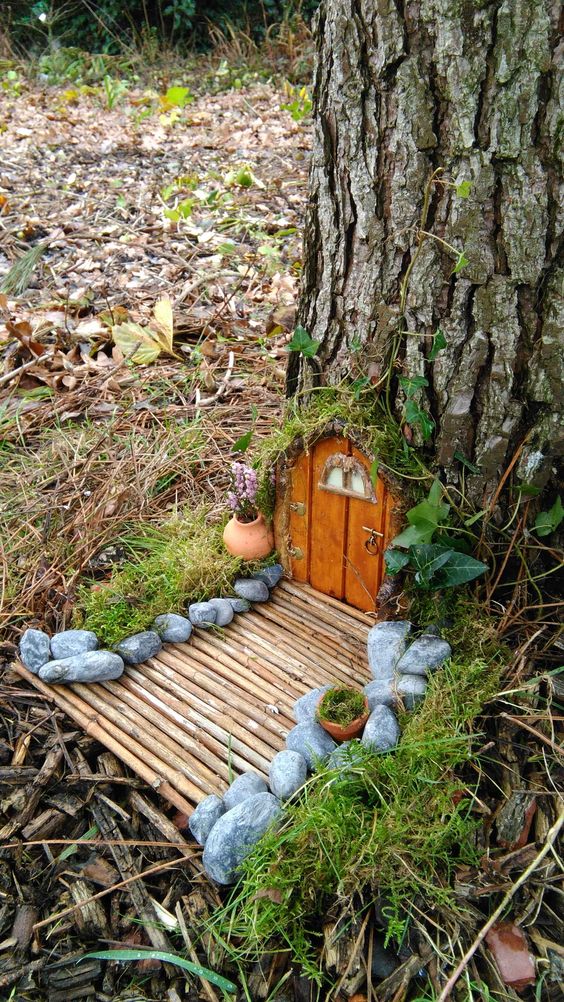
When nestled against the bark of a tree, fairy doors are thought to provide fairies with a cozy entrance to their woodland homes. These doors act as a bridge between our world and theirs, inviting nature’s guardians to watch over the flora and fauna. Imagine the whispers of tiny wings as fairies slip through the door to tend to their leafy kingdom.
Fairy Doors at Home:
Inside our homes, fairy doors can be placed along skirting boards or tucked into cozy corners. They bring a playful sense of mystery, as though a fairy might pop out at any moment to sprinkle a bit of magic into our everyday lives. It’s like having a little piece of a fairy tale right in your living room!

The Joy of Believing
The charm of fairy doors lies not just in their whimsical appearance but also in the joy and imagination they inspire. They remind us that a little belief can transform the ordinary into something truly magical. Whether you’re a child dreaming of meeting a real fairy or an adult holding onto the wonder of your childhood, fairy doors offer a delightful escape into a world where anything is possible.
So next time you pass a tree adorned with a tiny door or spot one inside a cozy room, take a moment to imagine the fairies bustling about their daily lives. Who knows, they might even leave you a tiny note or a sprinkle of fairy dust to remind you that magic is real – all you need to do is believe!
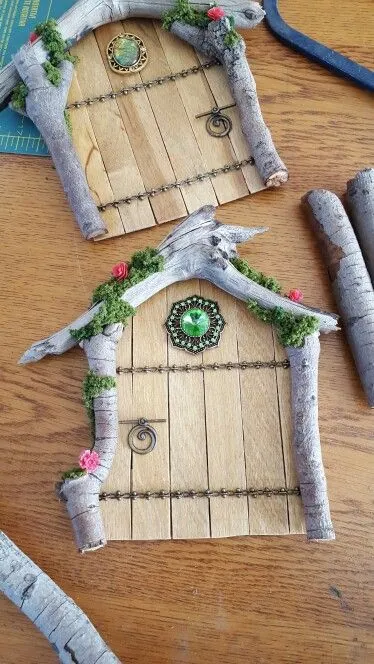
How to Make a Fairy Door with Popsicle Sticks
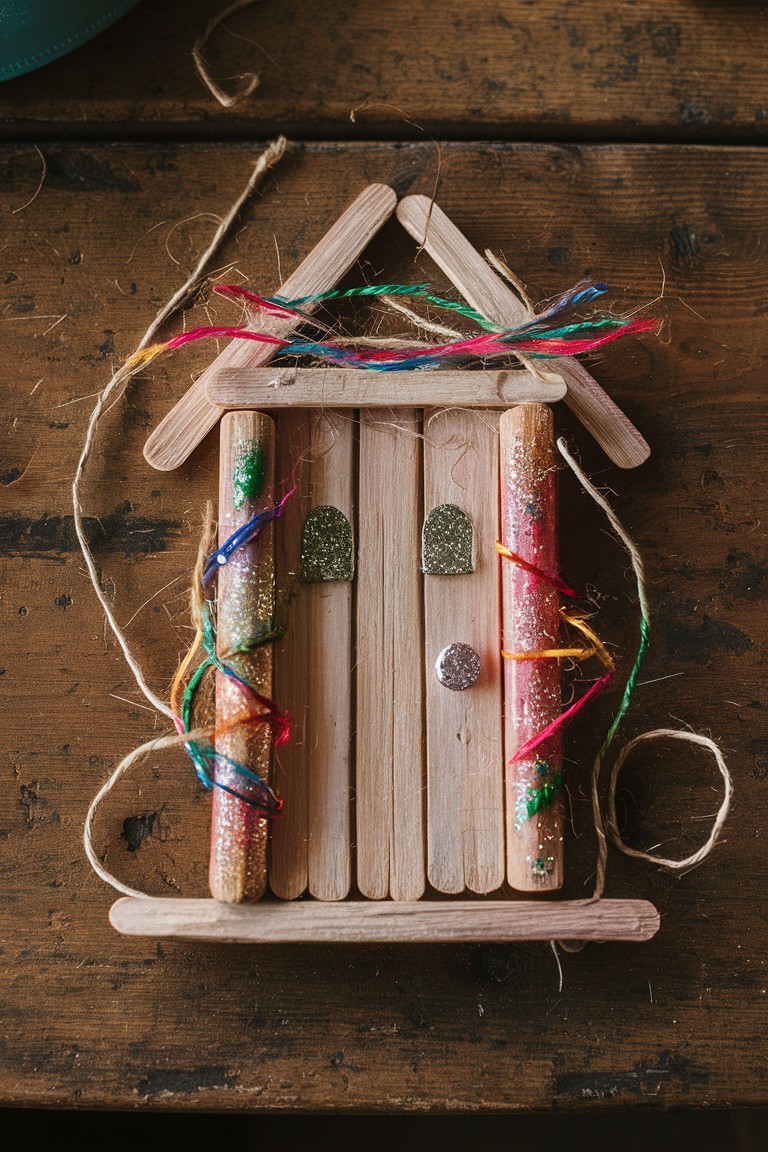
Creating a fairy door is a magical activity that sparks creativity and imagination in children. Using simple materials like popsicle sticks, kids can craft their own enchanting portal to the fairy world. This project is easy, fun, and suitable for children of all ages. Let’s dive into the steps to make your very own fairy door!
Materials Needed
To get started, you’ll need the following materials, which are readily available and inexpensive:
- Popsicle Sticks: About 10-12 sticks per door, depending on the desired size.
- Craft Glue or Hot Glue Gun: Make sure to have adult supervision if using a hot glue gun.
- Acrylic Paint or Markers: Choose your favorite colors for painting the door.
- Decorative Elements: Glitter, small gems, stickers, moss, or tiny artificial flowers for embellishments.
- Small Hinges (Optional): If you want the door to open and close.
- Cardboard or Foam Board: To use as a backing for the door if needed.
- Scissors or Craft Knife: For cutting shapes and trimming edges.
- Paintbrushes: For applying paint and glue.

Step-by-Step Instructions
Step 1: Plan Your Design
Before you start gluing, it’s helpful to plan your design. Decide on the shape and style of your fairy door. Do you want it to be round, arched, or rectangular Sketch a simple design on paper if needed.
Step 2: Lay Out the Popsicle Sticks
Lay out your popsicle sticks side by side on a flat surface. This will form the main body of your door. For a standard-sized fairy door, use about 7-8 sticks aligned vertically.
Step 3: Secure the Sticks Together
To hold the sticks together, apply glue across a horizontal popsicle stick and place it across the vertical sticks. Use one stick near the top and another near the bottom. Allow the glue to dry completely before proceeding.
Step 4: Cut Out Your Door Shape
If you’re using a particular shape, such as an arch, use scissors or a craft knife to carefully cut the sticks into your desired shape. An adult should help with this step to ensure safety.
Step 5: Create a Door Frame
Add a frame to your door for extra detail. Cut two popsicle sticks for the sides and one for the top of the door, and glue them in place. This gives the appearance of a real door frame and adds stability.
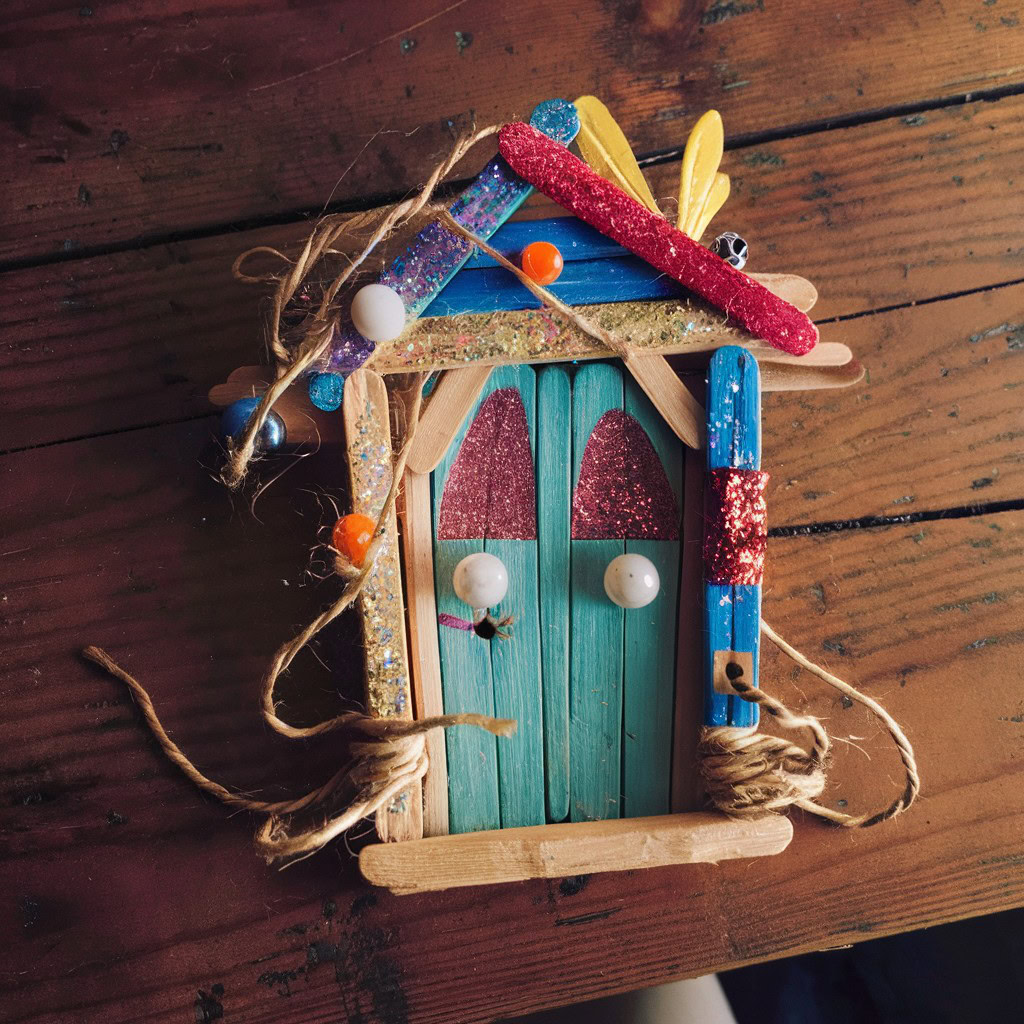
Step 6: Paint and Decorate
Now comes the fun part! Paint your fairy door using acrylic paints or markers. Choose bright, enchanting colors that will appeal to fairies. Allow the paint to dry thoroughly.
Step 7: Add Decorations
Once the paint is dry, let your creativity shine by adding decorative elements. Use glitter for a magical sparkle, attach tiny gems for a touch of fairy luxury, or glue on artificial flowers for a whimsical garden look. Don’t forget to add a doorknob using a small bead or gem.
Step 8: Attach the Door to a Backing (Optional)
If you want your fairy door to stand independently or open and close, attach it to a piece of cardboard or foam board. Cut the backing to match the shape of your door, and use glue to secure it.
Step 9: Optional Hinge Installation
For an operational door, attach small hinges to the side. This step requires precision and may need adult assistance. Make sure the door can swing open smoothly.
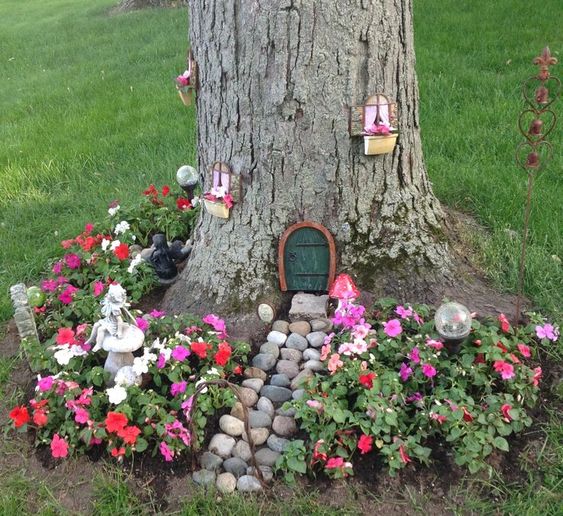
Step 10: Find a Home for Your Fairy Door
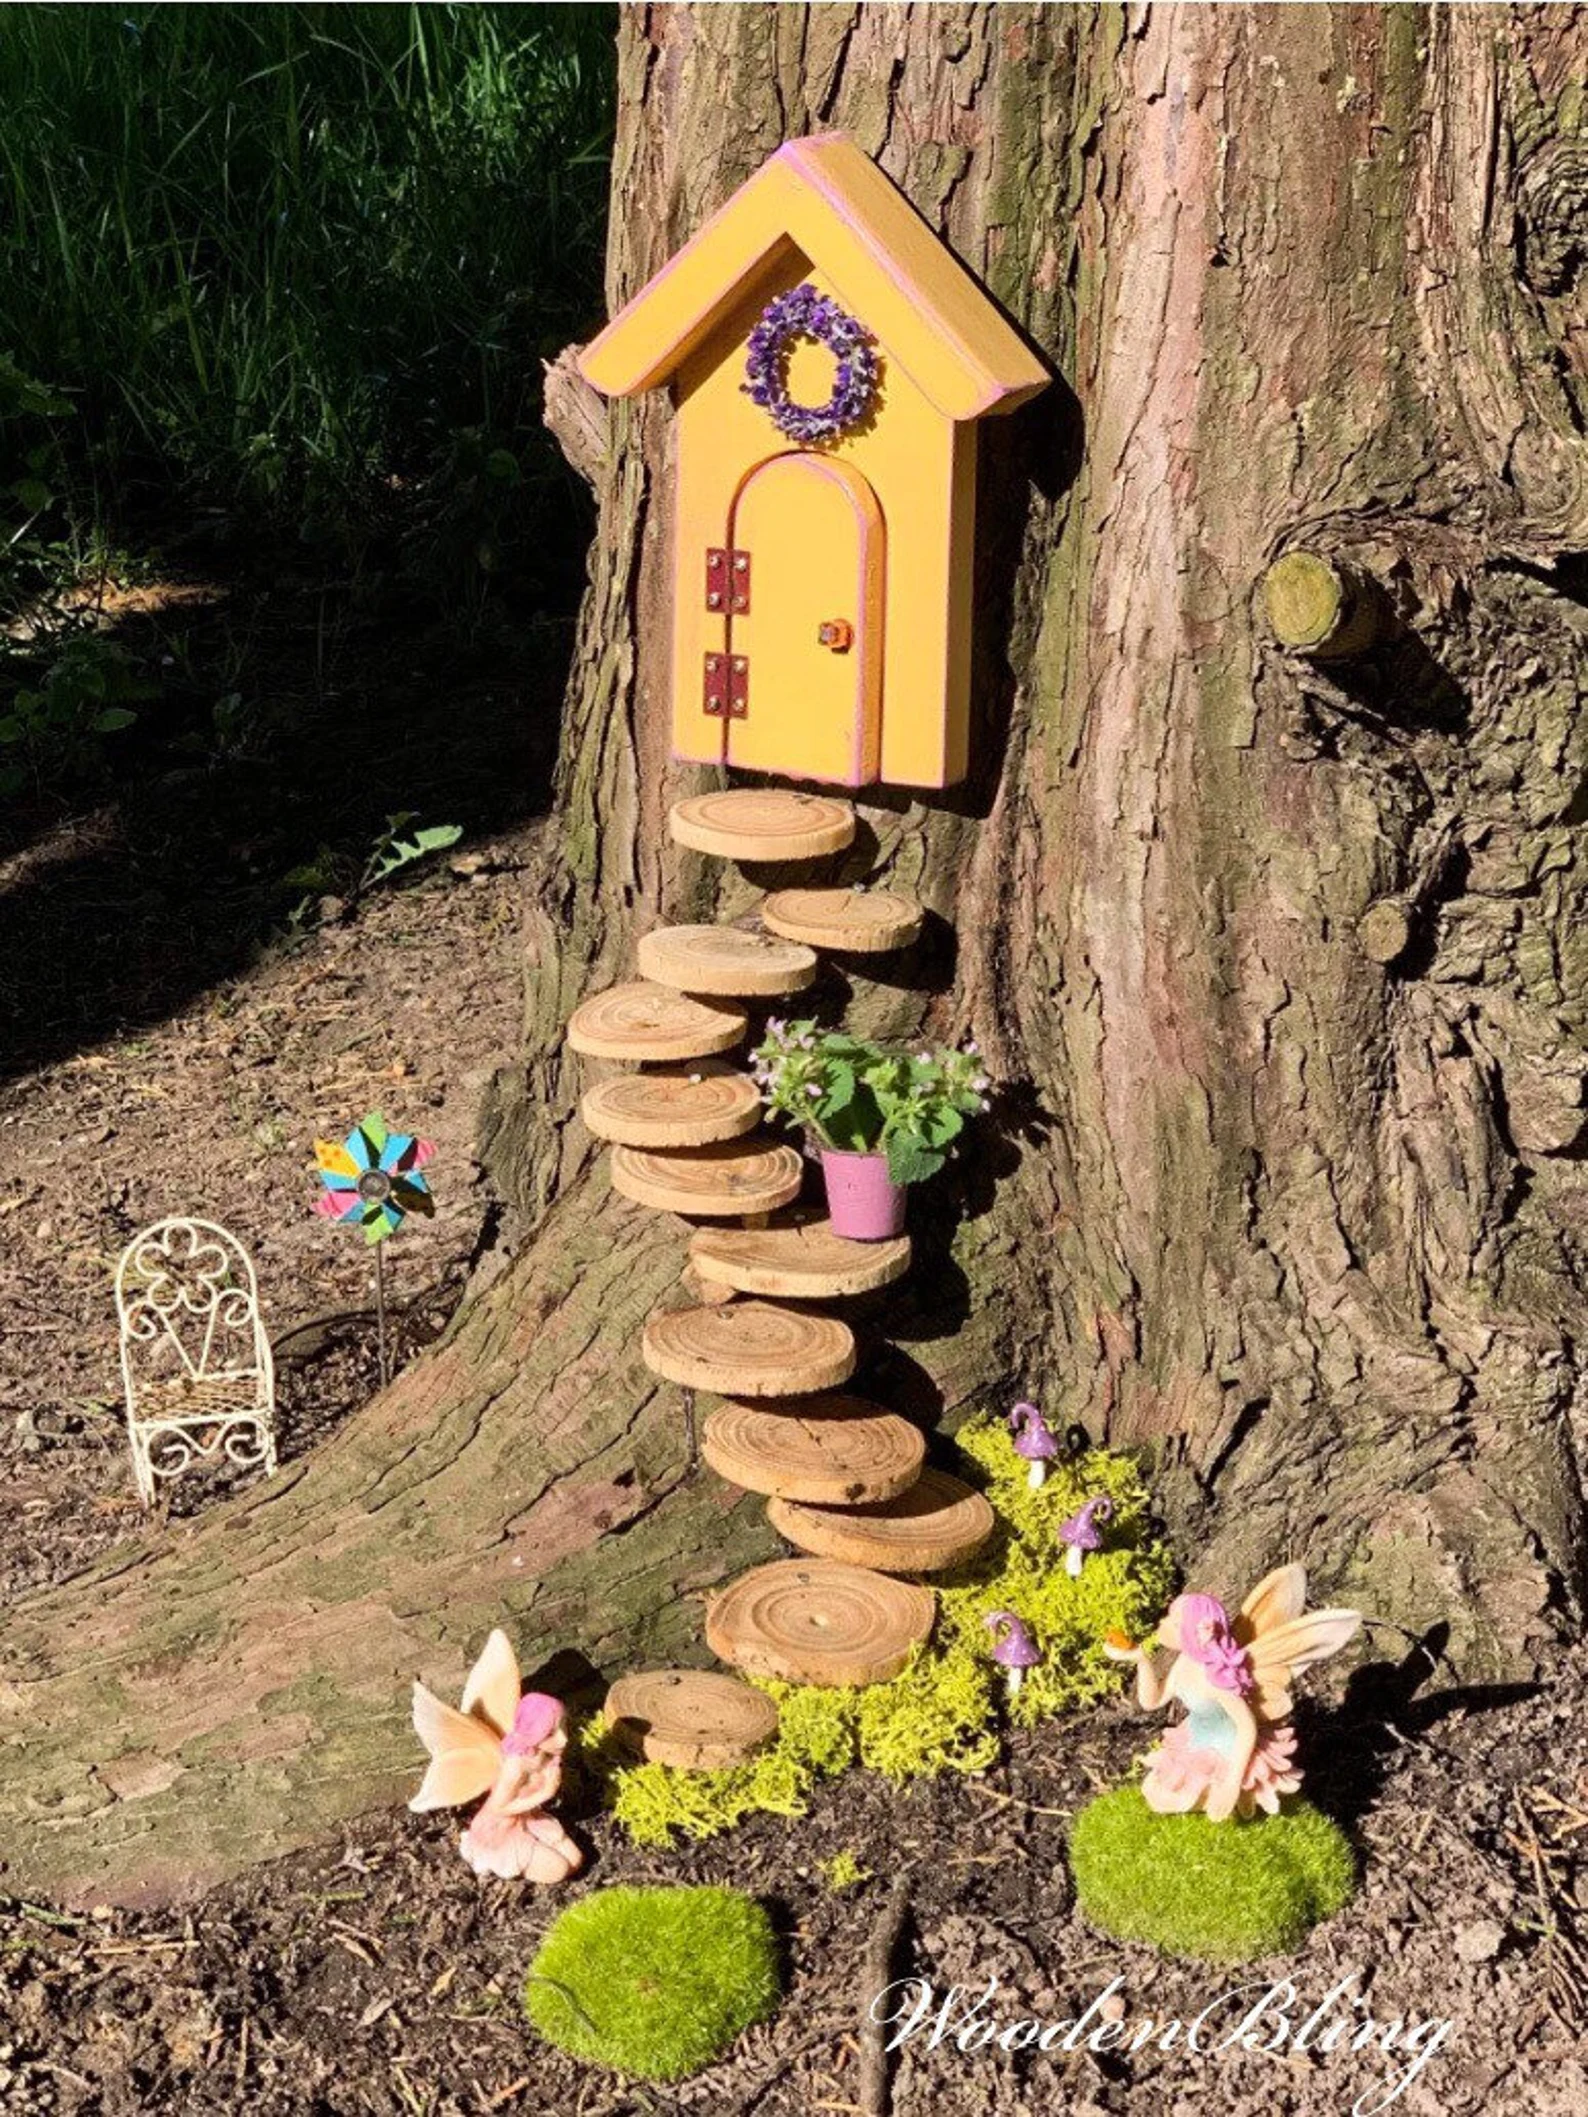
Once complete, find the perfect spot to place your fairy door. It could be at the base of a tree, along a garden path, or even in a cozy corner of a child’s bedroom. Wherever you place it, the fairies are sure to feel welcome!
This craft not only fosters creativity but also provides an engaging and educational experience for children. With just a few materials and a lot of imagination, kids can bring a touch of magic into their world with their handcrafted fairy door.
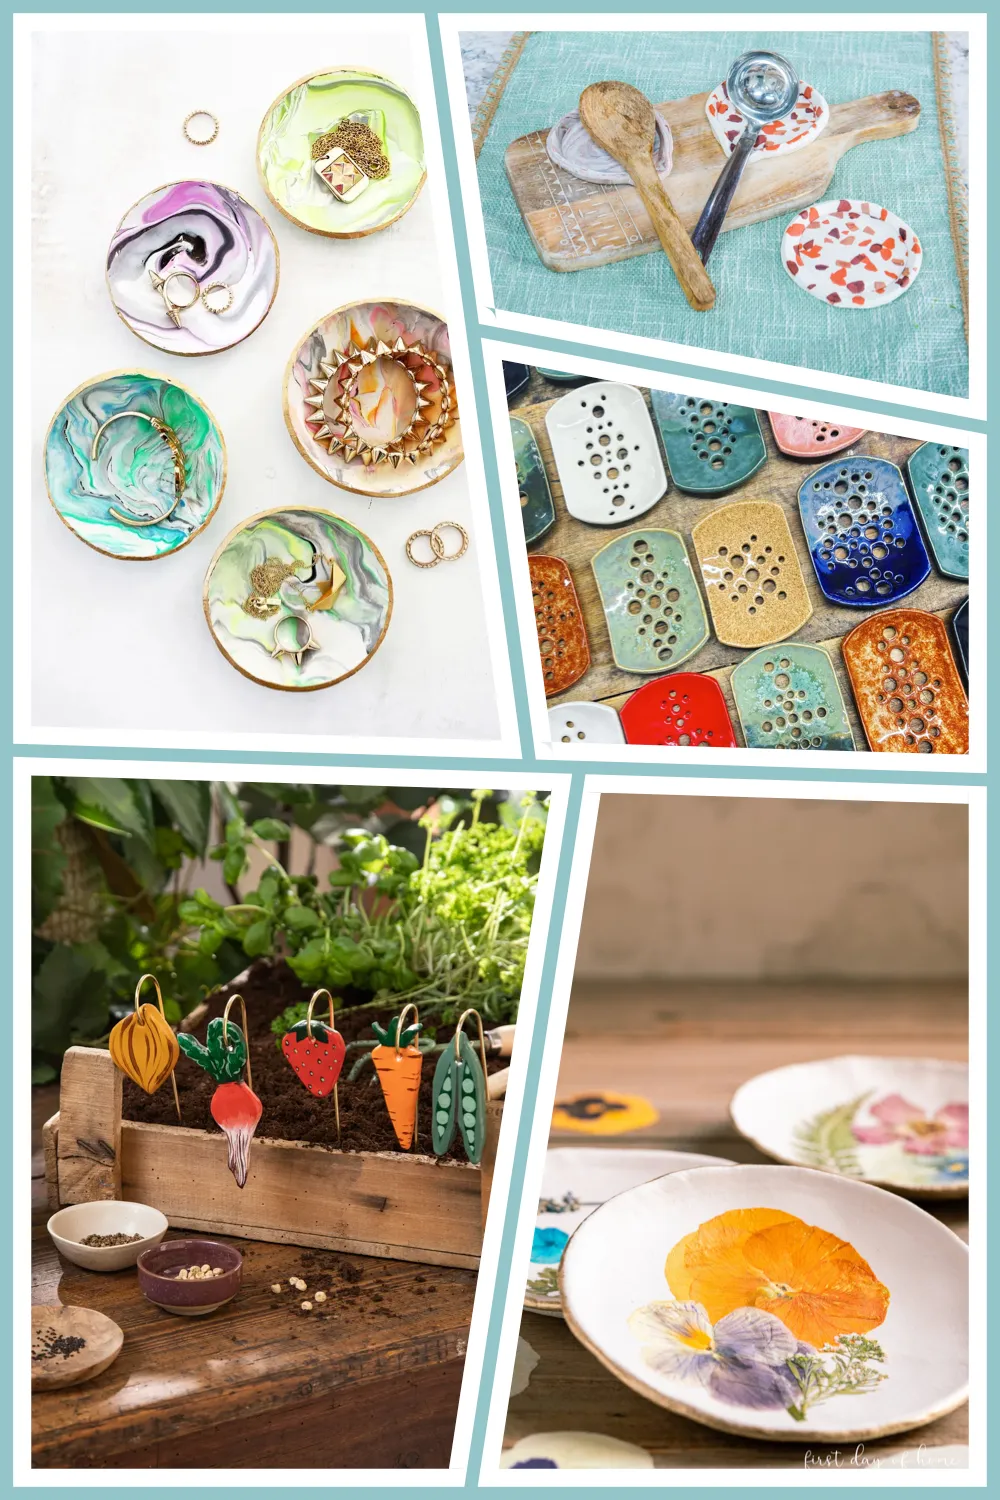
How to Make a Fairy Door with Polymer Clay ✨
Making a fairy door is such a fun little project, and it’s perfect for adding a bit of magic to a garden, a bookshelf, or even a child’s bedroom wall. The best part You don’t need fancy sculpting skills—just some polymer clay, a few basic tools, and a little imagination!
Here’s how to make your own adorable fairy door:
What You’ll Need:
- Polymer clay in your favorite colors (brown for wood, green for moss, and any extras for details!)
- A craft knife or clay blade
- A rolling pin or acrylic roller
- A toothpick or sculpting tools
- Liquid clay or water (for helping pieces stick together)
- A baking tray lined with parchment paper
- Optional: tiny charms, glitter, or moss for extra fairy vibes ✨
How to Make It:
1️⃣ Roll out the base – Take your main clay color (like brown for a wood look) and roll it out to about ¼ inch thick. Cut it into a rounded or arched door shape. No need for perfection—fairies love a rustic look!
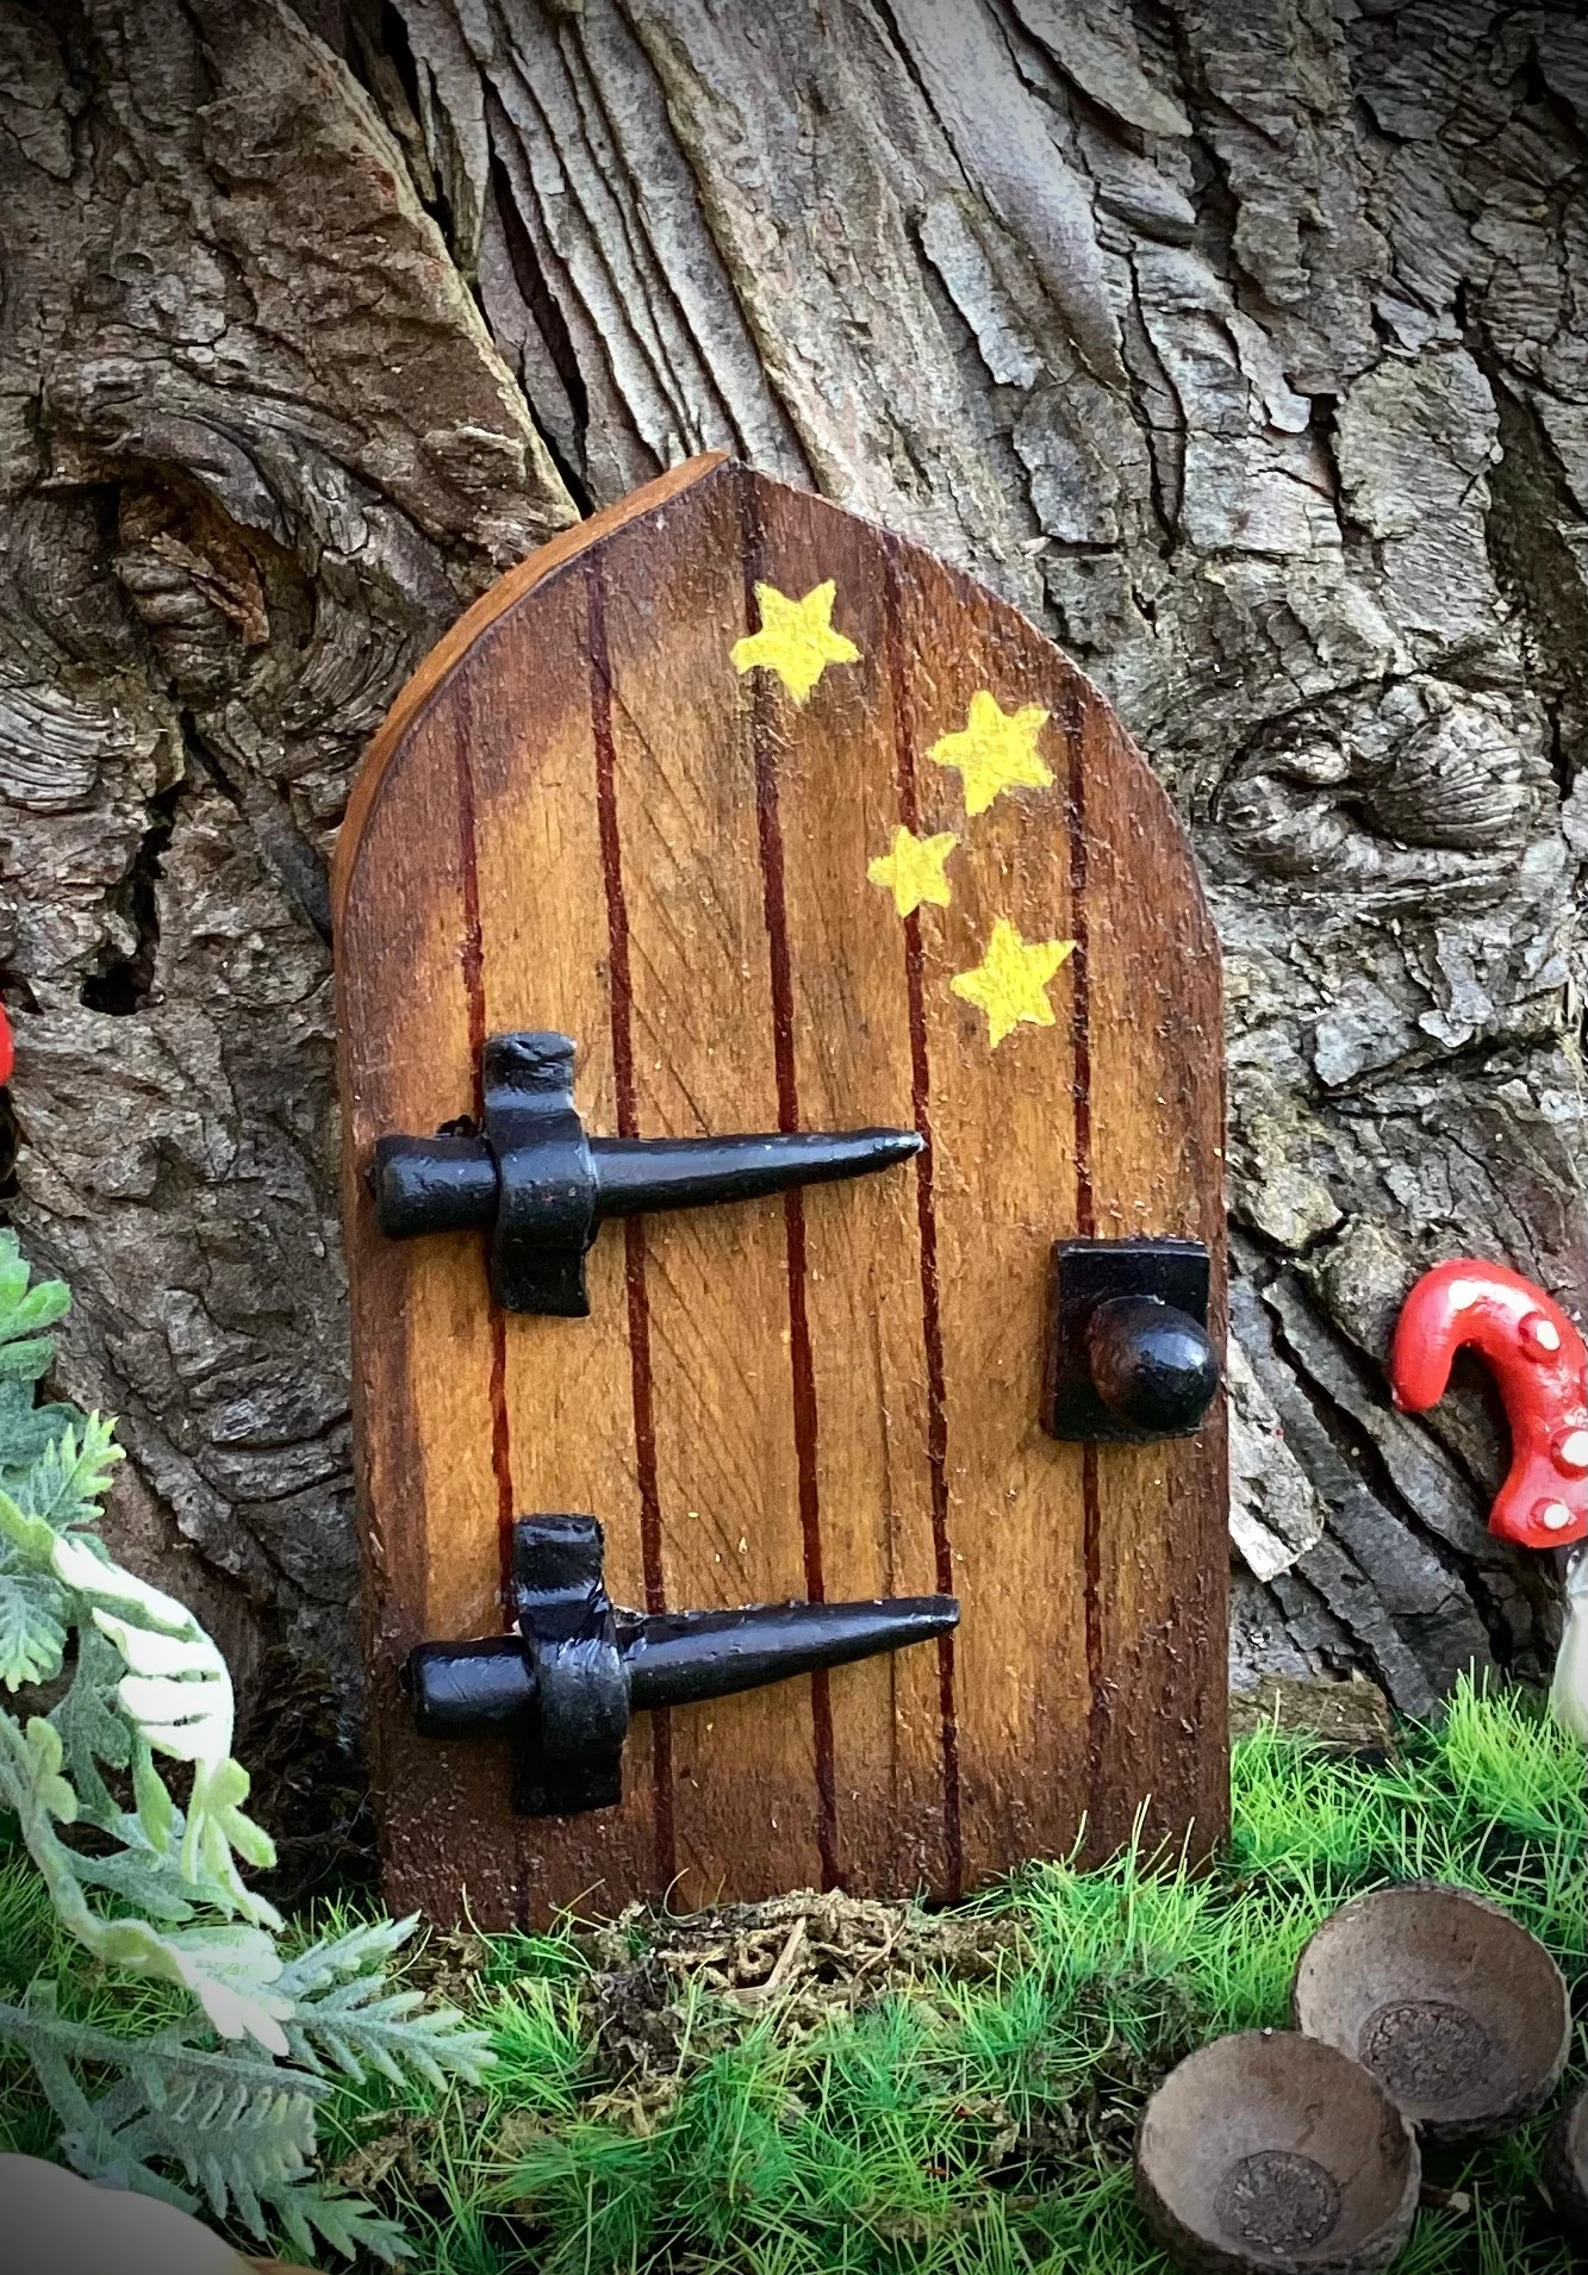
2️⃣ Make wood grain texture – Use a toothpick or sculpting tool to lightly drag lines into the clay, making it look like wooden planks. You can even add little knots for an extra realistic touch.
3️⃣ Create the door frame – Roll out a thin snake of clay in a slightly different shade (darker brown works great), then press it around the edges of your door to make a cute frame.
4️⃣ Add a tiny doorknob – Roll a small clay ball and press it onto one side of the door. If you have a tiny bead or charm, you can use that instead for an extra magical touch.
5️⃣ Decorate! – This is where the fun really begins. Add mini vines by rolling out thin green clay snakes, then twisting them around the frame. Pop on some teeny-tiny clay flowers, mushrooms, or even a little window if you’re feeling fancy.
6️⃣ Bake your masterpiece – Follow the instructions on your polymer clay packaging (usually around 275°F for 15-30 minutes). Let it cool completely before handling—baked clay is fragile when warm!
7️⃣ Optional extras – Once cooled, you can paint extra details, add a bit of glitter, or even glue on some moss to make it extra enchanting.
Now, all that’s left to do is place your fairy door somewhere special! Lean it against a tree, attach it to a bookshelf, or glue it to a wall with some strong adhesive. Who knows Maybe a fairy or two will move in overnight!✨
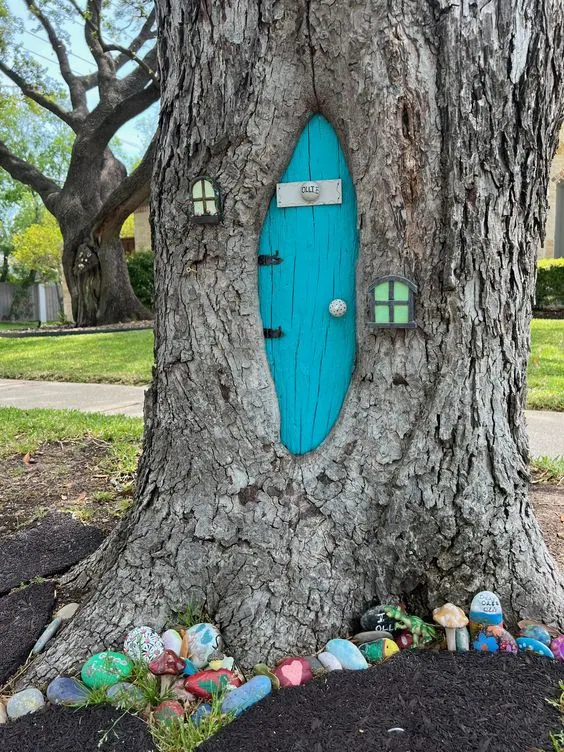
How to Attach a Fairy Door to a Tree✨
So, you’ve made an adorable little fairy door, and now it’s time to give it a magical home! Whether you want to tuck it into a garden nook or make it the star of your backyard, securing it properly will help it last through the seasons.
Here’s the easiest way to attach a fairy door to a tree:
What You’ll Need:
- Your fairy door (painted, baked, and ready to go!)
- Outdoor-safe adhesive (like E6000, Gorilla Glue, or a waterproof wood glue)
- Small nails or screws (optional, for extra security)
- Hook-and-loop tape (Velcro strips) (for a removable option)
- Sealant spray (optional, but great for weatherproofing)
How to Attach It:
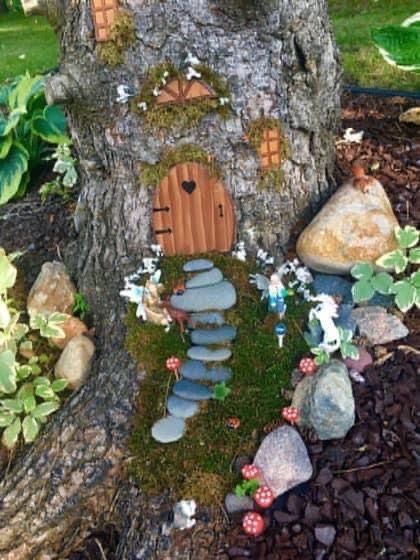
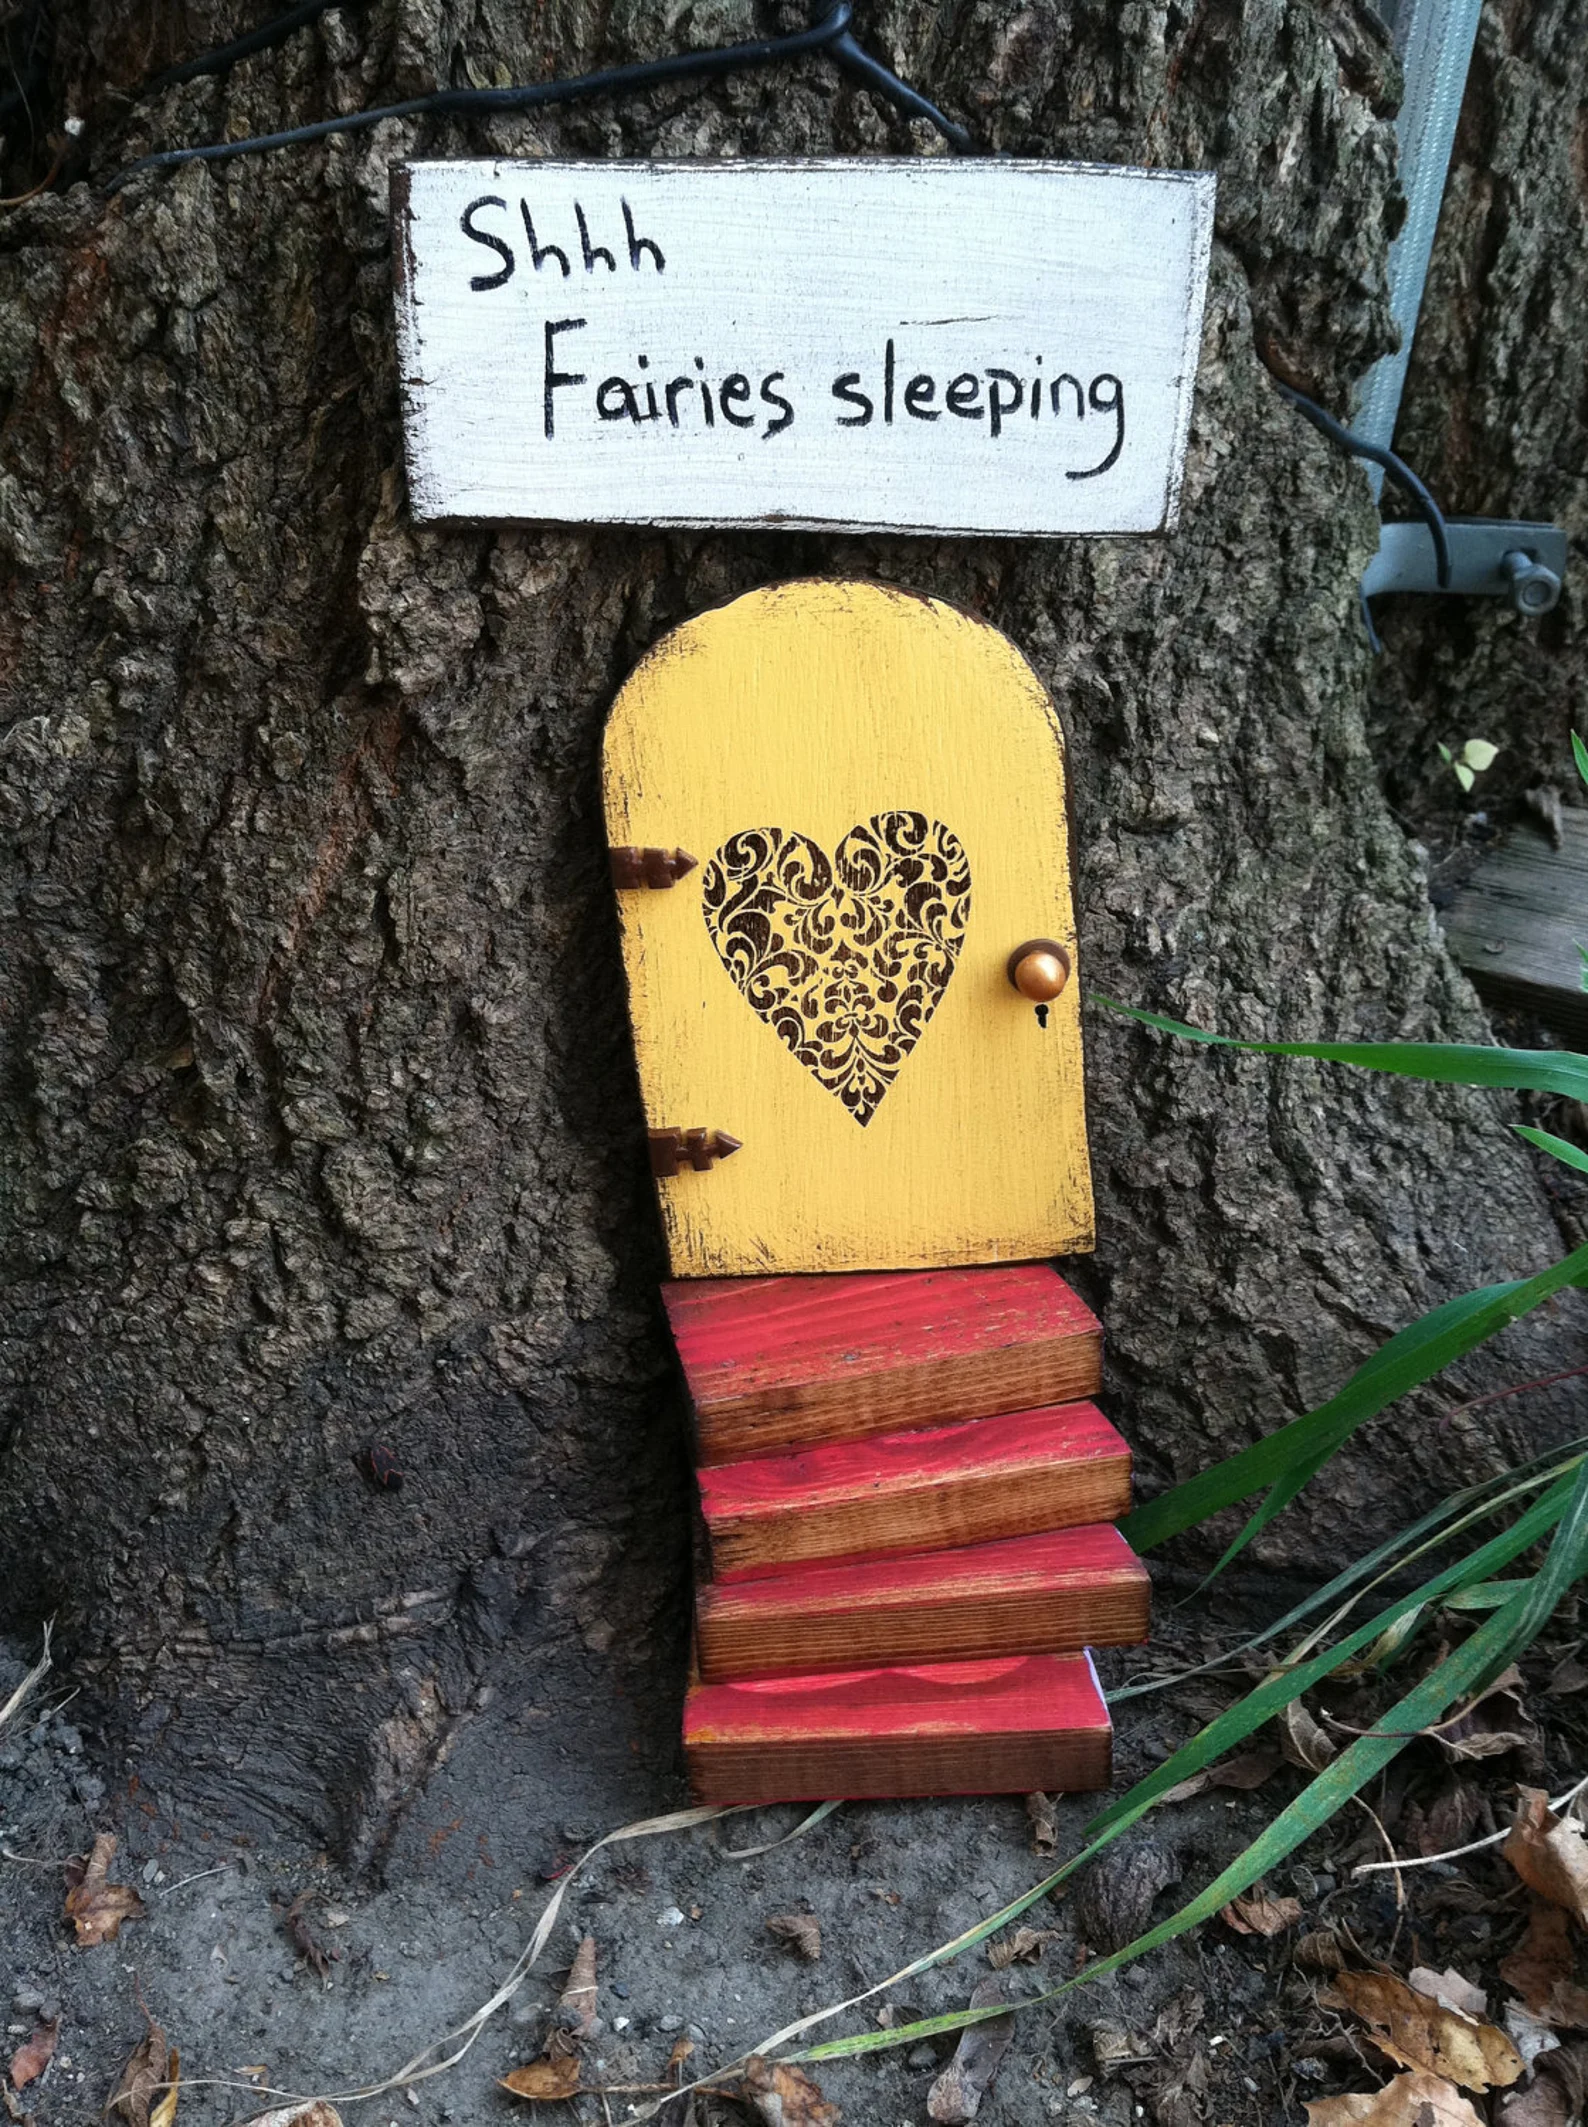
1️⃣ Pick the perfect spot – Find a tree with a smooth or slightly flat surface, ideally in a spot that’s a little sheltered (like near the trunk’s base or under a branch) to help protect your fairy door from heavy rain and wind.
2️⃣ Clean the bark – Wipe down the area with a dry cloth to remove dirt, moss, or loose bark. This helps the adhesive stick better!
3️⃣ Attach with strong glue (Easy & permanent) – Apply a good amount of waterproof adhesive to the back of your fairy door, press it firmly against the tree, and hold it in place for a minute. Let it cure fully before testing (check your glue’s drying time—some need a few hours!).
4️⃣ Use small nails or screws (For extra security) – If your fairy door is wooden, you can gently nail it into the bark using small finishing nails. Tip: Avoid using deep screws so you don’t harm the tree!
5️⃣ Try hook-and-loop tape (Velcro strips) (Removable option) – Stick one side of the tape to your fairy door and the other to the tree. This way, you can swap out fairy doors or move them around if needed!
6️⃣ Weatherproof it – If your fairy door is painted, a quick coat of outdoor sealant spray will help protect it from rain and fading.
And that’s it! Now your fairy door is ready to welcome some tiny magical visitors.♂️✨ You can even add mini stepping stones, tiny potted plants, or a little lantern for extra charm. Just keep an eye out—fairies are known to rearrange things when no one’s looking!