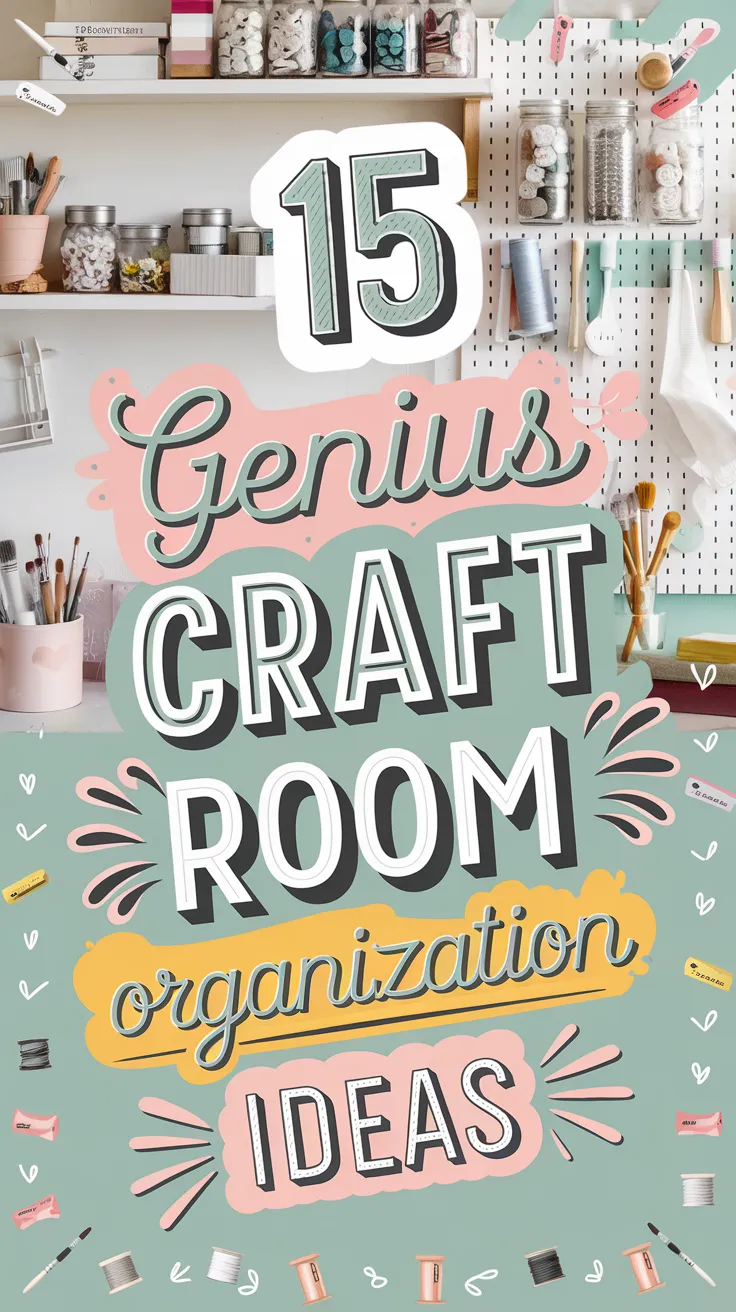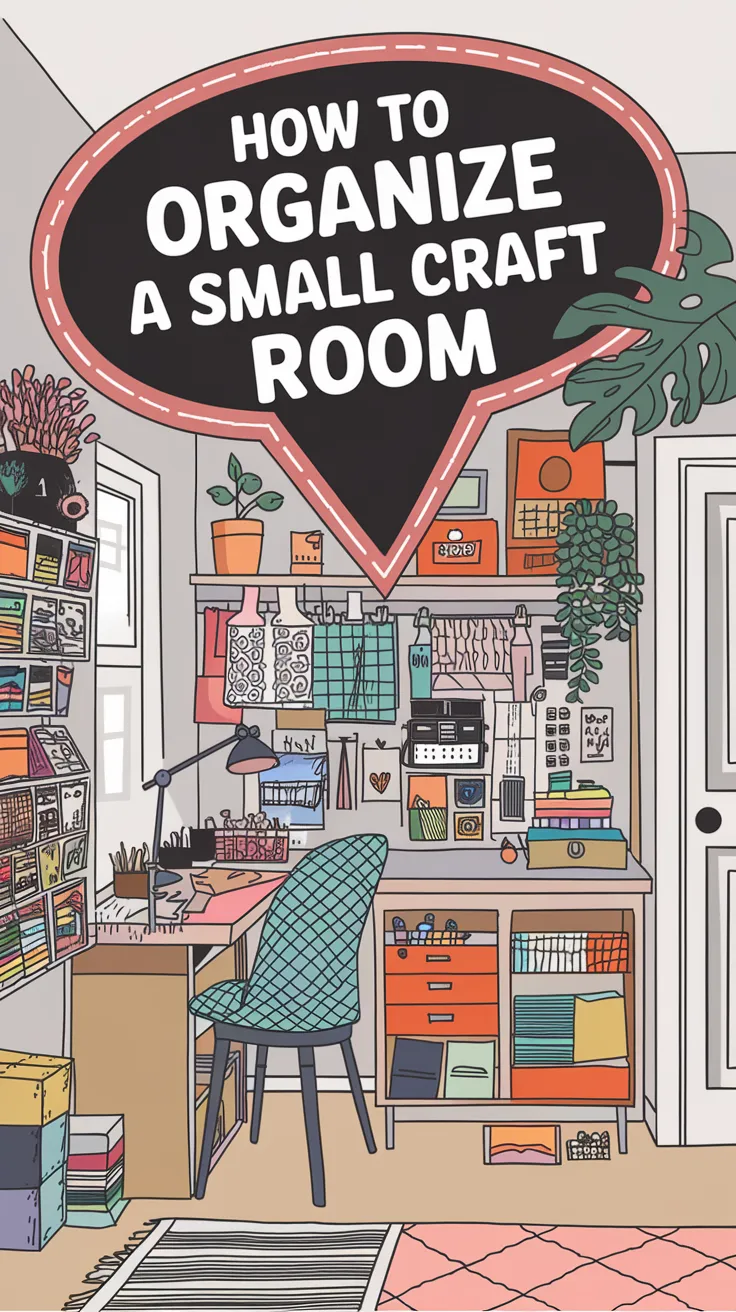
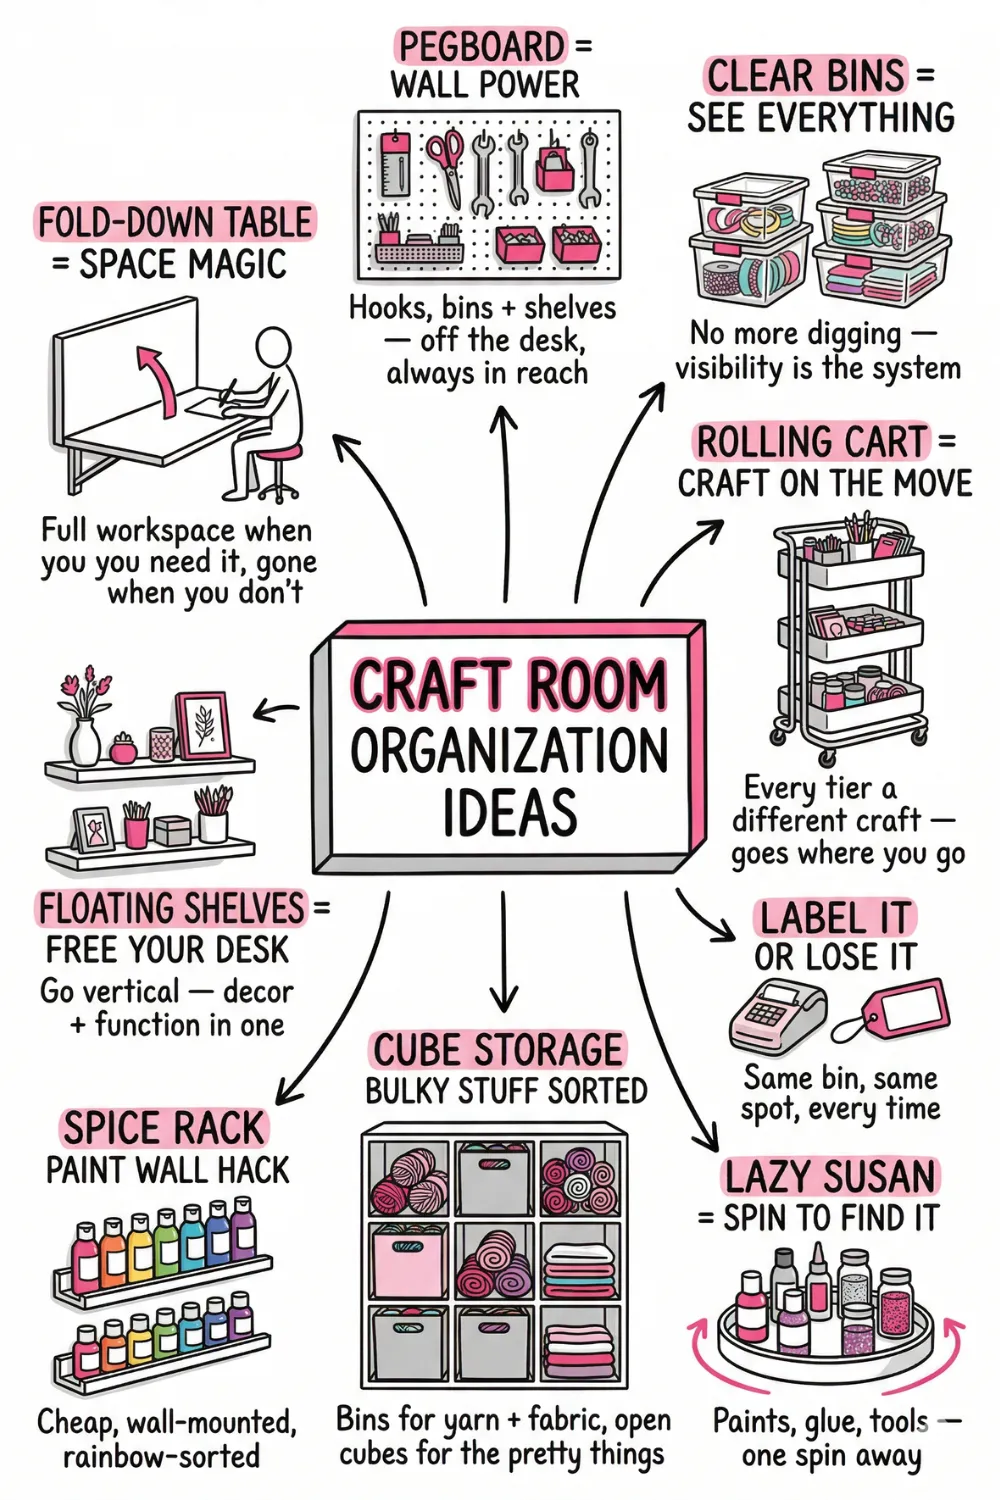
Ever started a craft project, only to spend half your time searching for scissors or digging through drawers for that one roll of washi tape? If your craft room feels more like a chaotic supply closet than a creative sanctuary, you’re not alone!
Keeping a craft space organized can feel like a never-ending battle, but with a few clever storage solutions, you can transform it into a functional, stress-free space. Whether you have a whole room or just a small corner, these 15 genius craft room organization ideas will help you maximize space and keep everything easy to find!
This post may contain affiliate links. As an Amazon Associate I earn from qualifying purchases. If you click and buy, I may receive a small commission at no extra cost to you. Read our Disclosure Policy
➡️ This way for 20+ Craft Room Ideas to Copy Right Now
Contents
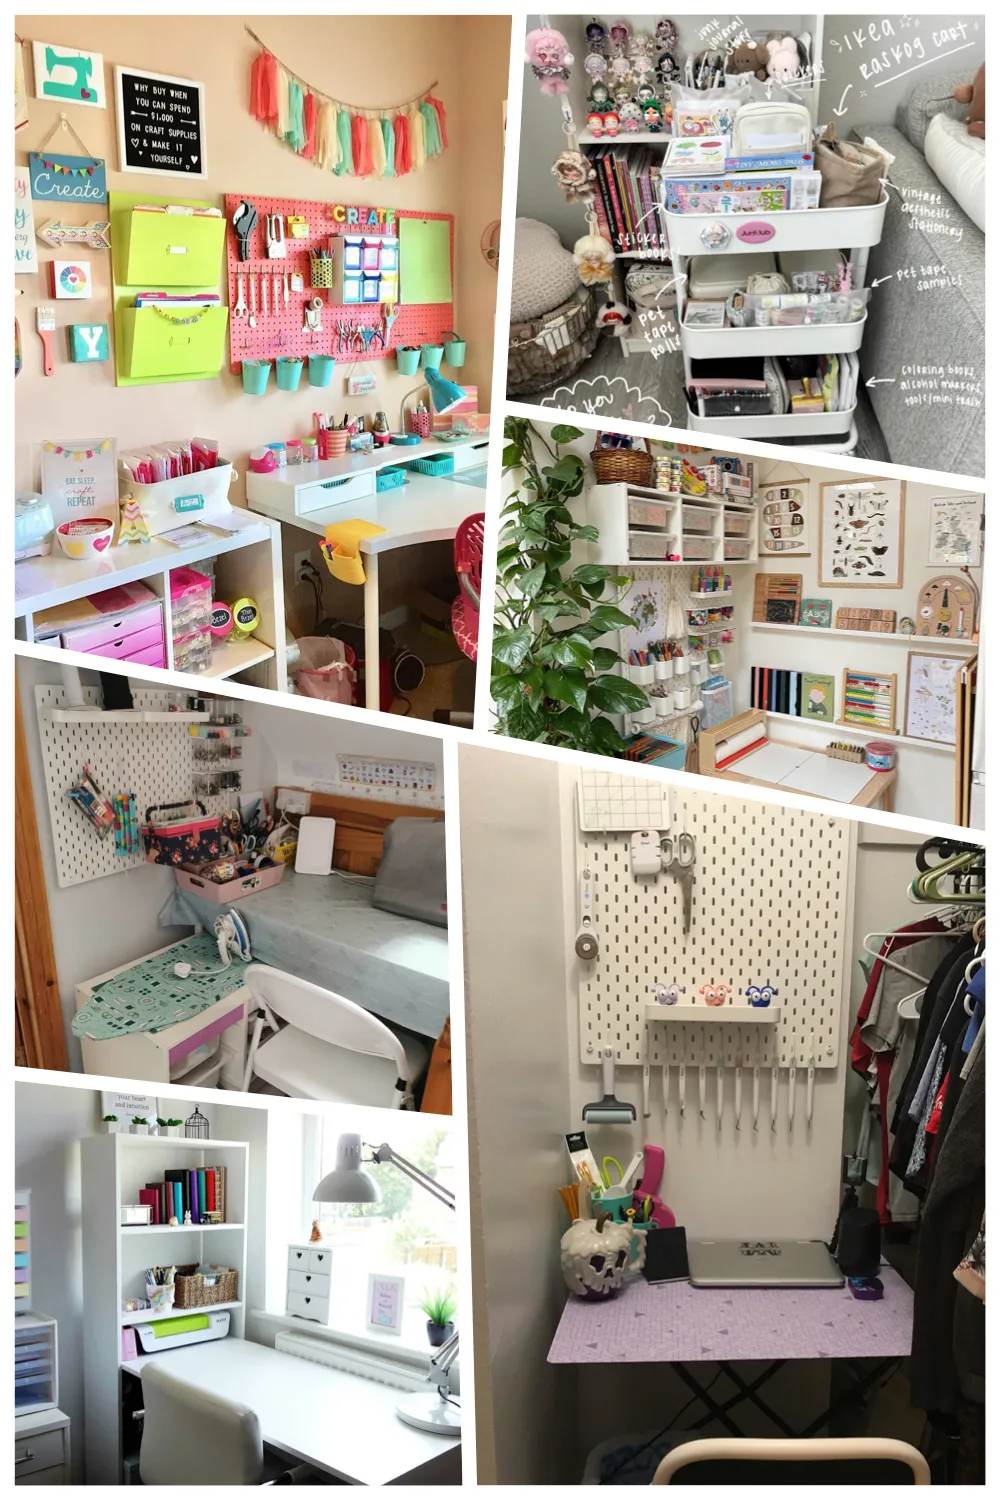
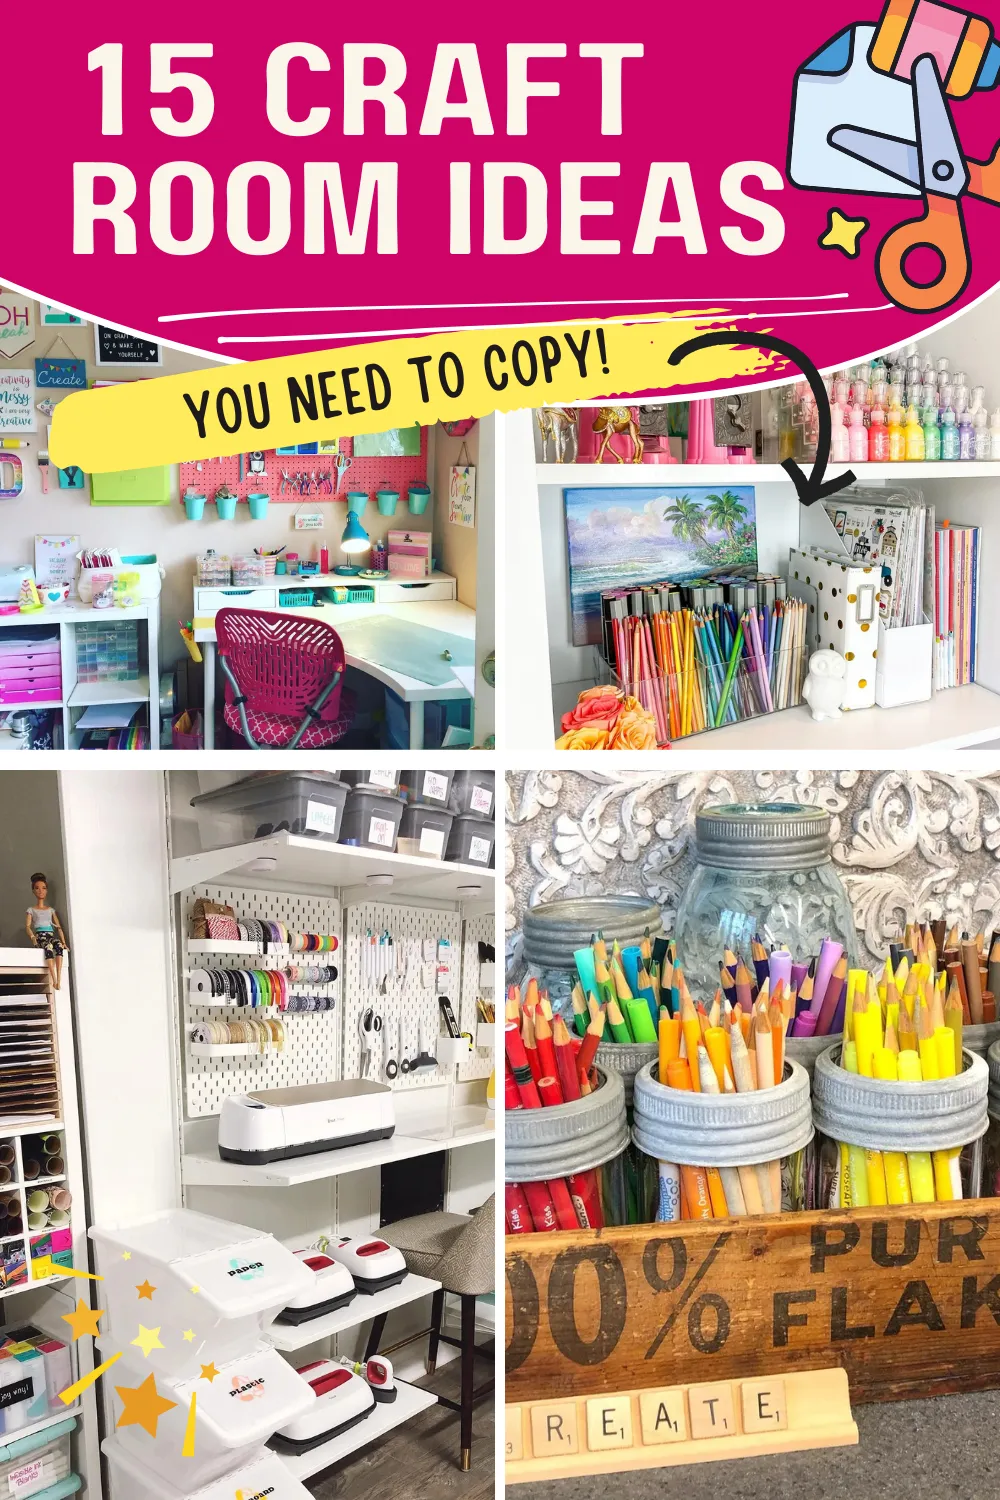
Use a Pegboard for Vertical Storage
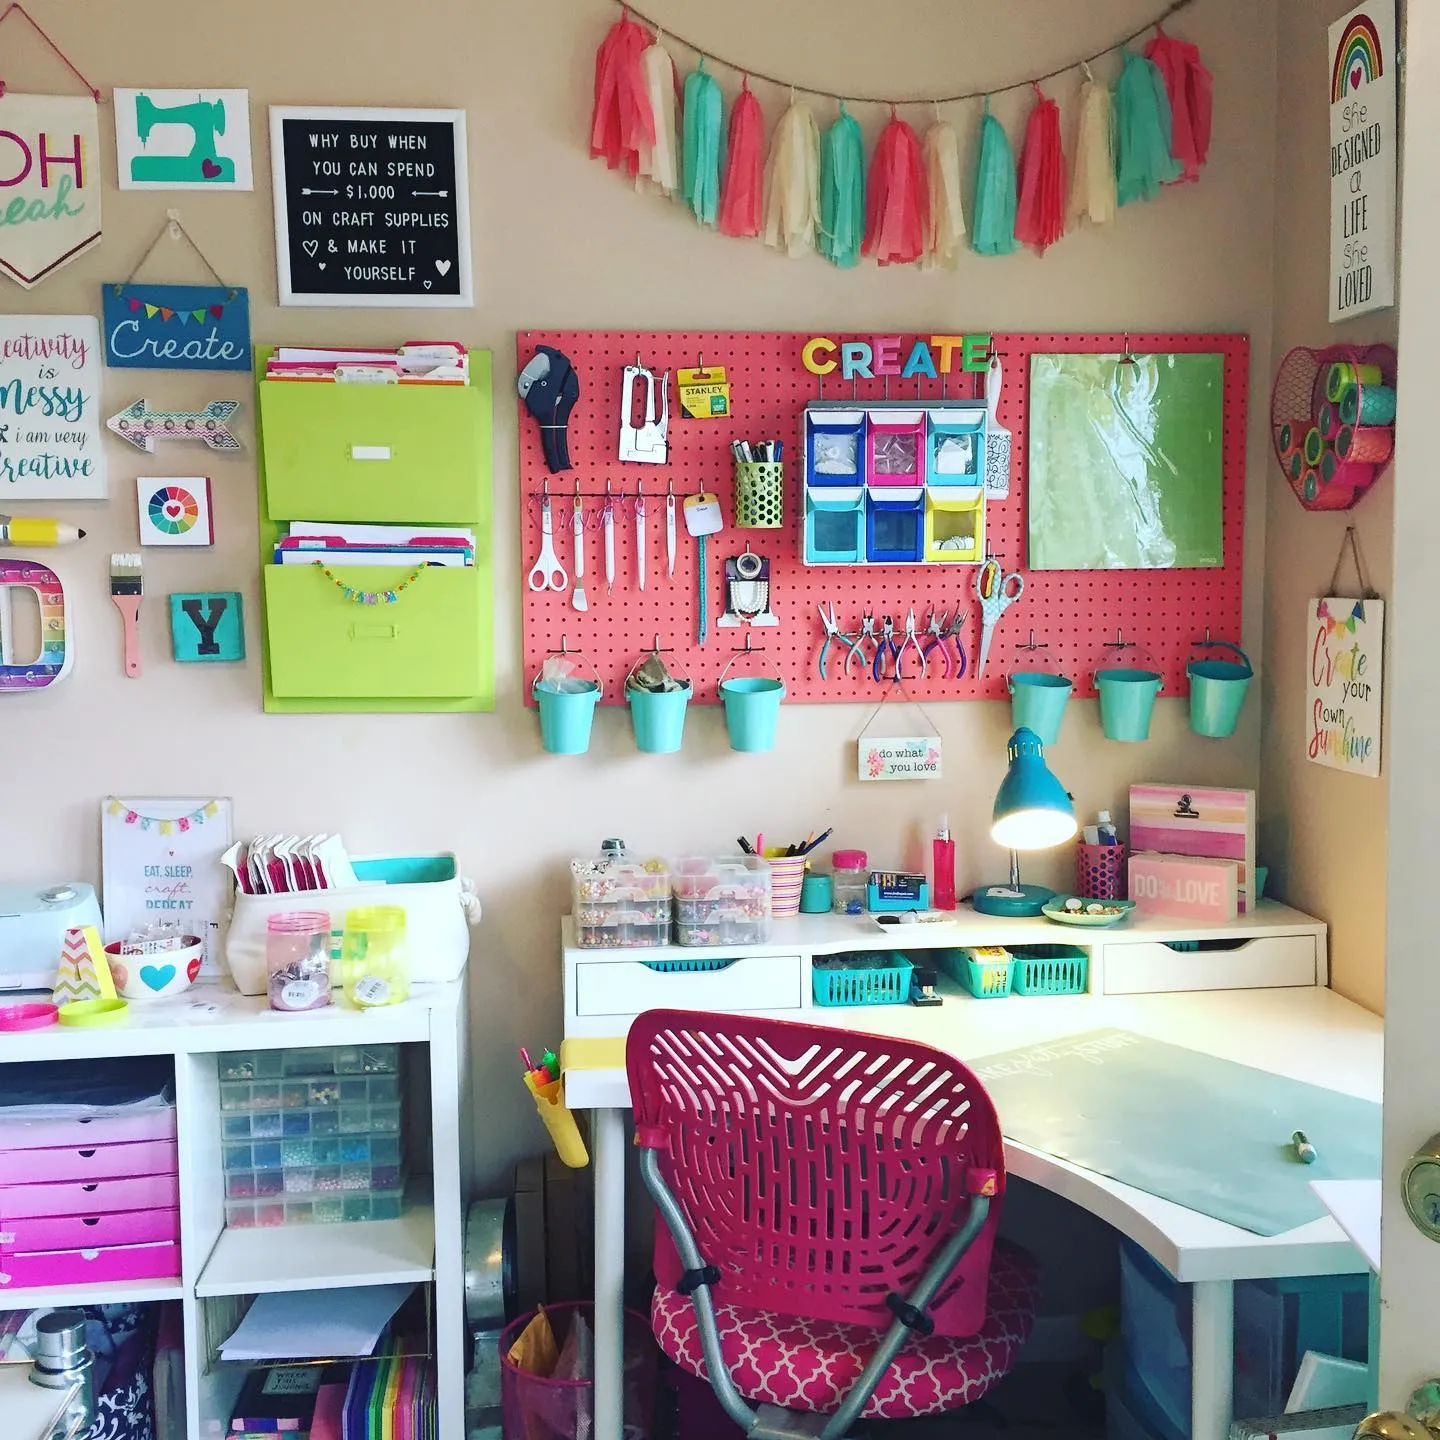
Bright and playful! A colorful pegboard with hanging bins, hooks, and shelves turns an empty wall into a beautifully organized craft corner. @takeitpersonalbyashley
If you’re not using a pegboard in your craft room yet, this is your sign to get one! Pegboards are one of the best ways to keep your craft space organized without taking up valuable desk or shelf space.
Why It Works:
- Maximizes vertical space: Instead of cluttering your desk with tools, a pegboard keeps everything off the surface while still being easily accessible.
- Completely customizable: You can rearrange hooks, shelves, and baskets as your craft storage needs change.
- Works in any space: Whether you have an entire craft room or just a small corner, pegboards work in rooms of all sizes.
How to Set It Up:
- Choose the right size: Measure your space before buying a pegboard. If you only have a small area, opt for a narrow panel. If you have a full wall, go big!
- Install it securely: Use drywall anchors or attach it to wooden strips to ensure it holds weight properly.
- Use a variety of storage options: Hooks are great for scissors and rulers, small bins work for glue sticks and beads, and shelves can hold paint bottles or jars of buttons.
- Frame it for a stylish touch: Adding a decorative frame turns your pegboard into a functional statement piece for your craft room.
Pro Tip:
Paint your pegboard a fun color to match your craft room decor, or keep it white for a clean, minimalist look! Get a pegboard kit with accessories so everything is ready to go straight out of the box.
➡️ This way for 15+ Craft Room Pegboard Ideas You’d Hate to Be Missing Out On
Clear Containers for Easy Visibility
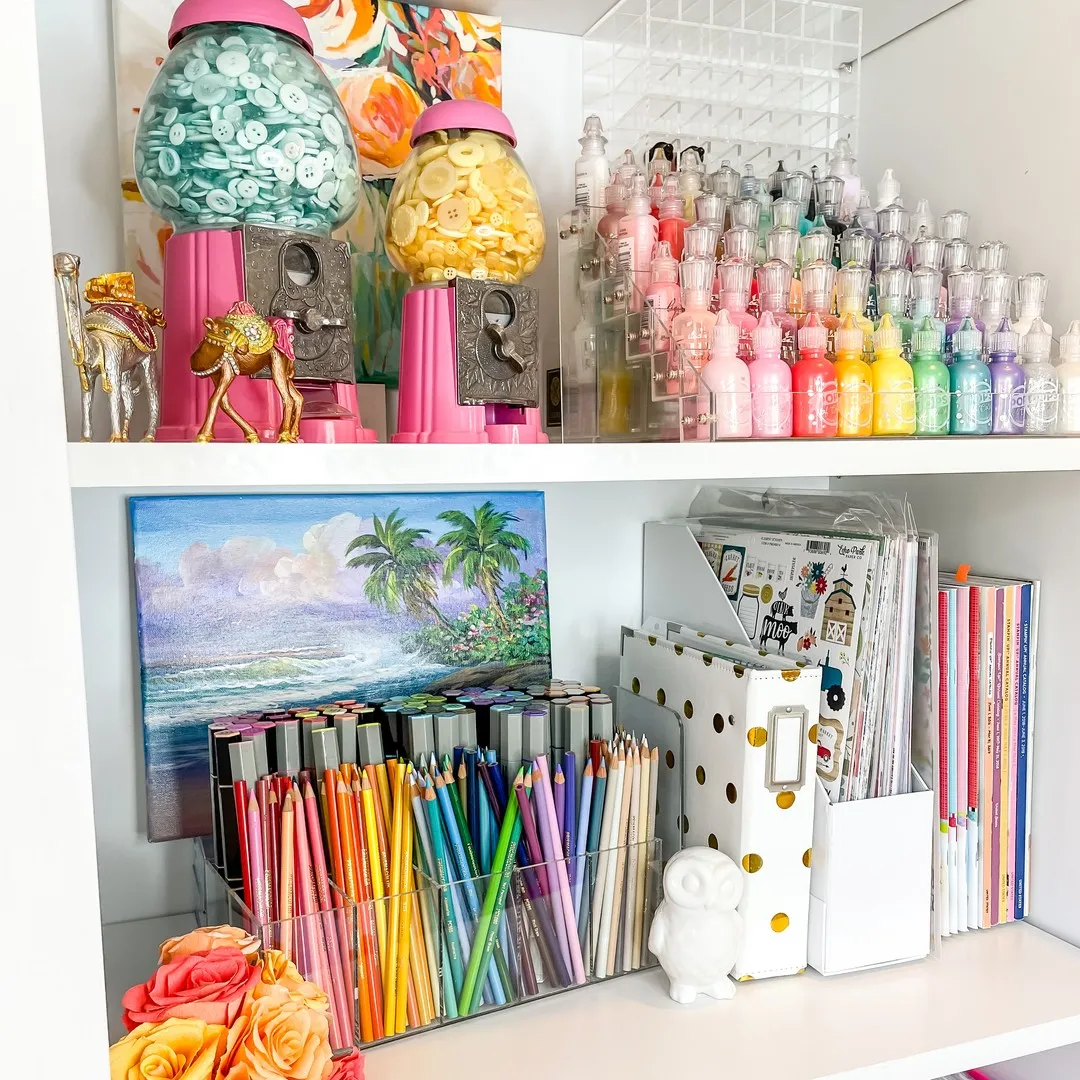
Talk about a creative twist—repurpose vintage gumball machines for storing buttons! This fun and functional setup adds personality to your craft space. @laura_evangeline
Ever spent 20 minutes searching for a specific paint color or pack of beads, only to find it buried at the back of a drawer? Clear storage containers solve that problem instantly.
Why It Works:
- You can see what you have: No more digging through opaque bins wondering if you have more of a specific supply.
- Encourages organization: When everything is visible, you’re less likely to let things pile up in a mess.
- Makes restocking easy: You’ll know at a glance when you’re running low on something.
Best Ways to Use Clear Storage:
✔ Stackable plastic bins: Ideal for organizing fabric, ribbon spools, markers, or scrapbooking supplies.
✔ Glass or acrylic jars: Perfect for storing small items like buttons, beads, or sewing thread.
✔ Divided trays: Great for separating different shades of embroidery floss, colored pencils, or paints.
✔ Magazine holders: Use clear acrylic ones for keeping sticker sheets, vinyl, or large scrapbook paper tidy.
Pro Tip:
Label your clear stackable bins with white vinyl stickers or chalkboard labels so you can instantly find what you need!
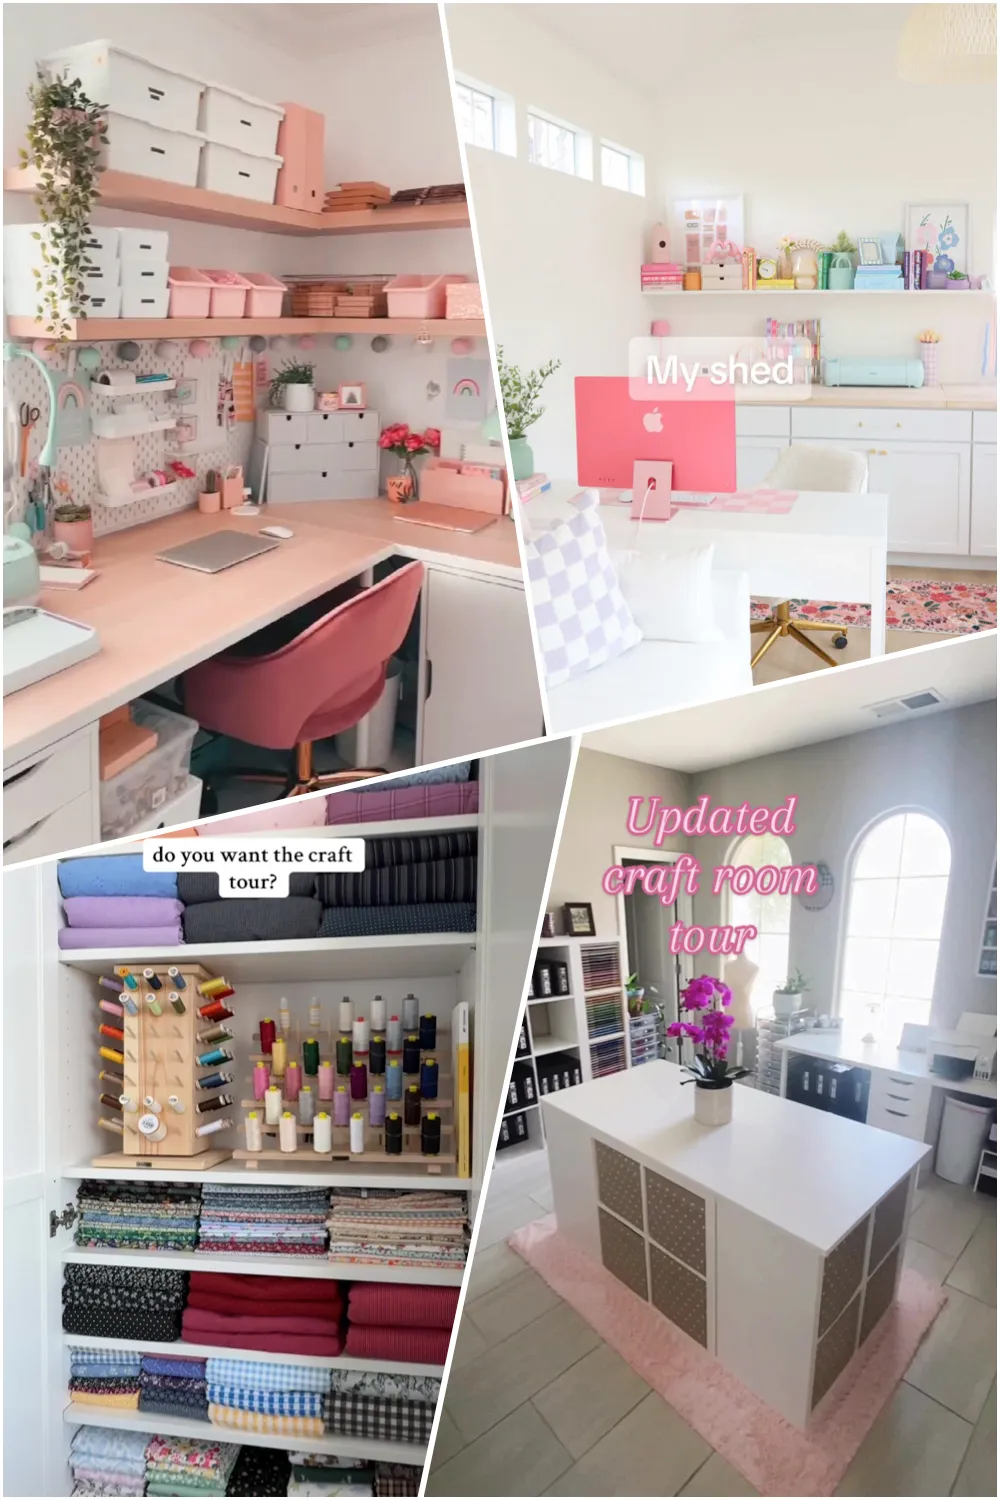
Rolling Carts for Mobile Storage
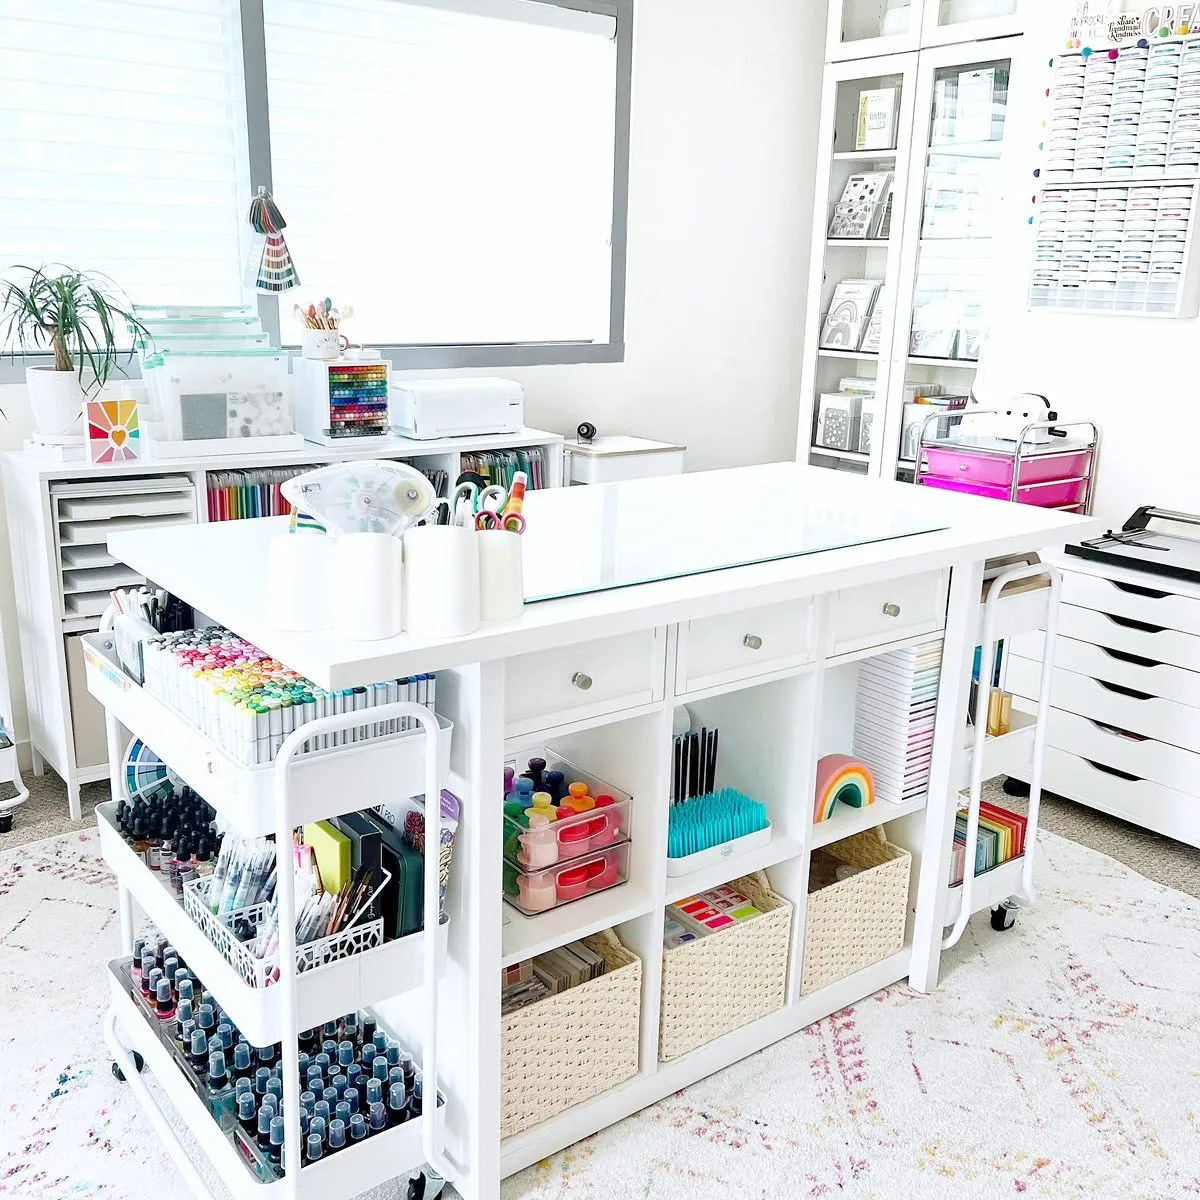
This bright and airy craft room features a spacious worktable with built-in cubbies and rolling carts—perfect for keeping essentials close while crafting! @sctmagazine
If you craft in multiple areas (or just don’t have a ton of space), a rolling cart is a game-changing organization solution. It keeps your supplies within reach when you need them — and out of the way when you don’t.
Why It Works:
- Portable and flexible: Need to work at the dining table instead of your craft room? Just roll your supplies over.
- Great for small spaces: If you don’t have a dedicated craft room, a rolling cart can act as a movable workstation.
- Easy to categorize supplies: Assign each tier of your cart a different craft — scrapbooking on top, painting in the middle, knitting supplies on the bottom.
How to Organize Your Rolling Cart:
Tier 1: Frequently used tools like scissors, glue, rulers, and pens.
Tier 2: Medium-sized supplies like paint bottles, small fabric bundles, or washi tape.
Tier 3: Larger items such as vinyl rolls, sketchbooks, or a sewing kit.
Best Places to Use a Rolling Cart:
✔ Next to your desk: Keep your essentials handy while working.
✔ In a closet: Roll it in and out when needed — perfect for small spaces.
✔ As a dedicated “in-progress” cart: Store ongoing projects so they don’t clutter your workspace.
Pro Tip:
Add hanging cups or mini bins on the side of your cart for even more storage. Great for keeping markers, glue sticks, or small embellishments within arm’s reach!
Over-the-Door Storage Solutions
If you’re not utilizing the back of your craft room door, you’re missing out on prime storage space! Over-the-door storage solutions are perfect for keeping supplies neat without taking up floor space.
Why It Works:
- Takes advantage of unused space: No need to cram more shelves or bins into your craft room — just use the door!
- Keeps frequently used supplies within easy reach: No more rummaging through drawers for what you need.
- Perfect for renters: Since most over-the-door organizers don’t require drilling, they’re a great damage-free option.
Best Over-the-Door Storage Ideas:
Hanging shoe organizer – Perfect for storing markers, glue bottles, scissors, fabric scraps, and even small paint bottles in individual pockets.
Wire rack or basket system – Great for holding vinyl rolls, scrapbooking paper, or craft magazines.
Towel bar with hooks – Hang ribbon spools, washi tape, or small baskets for extra storage.
Over-the-door hooks – Use for hanging cutting mats, aprons, or even a mini ironing board for sewing projects.
Pro Tip:
If your craft room door is also visible from another room, choose a neutral-colored or fabric organizer so it blends in with your decor while still being functional.
Label Everything for Quick Access
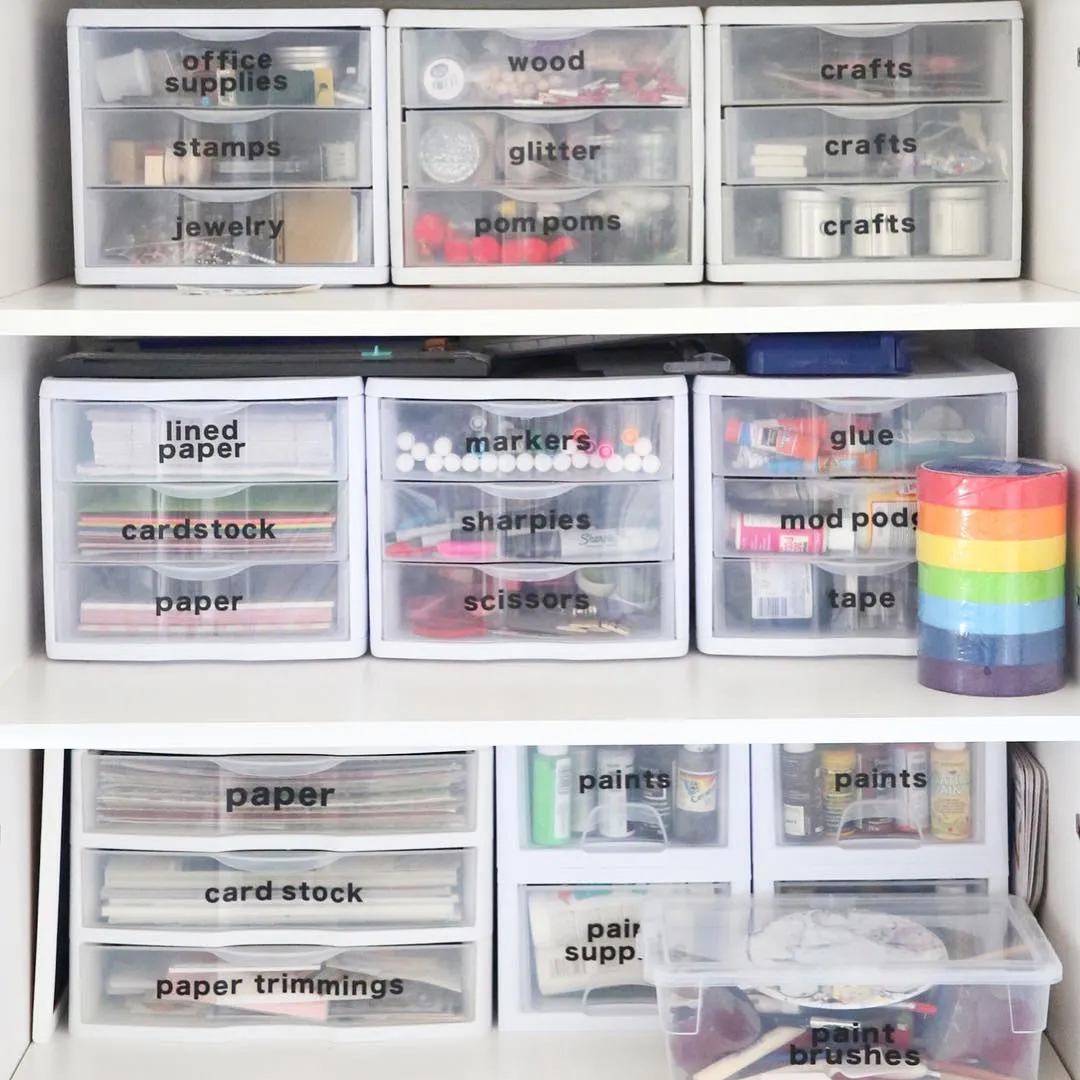
Clear, labeled plastic drawers are a game-changer for keeping everything from glue to scissors in check—quick to grab and easy to maintain! @theidearoom
Crafting is a lot more fun when you don’t have to stop mid-project to dig through a mountain of supplies. Labeling your storage solutions is one of the easiest ways to keep things organized long-term — so you’ll always know where everything belongs.
Why It Works:
- Saves time: No more guessing what’s inside each bin or drawer.
- Encourages tidy habits: You’re more likely to put things back where they belong if there’s a clear label guiding you.
- Looks aesthetically pleasing: Uniform labels give your space a clean and polished look!
Best Ways to Label Your Craft Supplies:
🏷️ Chalkboard labels – Perfect for plastic bins or glass jars that you may want to re-label later.
🏷️ Vinyl labels (made with a Cricut!) – A super stylish and professional-looking option for permanent organization.
🏷️ Label maker – Quick, easy, and uniform for a neat, streamlined look.
🏷️ Handwritten tags – Add a personal touch with cute tags tied to baskets or bins.
What to Label
✔ Drawers – Separate paper, stickers, stamps, and adhesives.
✔ Bins & baskets – Label general categories like yarn, paint supplies, or fabric scraps.
✔ Shelves – Keep books, sketchpads, and project binders organized.
✔ Clear containers – Even though they’re see-through, labels help keep things from getting mixed up.
Pro Tip:
If you use a label maker, try black-on-clear or white-on-clear tape for a sleek, minimalist look!
Floating Shelves to Free Up Desk Space
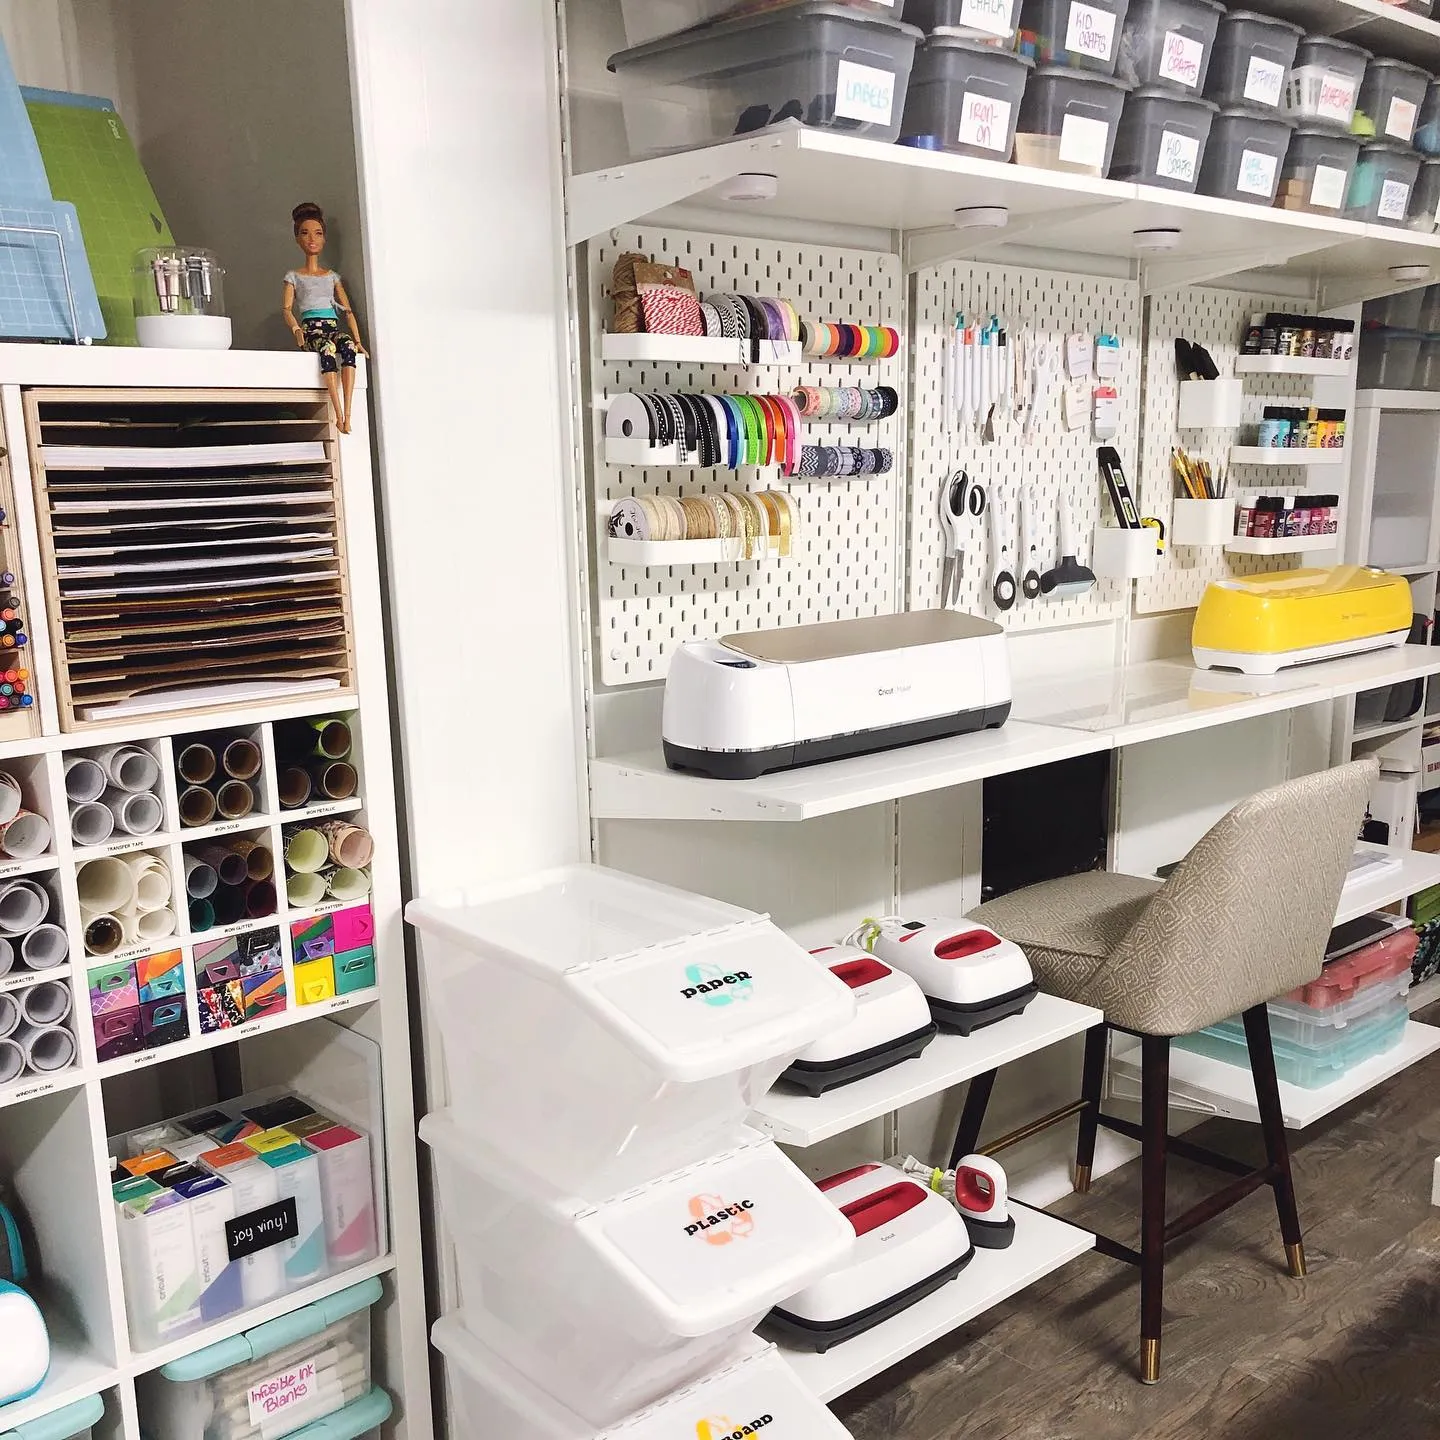
A well-planned pegboard and shelf combo keeps tools, ribbons, and machines in order while leaving plenty of workspace. Smart and stylish! @lelaburris
If your desk is constantly cluttered with craft supplies, floating shelves are your new best friend. They free up workspace while keeping everything within reach — without taking up valuable floor space.
Why It Works:
- Utilizes vertical space: Perfect for small rooms that don’t have room for bulky furniture.
- Keeps frequently used items accessible: Great for items you use all the time, like glue guns, thread spools, or notebooks.
- Doubles as decor: With cute baskets and bins, floating shelves can be both practical and stylish!
How to Use Floating Shelves in a Craft Room:
Above your desk – Store craft books, organizers, or inspirational decor to keep your workspace clutter-free.
Next to a pegboard – Combine a pegboard and floating shelves for the ultimate vertical storage system.
Stacked on a blank wall – If you’re short on storage, stack multiple floating shelves to make the most of your wall space.
Under a window – A low shelf beneath a window can hold small baskets of fabric, pens, or scrapbooking materials.
Pro Tip:
Use small bins or decorative baskets on floating shelves to prevent items from tipping over while still keeping them easily accessible!
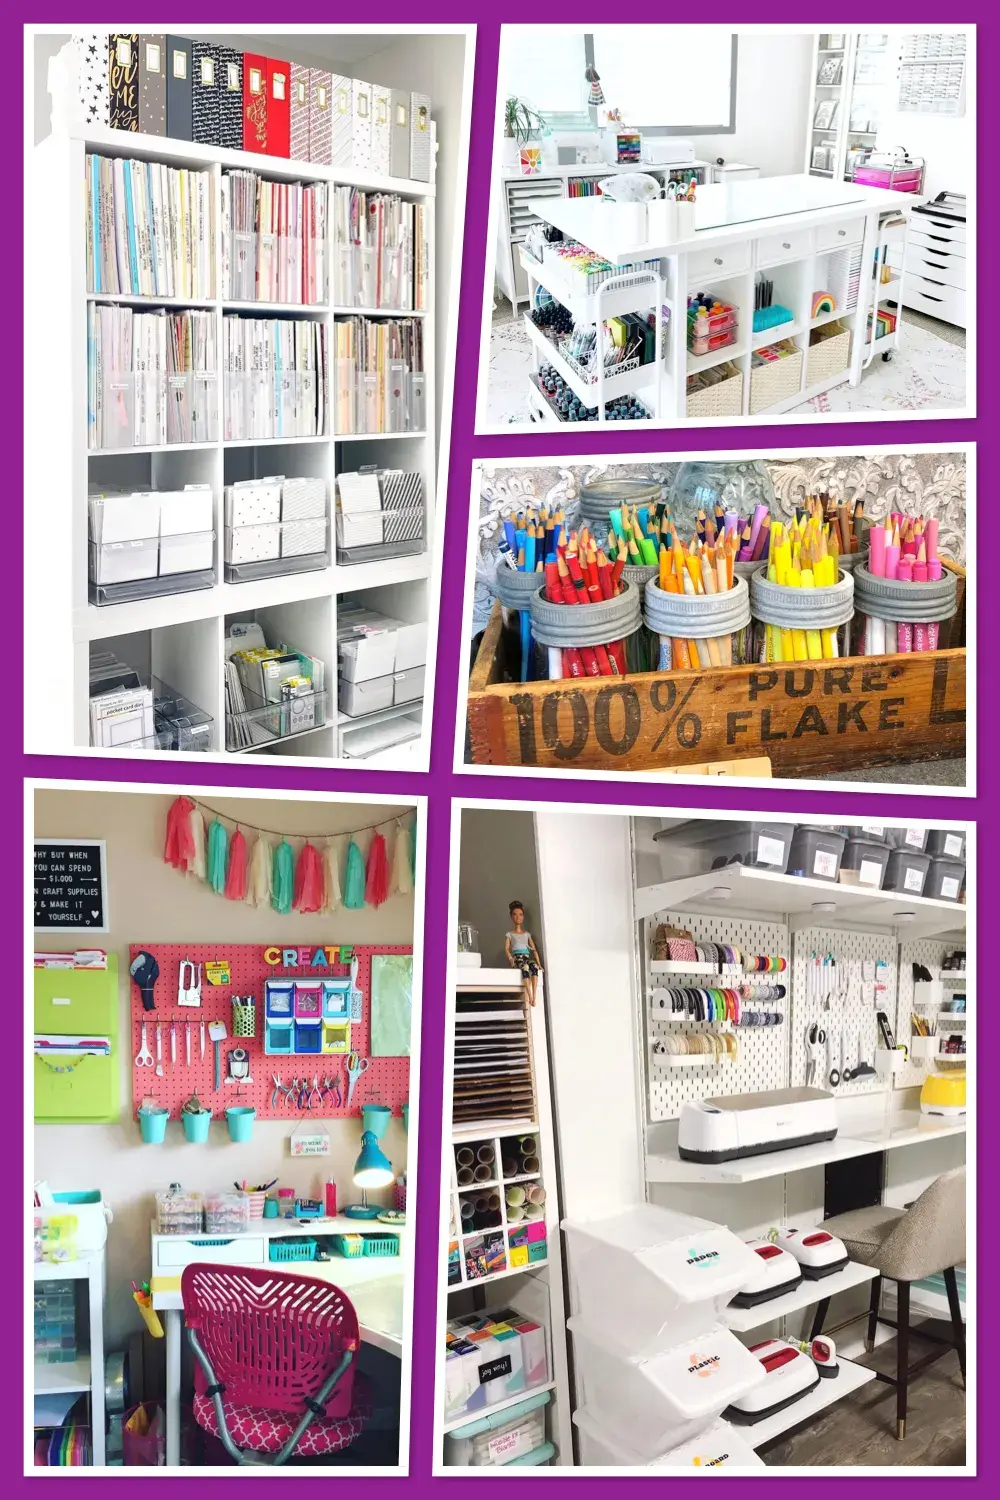
Cube Storage for Bulky Supplies
A cube organizer is one of the most versatile pieces of furniture you can add to a craft room. It works equally well for fabric, yarn, bulky tools, and ongoing projects — and with the right baskets and bins, it looks great too.
Why It Works:
- Holds everything: From yarn and fabric yardage to paper pads and project bags, cube storage handles the bulky stuff that won’t fit anywhere else.
- Completely customizable: Mix open cubbies with fabric storage bins to keep some things on display and hide the less photogenic supplies.
- Scales with your collection: Start with a small 4-cube unit and add more as your supplies grow.
How to Organize a Cube Unit:
Use bins for loose items – Yarn, fabric scraps, and ribbon are perfect for fabric-lined bins.
Leave some cubbies open – Display your prettiest supplies (beautiful yarns, ribbon collections, paint sets) for an inspiring and practical display.
Dedicate a cube to in-progress projects – Give every ongoing project its own bin so nothing gets lost or mixed up.
Add a tension rod between cubes – Thread washi tape, ribbon, or twine onto a rod mounted across a cubby opening.
Pro Tip:
Label every bin, even the fabric ones. It takes two minutes and saves hours of rummaging later!
A Lazy Susan for Your Craft Desk
A spinning turntable might be the most underrated craft room storage hack out there. A lazy Susan keeps all your most-used supplies visible, accessible, and right where you need them — no reaching or rummaging required.
Why It Works:
- Everything is always within reach: Spin to grab what you need instead of shuffling things around.
- Perfect for paint: Line up your paint bottles on a turntable and find the right color in seconds.
- Works on any surface: Use one on your desk, on a shelf, or inside a deep cabinet to make the back row accessible.
Best Uses for a Craft Room Lazy Susan:
✔ Paint storage: Stand bottles upright on a large turntable organizer so every color is visible.
✔ Glue and adhesives: Keep your glue gun, tape runner, and glue sticks grouped together and easy to grab.
✔ Desk caddy: Place a small lazy Susan on your desk with your most-used tools — scissors, pens, rulers — for instant access.
✔ Inside a cabinet: Spin to reach items at the back without emptying the whole shelf first.
Pro Tip:
Lazy Susans come in a huge range of sizes. Measure your shelf or desk space before buying — a 12-inch works well for desks, while a 16-inch is better for shelves and cabinets.
Wall-Mounted Spice Racks for Paint and Small Supplies]
This budget-friendly hack is one of the most popular ideas in the craft room community — and for good reason. Wall-mounted spice racks are the perfect size for paint bottles, glitter jars, ink pads, and all the other small supplies that end up rolling around your desk.
Why It Works:
- Cheap and cheerful: Spice racks are inexpensive and widely available — this is a high-impact, low-cost upgrade.
- Keeps supplies vertical and visible: You can see every bottle at a glance without stacking or shuffling.
- Uses wall space you’re not using: Mount a few rows between your desk and your upper shelves for instant extra storage.
How to Set It Up:
- Mount in rows: Install two or three wall-mounted spice racks in horizontal rows to create a full paint wall.
- Sort by color: Arrange paints in rainbow order so you can find the right shade in seconds.
- Use for more than paint: Glitter jars, stamp inks, essential oils for crafts, and small bottles of mod podge all fit perfectly.
- Label the fronts: A quick label on each bottle means you don’t have to pull everything out to find the right shade.
Pro Tip:
This works brilliantly above a craft desk. Mount your racks at eye level when seated so everything is in your sightline while you work!
Turn a Bookshelf into a Craft Supply Station
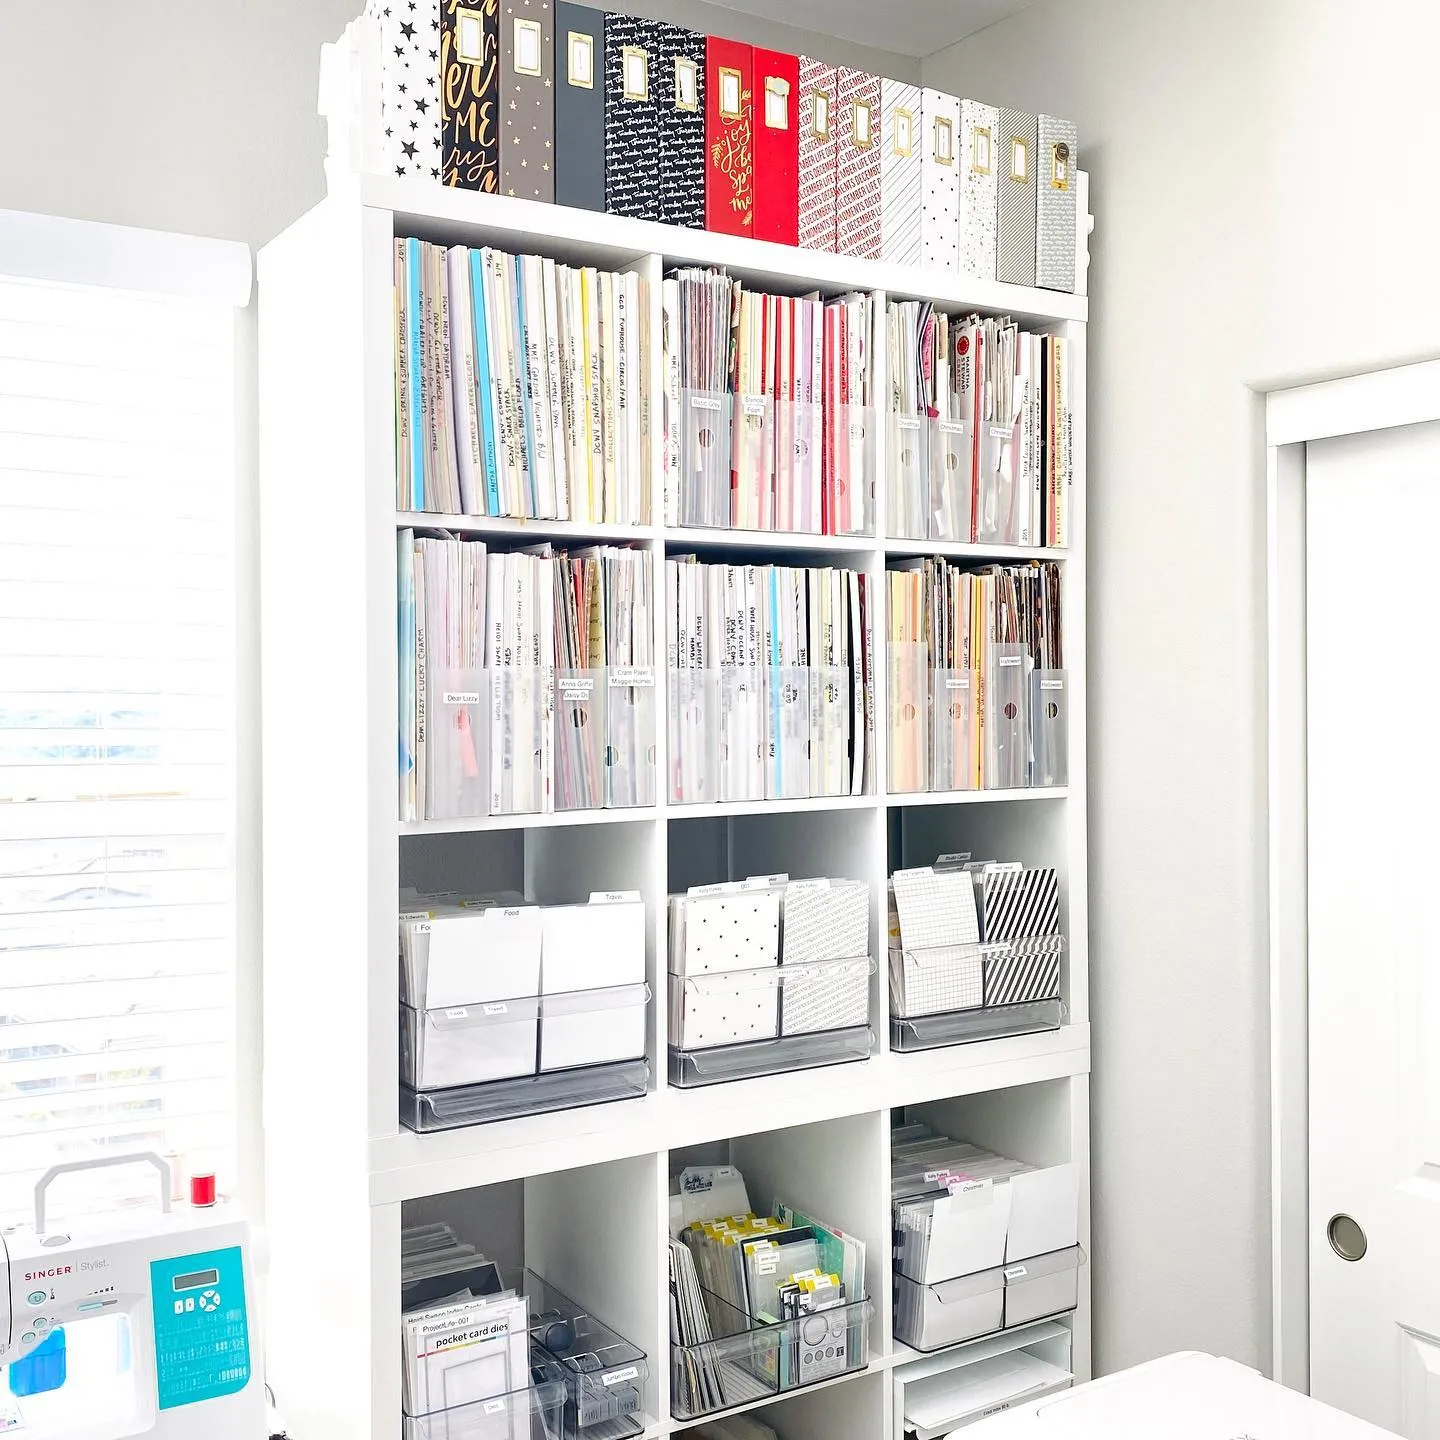
A towering bookshelf with labeled storage bins keeps craft paper, stickers, and supplies ultra-organized—plus, clear containers make it easy to see what you have! @lisasoares
Bookshelves aren’t just for books! A cubby-style bookshelf can be transformed into a fully functional craft supply station, keeping everything organized and easy to find. Whether you have a large shelving unit or a small bookcase, this storage hack maximizes vertical space while keeping supplies within reach.
Why It Works:
- Provides multiple storage options – Use a mix of baskets, bins, and open shelves for easy access.
- Visually organizes supplies – Everything has a dedicated space, reducing clutter.
- Works for any craft type – Whether you scrapbook, sew, or paint, a bookshelf can be customized for your needs.
How to Organize a Craft Room Bookshelf:
Use labeled bins for hidden storage – Great for keeping extra glue sticks, stickers, or tools tidy.
Store paper and vinyl upright – Use magazine holders to keep scrapbook paper, cardstock, or vinyl sheets organized.
Add clear jars for small items – Perfect for buttons, beads, and thread spools.
Include decorative elements – A plant, framed print, or small decor piece can make the space feel stylish.
Use tension rods for ribbon and tape – Install tension rods between shelves to store washi tape and ribbon spools.
Pro Tip:
If you have a deep bookshelf, add sliding bins or turntables so items in the back are easy to reach!
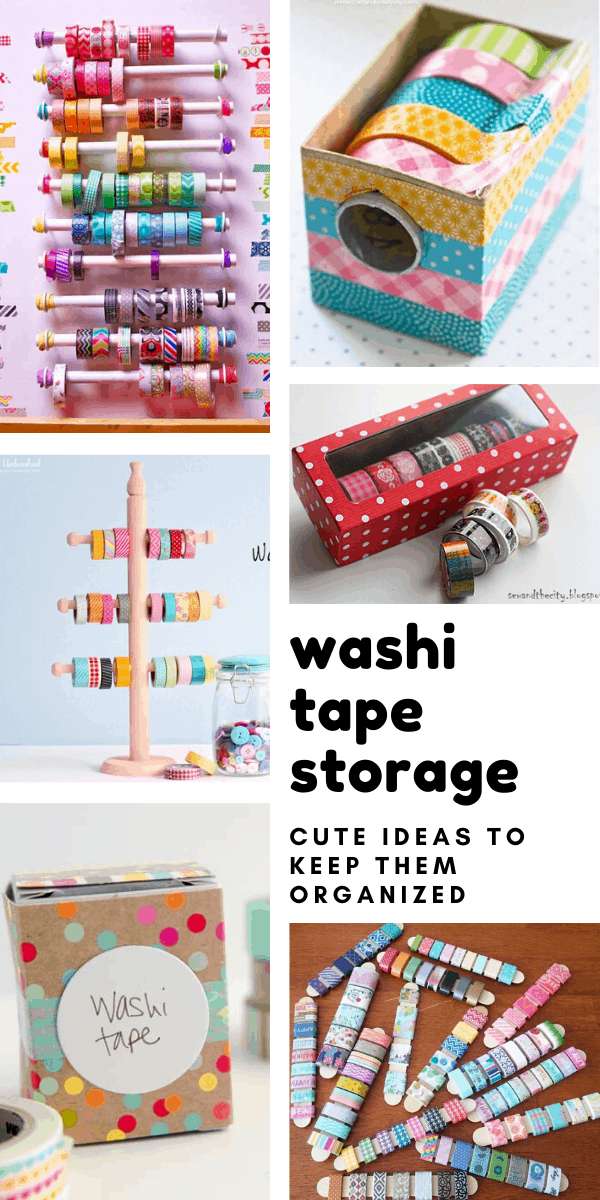
DIY Ribbon and Washi Tape Organizer
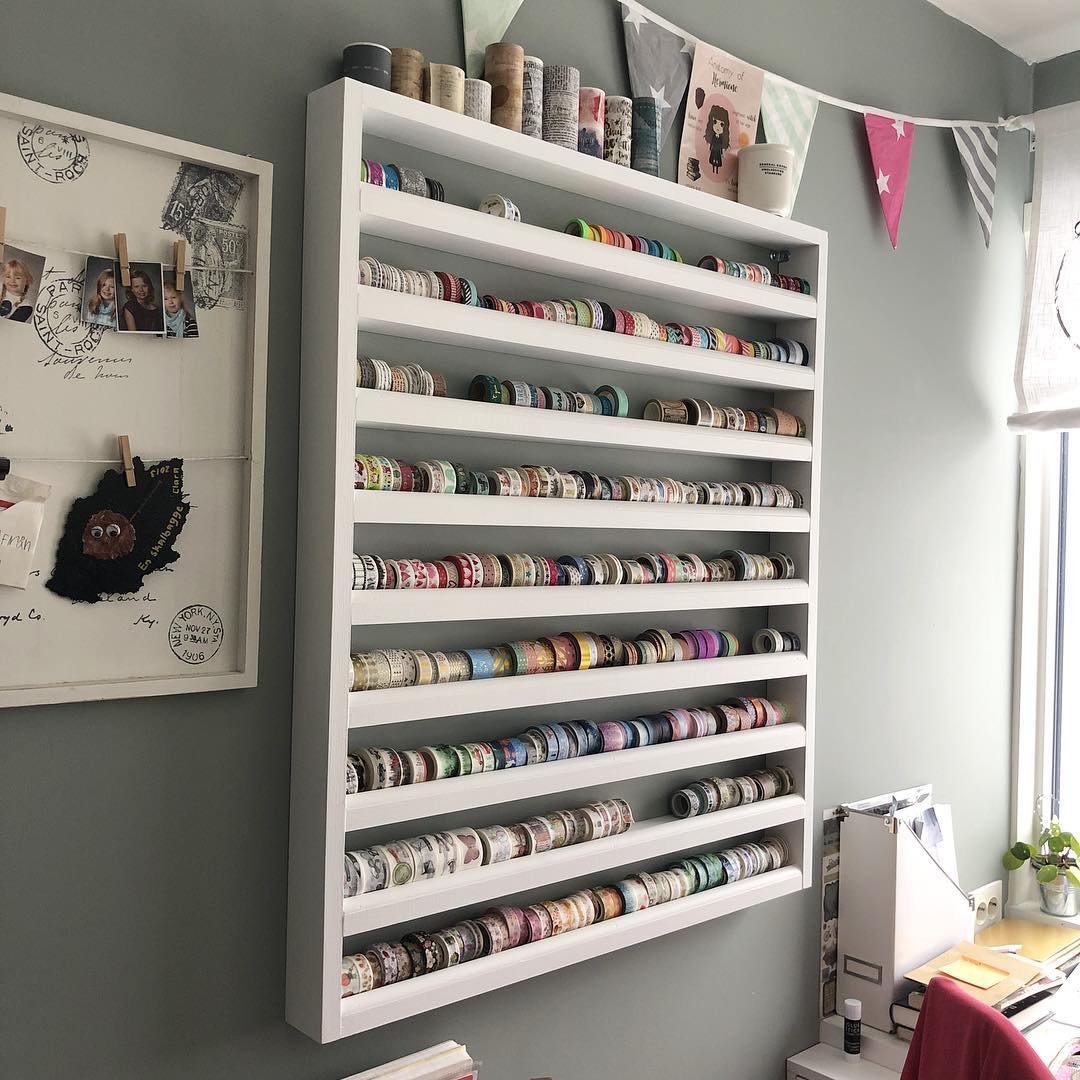
Washi tape heaven!✨ This wall-mounted shelf is a genius way to keep your collection organized and beautifully displayed. No more digging through drawers—just grab and craft! @annasbujo
If you love crafting with ribbon, washi tape, or twine, you know how easily they become a tangled mess. Instead of throwing them in a drawer, try a DIY organizer to keep them neat and easy to access.
Why It Works:
- Keeps spools from unraveling – No more loose ribbons or tangled washi tape.
- Saves time when crafting – Quickly grab the color or pattern you need without digging through a pile.
- Makes your supplies look beautiful – A well-organized display of colorful ribbons adds a creative touch to your space.
DIY Ways to Organize Ribbon and Washi Tape:
Tension rods – Thread ribbon spools onto a tension rod and mount it inside a shelf or under a cabinet.
Paper towel holder – A budget-friendly option for stacking washi tape rolls.
Pegboard with dowels – Use wooden dowels to create a hanging ribbon display.
Clear storage bins – Stackable bins with dividers keep washi tape neatly sorted.
Clothespins for loose ribbon – Wrap small pieces of ribbon around clothespins and store them in a jar.
Pro Tip:
Use a dowel with removable ends so you can easily swap out ribbons when needed!
➡️ This way for 20 DIY Washi Tape Storage Ideas You Need to Control Your Stash
Use Drawer Dividers for Tiny Tools
Craft room drawers can quickly turn into a chaotic mess of glue sticks, markers, and random supplies rolling around. Drawer dividers help create designated spaces for everything, making it easy to grab what you need.
Why It Works:
- Prevents clutter buildup – No more junk drawers full of mixed-up supplies!
- Saves time – Quickly find the right tool without digging through piles.
- Creates a clean, organized look – Everything has a place, and it stays there.
How to Use Drawer Dividers Effectively:
🗂️ Customize with adjustable dividers – Great for deep drawers with a mix of small and large supplies.
🗂️ Use small trays for tiny items – Store paper clips, beads, or sewing needles in mini compartments.
🗂️ Sort by craft type – Keep adhesives in one section, cutting tools in another, and pens in a third.
🗂️ Repurpose utensil trays – A silverware organizer works perfectly for craft tools like scissors and markers.
🗂️ Add a non-slip liner – Keeps items from shifting around when you open and close the drawer.
Pro Tip:
Use acrylic drawer dividers for a sleek, modern look that makes everything visible at a glance!
Repurpose Jars and Cups for Pen & Brush Storage
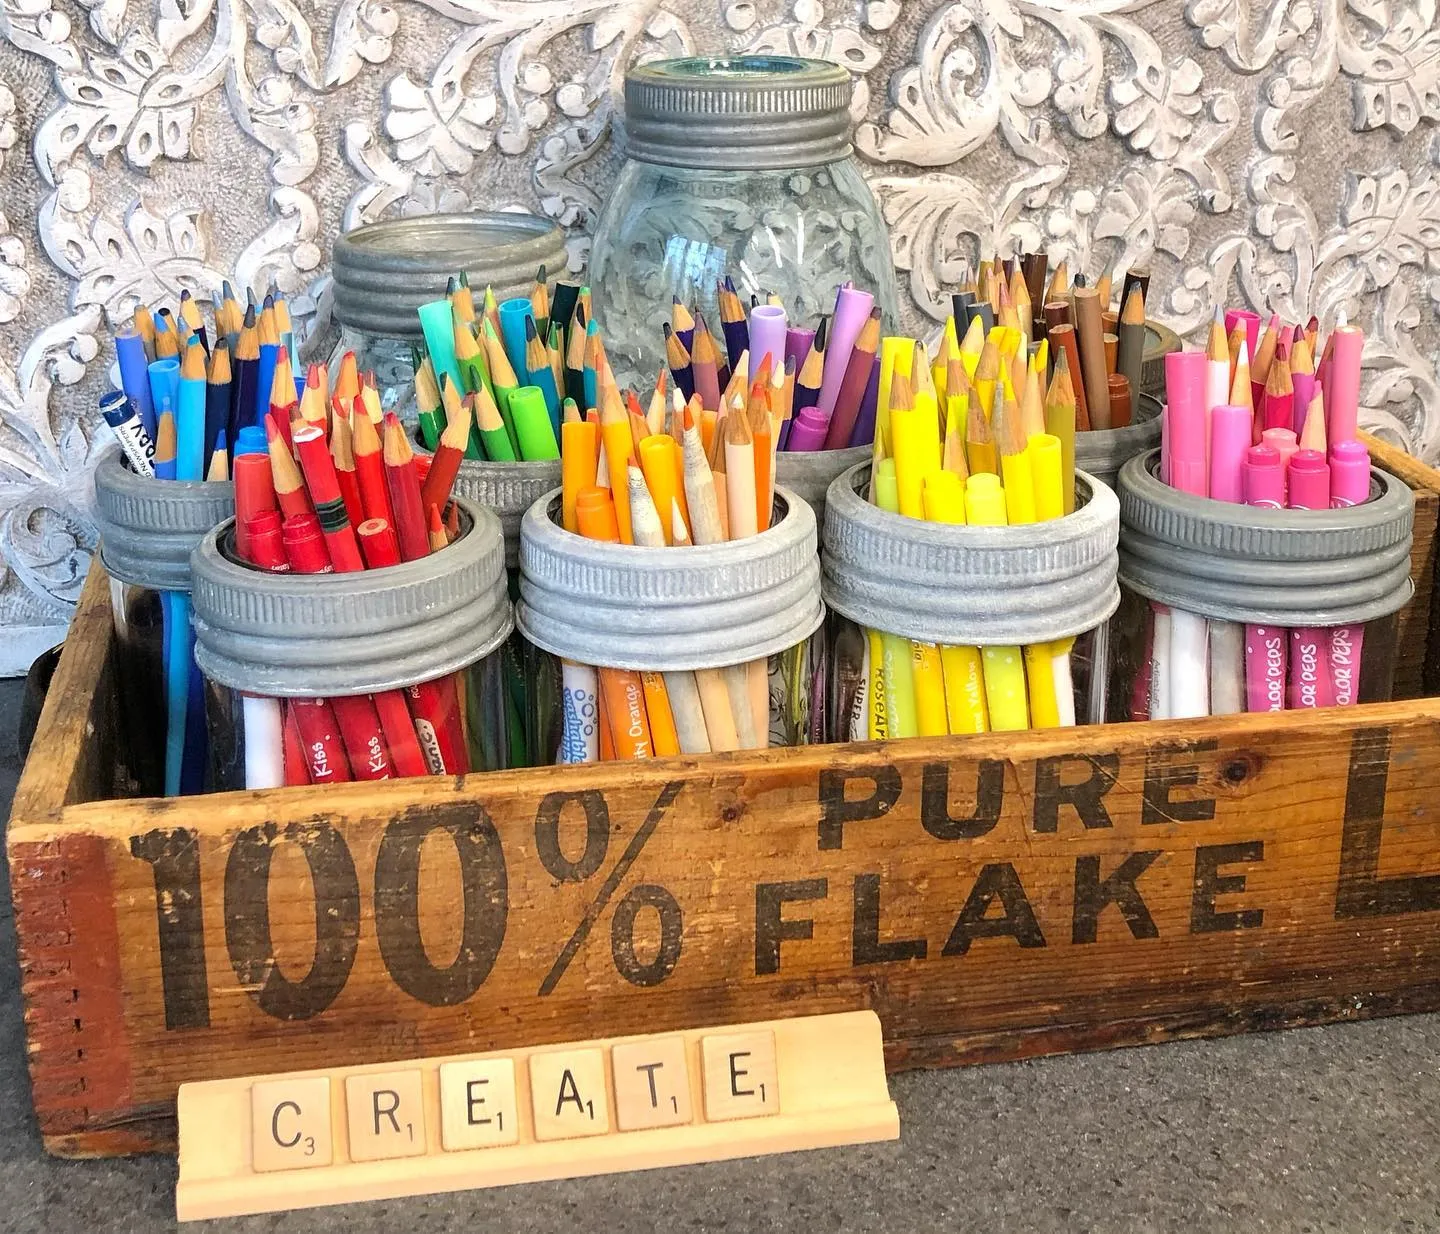
A vintage-inspired DIY storage hack! Repurpose mason jars and a wooden crate for a budget-friendly way to keep colored pencils and markers sorted. @pinkpressvintage
If you love collecting paintbrushes, markers, or colored pencils, you know they can quickly take over your workspace. Instead of letting them pile up, repurpose jars, mugs, or cups to create a functional and stylish storage solution!
Why It Works:
- Keeps frequently used tools within arm’s reach – No more digging through drawers for your favorite brush.
- Gives a personalized touch – Mason jars, vintage mugs, or even old candle holders can add charm to your craft space.
- Budget-friendly and eco-friendly – Repurposing what you already have saves money and reduces waste!
Creative Ways to Use Jars & Cups for Storage:
🖌️ Mason jars – Perfect for storing paintbrushes, markers, and colored pencils upright.
🖌️ Mugs with personality – Use fun, colorful mugs to hold pens and scissors while adding a decorative touch.
🖌️ Rotating caddy – Place jars inside a lazy Susan so you can easily spin to grab what you need.
🖌️ Hanging jar system – Mount a wooden board with hose clamps to create a wall-mounted jar organizer.
🖌️ Tiered stand – Stack small cups on a tiered dessert tray for a compact, desk-friendly storage solution.
Pro Tip:
Label each jar with chalkboard stickers or vinyl decals so you always know where things belong!
Hanging Baskets for Extra Storage
If your craft room is short on shelves and counter space, hanging baskets are an easy way to add storage without cluttering up your work area. These can hold everything from fabric scraps to paint bottles while keeping your space tidy and stylish.
Why It Works:
- Maximizes wall space – Keeps supplies off your desk but still easily accessible.
- Great for lightweight items – Perfect for yarn, ribbons, stickers, or small crafting tools.
- Easily movable – Many hanging baskets can be rearranged as your storage needs change.
Best Ways to Use Hanging Baskets in a Craft Room:
Pegboard baskets – Attach small wire or fabric baskets to a pegboard for instant storage.
Under-shelf hanging baskets – Clip these onto shelves to store extra paper or crafting tools.
Over-the-door baskets – Great for storing paints, glue sticks, or fabric swatches.
Wall-mounted wire baskets – Stylish and functional, these keep supplies visible and organized.
Hanging rail with hooks – Use S-hooks to hang small baskets under cabinets or shelves.
Pro Tip:
Choose baskets in different sizes so you can store a variety of supplies without wasting space!
Fold-Down Table for Small Spaces
If you don’t have a dedicated craft room (or you need more workspace but don’t have the room for a large table), a fold-down table is a game-changing solution. It provides a functional workspace when you need it, and it folds away neatly when you don’t!
Why It Works:
- Saves space – Ideal for small craft rooms or multipurpose spaces.
- Easy to store – When not in use, it folds flat against the wall or into a cabinet.
- Creates a flexible workspace – Perfect for those who craft occasionally but don’t want a permanent table taking up room.
Best Fold-Down Table Ideas:
Wall-mounted drop-leaf table – Folds up against the wall when not in use, saving floor space.
Cabinet fold-out desk – A craft station hidden inside a storage cabinet — just open it up when you’re ready to create!
Murphy-style crafting table – A fold-down workspace with built-in storage inside.
Rolling fold-up table – A foldable cart that can be stashed in a closet when not in use.
Pro Tip:
If you’re using a wall-mounted fold-down table, install a pegboard or shelves above it for extra storage without taking up workspace! Working with a smaller footprint? These craft corner ideas for small spaces are full of inspiration.
Final Thoughts
Craft room organization doesn’t have to be overwhelming — it’s all about using smart storage solutions that fit your space and crafting style. Whether you’re working with a full craft room or just a small corner, these 15 genius ideas will help you stay organized, maximize your space, and make crafting even more fun!
Looking for more inspiration? Check out these clever craft room ideas and the latest craft room ideas from TikTok for even more ways to transform your space. And if you’re working with furniture rather than storage solutions, these repurposed armoire ideas show just how creative you can get!
➡️ No Clue How to Organize Your Small Craft Room? Read This Guide!
Which of these organization ideas are you excited to try? If you found this helpful, don’t forget to save this post on Pinterest so you can come back to it later.