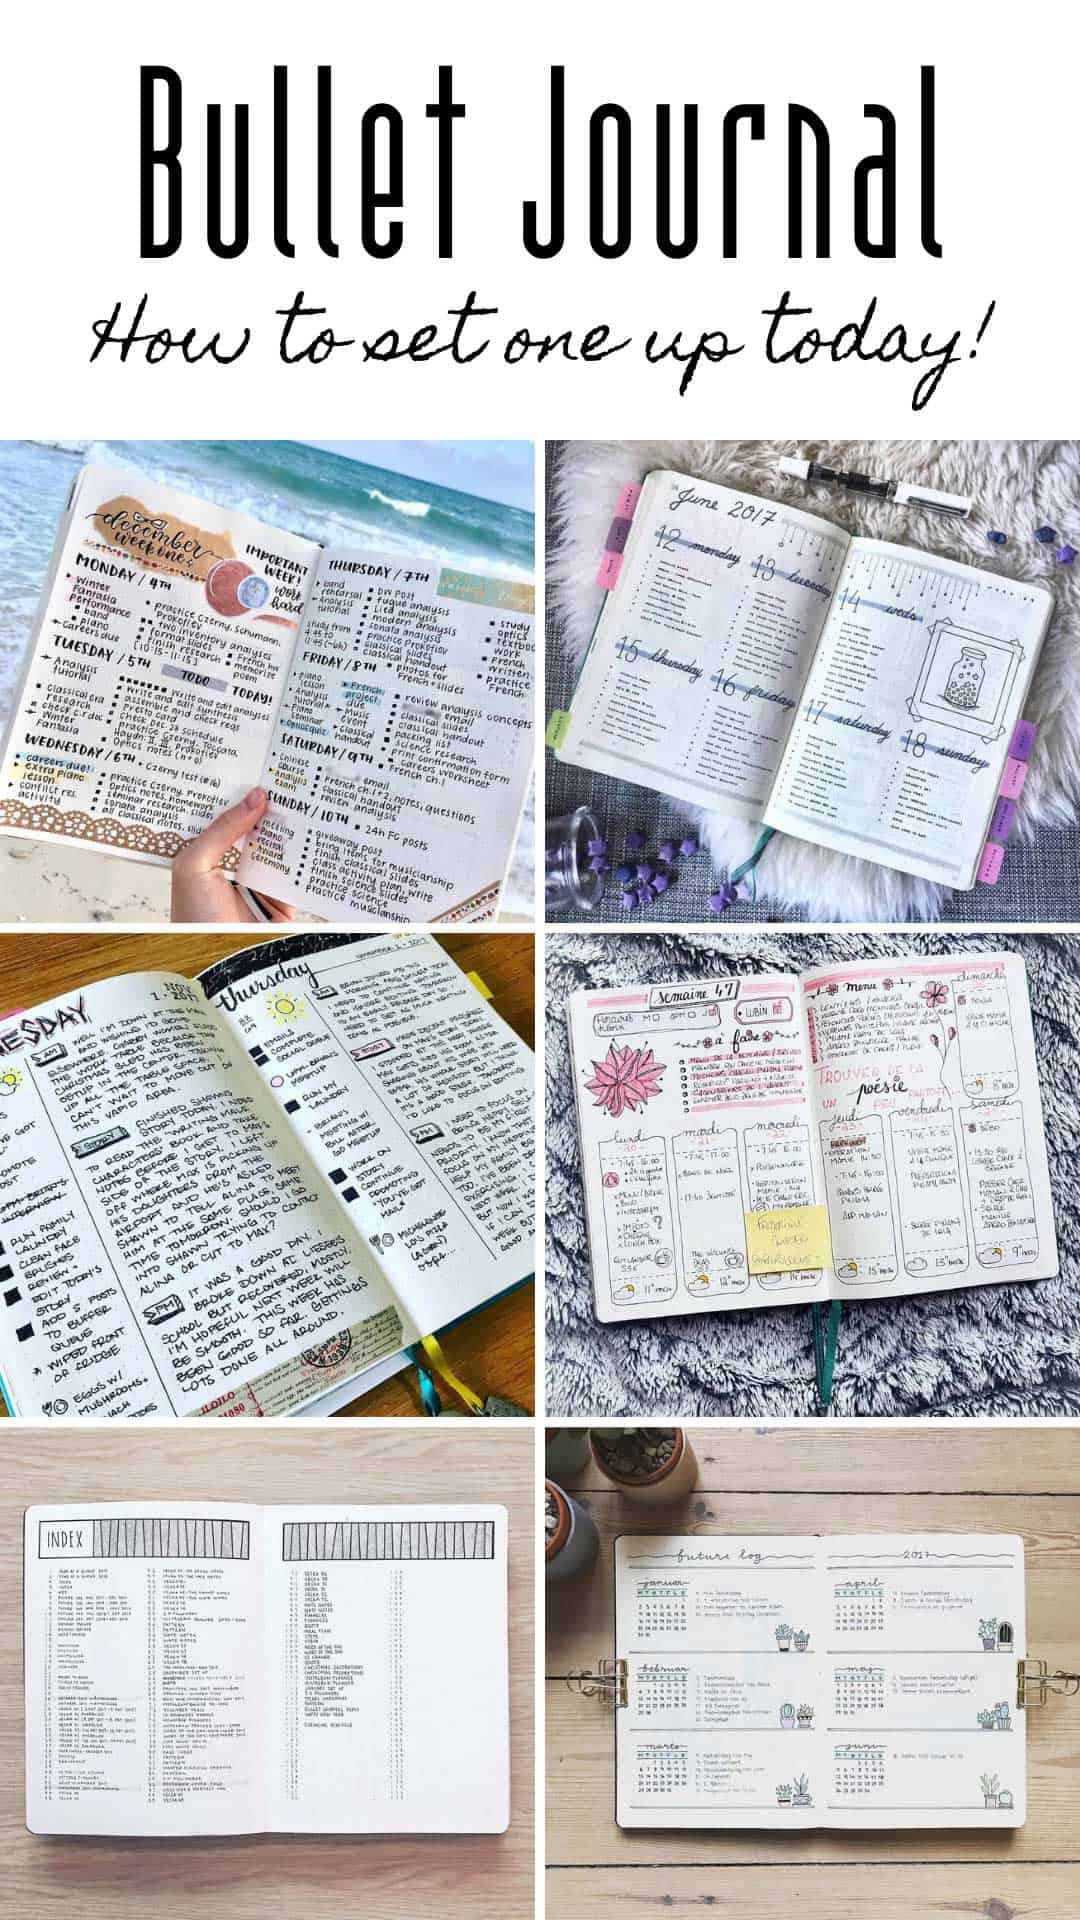
What is a Bullet Journal anyway
There isn’t usually a day that passes that I don’t hear people talking about Bullet Journals, one friend uses hers to stay on top of her teaching duties, reading logs and crochet projects, another is a lawyer and uses hers to stay organized but also has the best collection of cat name ideas mixed right in there with her work stuff!
This post may contain affiliate links. As an Amazon Associate I earn from qualifying purchases. If you click and buy, I may receive a small commission at no extra cost to you. Read our Disclosure Policy
So what is a Bullet Journal
Well the simplest explanation I can give you is that it’s a to-do list, a planner and a diary all in one book.
Sound like a crazy idea
Most people think that until they actually try it, because when it comes to Bullet Journalling the proof is in the pudding.
You won’t know if it it’s the thing that’s going to rock your world until you try it.
And the best thing about using a Bullet Journal is that it’s totally custom designed for you, by you.
If you struggle using a planner because you can never find one that has the right layout, or number of boxes, for the information you need to organize your time then a Bullet Journal is what you want.
You can decide whether you want to plan your time using a daily or weekly spread, and you can design it yourself right there on a blank page.
And at the end of the month you take a look at what worked and what didn’t and you design a slightly different layout for the next month! It evolves with you.
If you’ve always liked the idea of journalling or keeping a diary but never really knew what to write down then a Bullet Journal can help you with that too. You can go as simple as recording events and memories right there in your “planner” lists.
Or you can embrace bujo collections and have whole pages dedicated to the books you’ve read, the places you’d love to visit, or just how long it took you to complete the couch to 5k!
The great thing about bullet journals is that they can be the perfect way to plan for everyone from a college student who wants to organize their school schedule to a stay at home mom who needs to keep track of everything family life throws at her!
Keep reading to check out our super simple guide to Bullet Journal setup, because all you need to get started is a blank notebook and a pen so you have nothing to lose in trying it out for yourself!
If you’re still not convinced that a bujo is right for you go ahead and check out our ultimate guide about how to bullet journal which goes into a lot more detail.
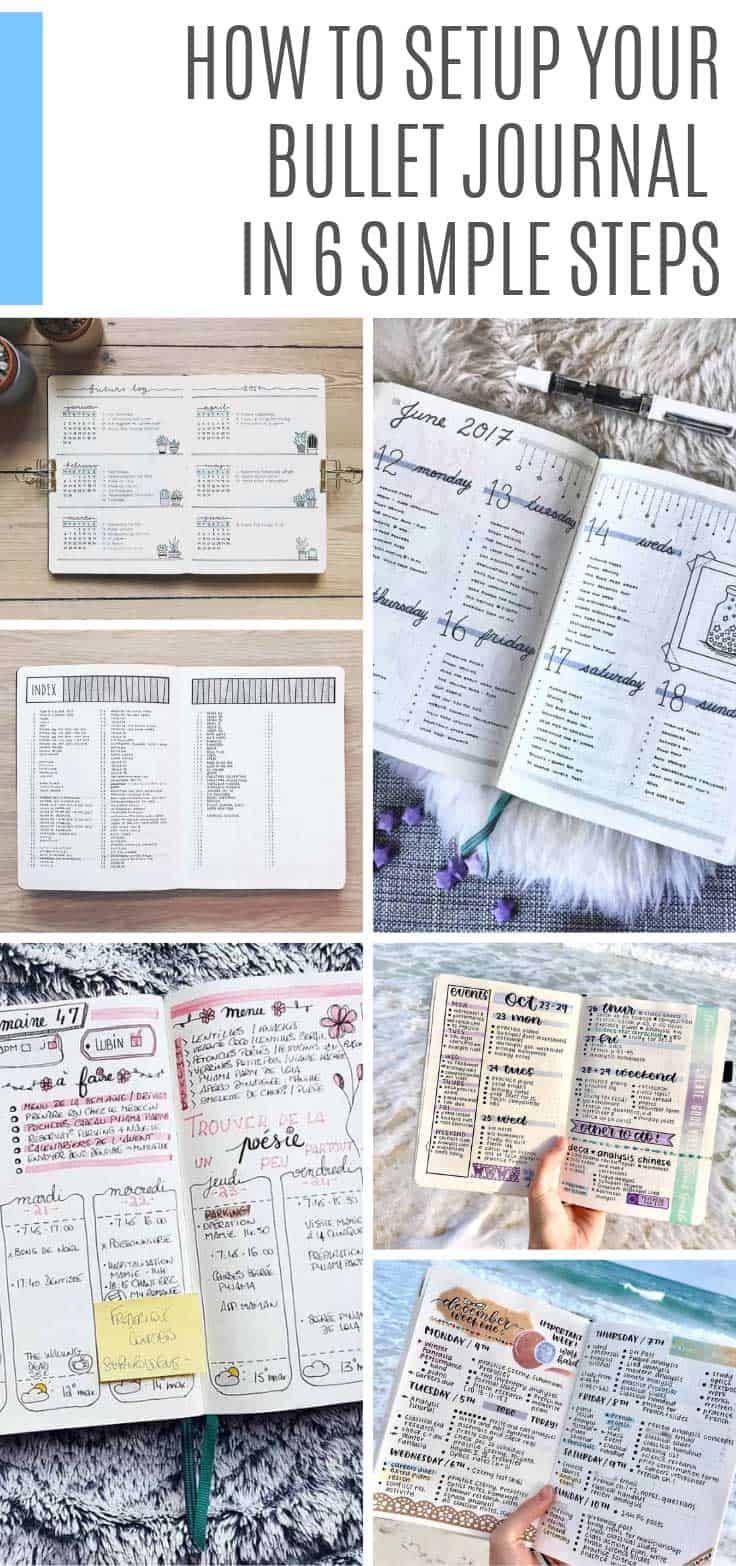
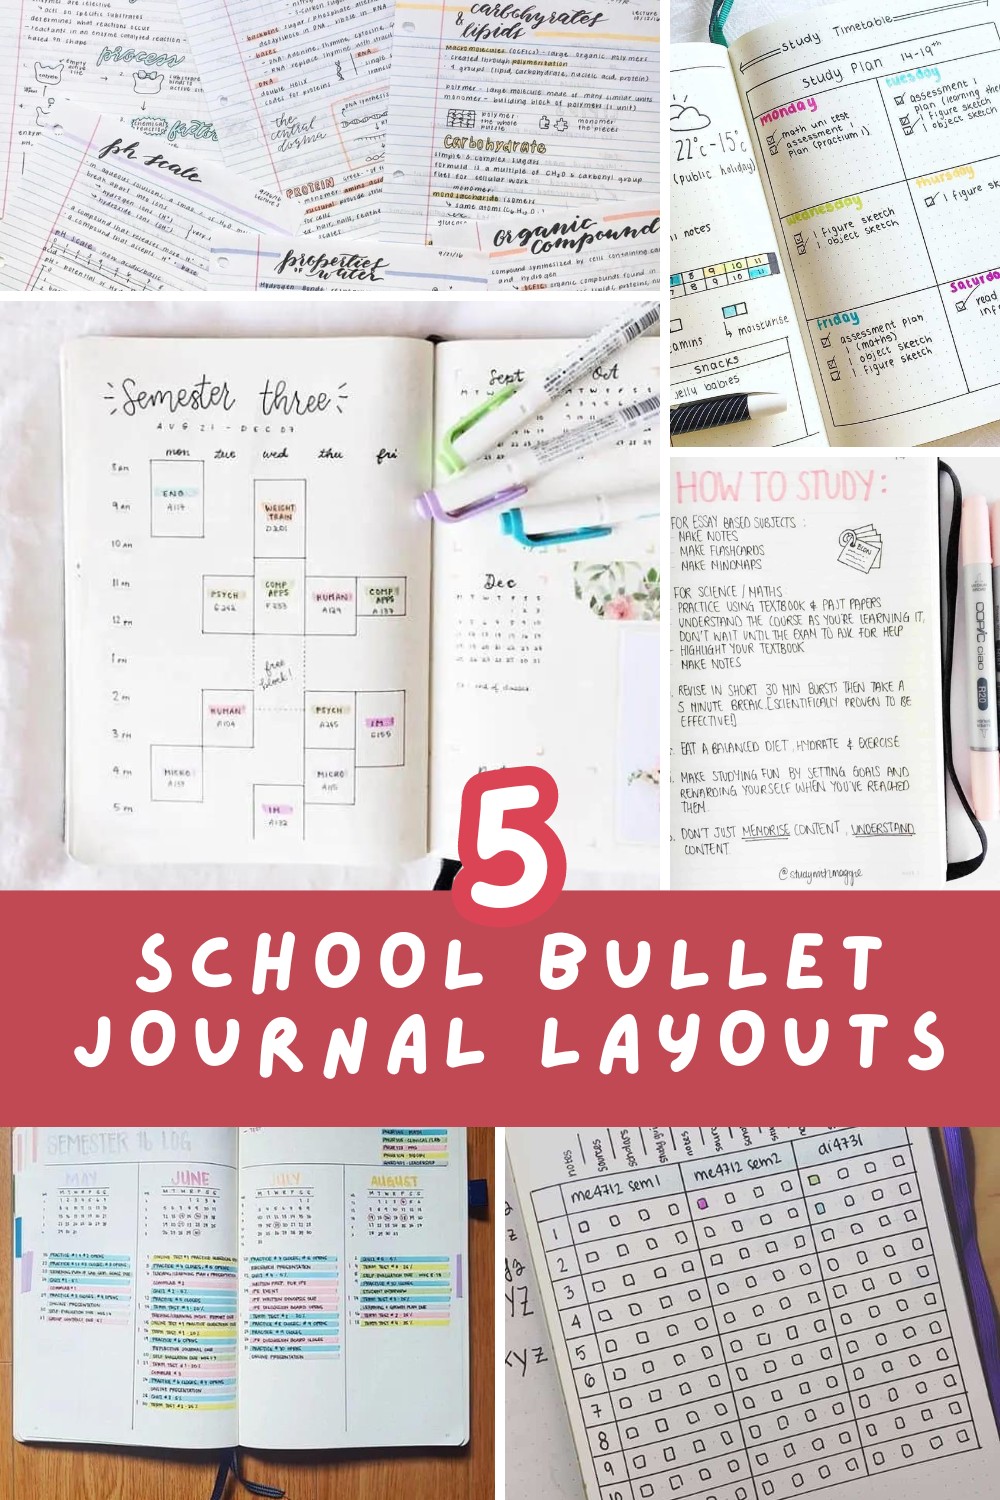
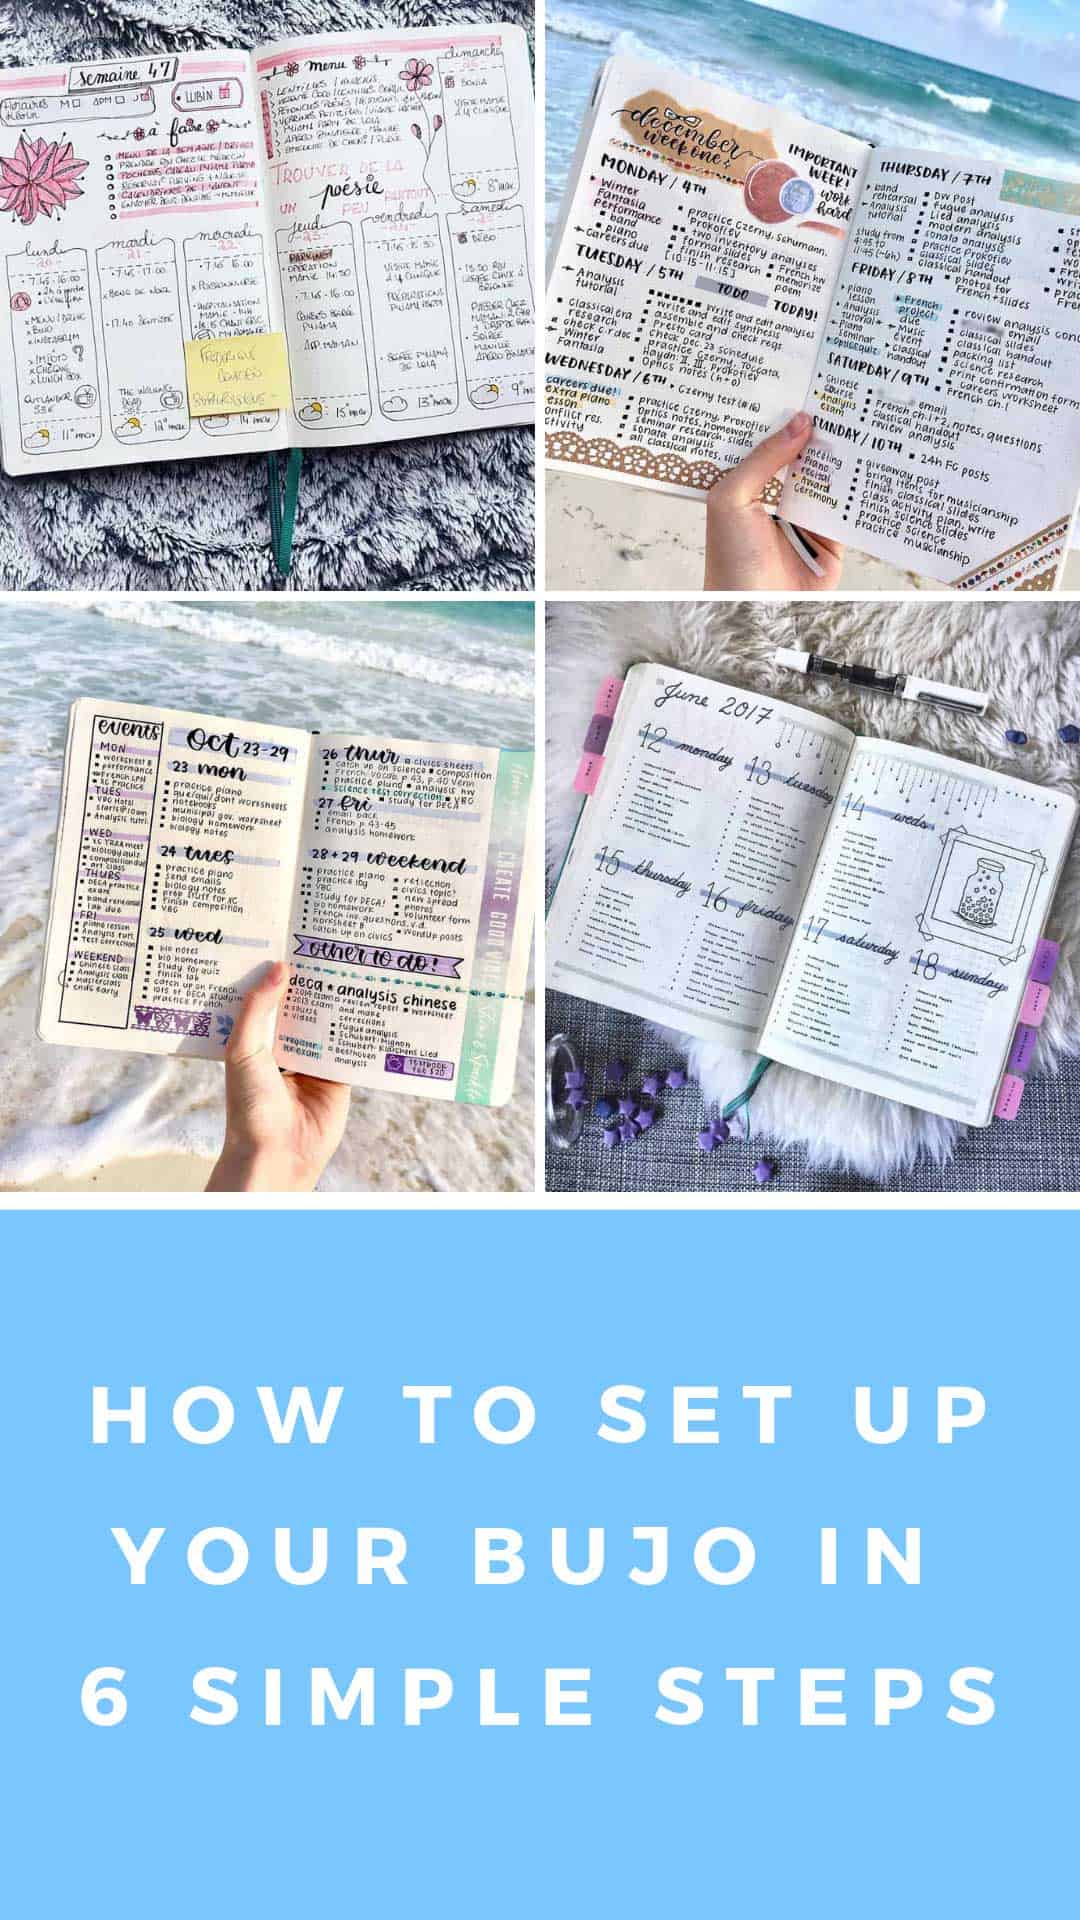
Bullet Journal Setup
Now you know what a Bullet Journal is here’s your super simple guide to setup!
Step 1: Number all of your pages
Unless you have a Leuchtturm1917 notebook which comes with it’s pages already numbered you’re going to need to hand write in your own page numbers.
It’s tempting to think you’ll just do it as you go along but since the page numbers are pretty critical to how your Bullet Journal works it’s best to do it up front.
So grab a pen, switch on your favourite TV show and get it done!
Step 2: Set up your Bullet Journal index on the first two pages
This is where you are going to list out all of your weekly and monthly logs, planners, trackers and collections.
Set aside at least two pages, and then it’s up to you whether you want to have a running list of all items in your BuJo with their associated page numbers, or whether you want to break the index up into sections so your logs are separate from your collections.
Just make sure you remember that every time you start a new page you need to note down the title and page number in your index so you can find it again!
Here are a few examples to inspire you.
Chronological index
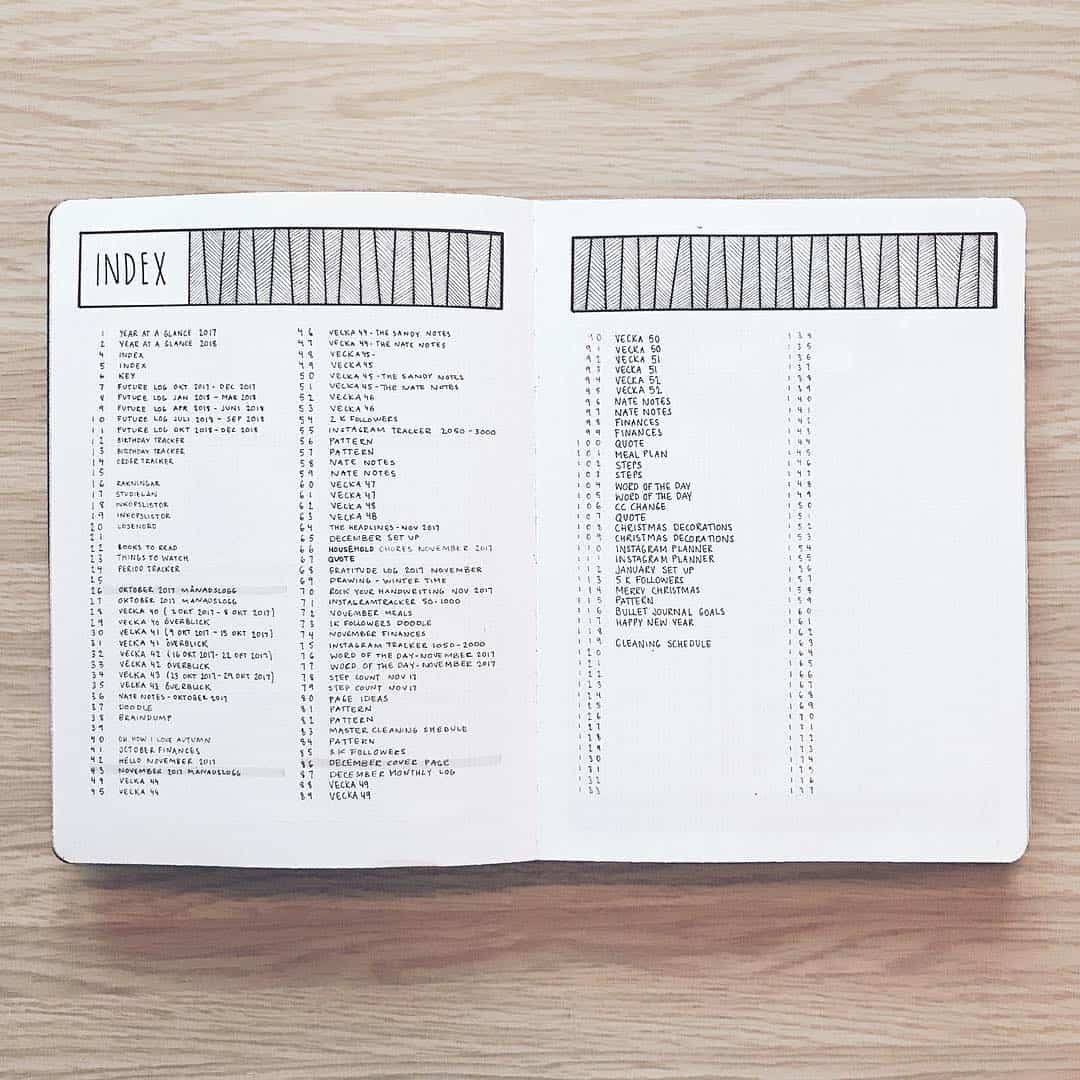
This is an example of a chronological index.
Split column index
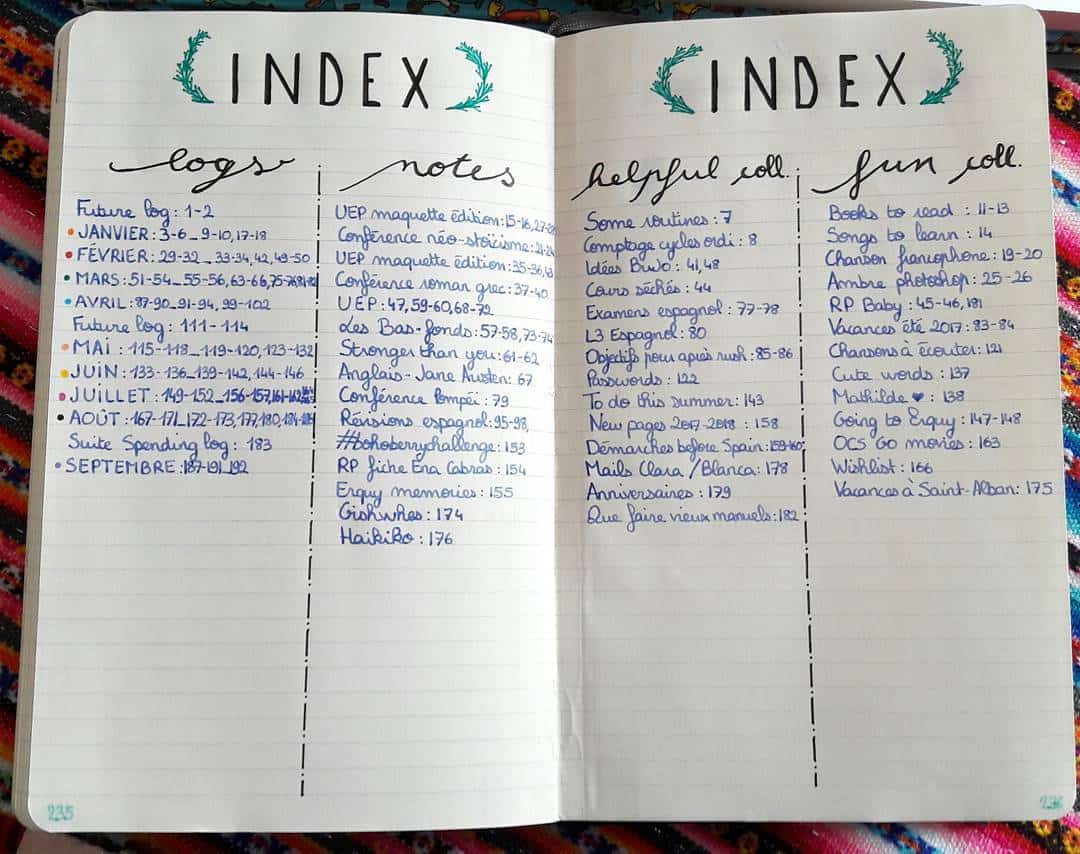
And this one uses a different column for logs and collections etc.
Step 3: Set up your future log
This is where you are going to keep track of events coming up over the next year. It could be a dentist appointment, your car service or a friend’s birthday.
Your future log will extend over a number of pages depending on how much space you want to set aside for each month.
The most common practice is to split a page into three sections so that you have a four page spread to cover the whole year.
It’s up to you whether you use horizontal or vertical columns. You can also decide whether to have a dated calendar box incorporated into your future log. Some people choose to have a page with all 12 boxes on so they can see the year at a glance.
Oh and going back to the birthday thing, you might actually decide to set up a birthday spread instead because it can be more fun that way!
Here’s your future log inspiration…
Horizontal log
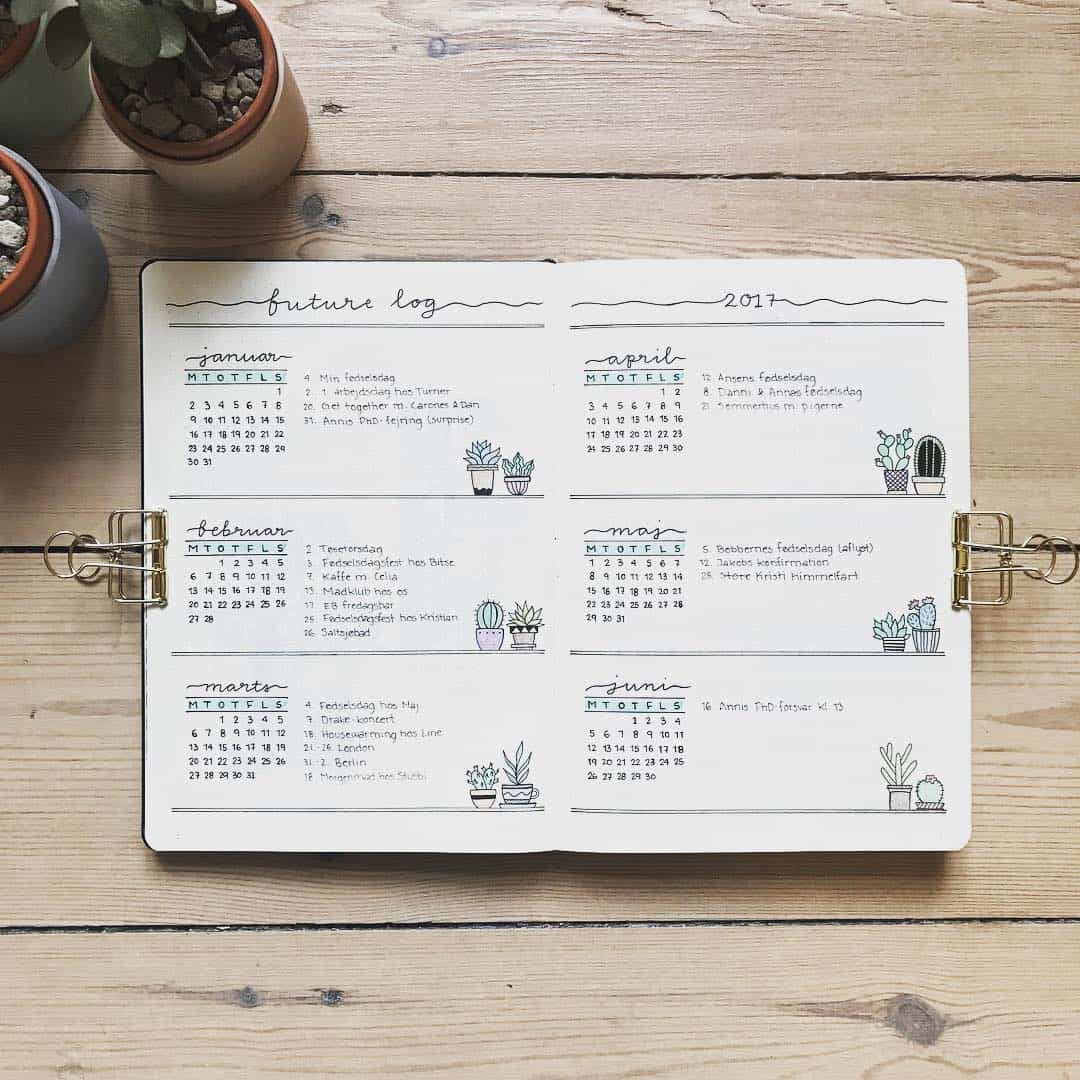
This is a great example of a horizontal future log set up. You can never have too many flower doodles in your journal!
Calendar squares
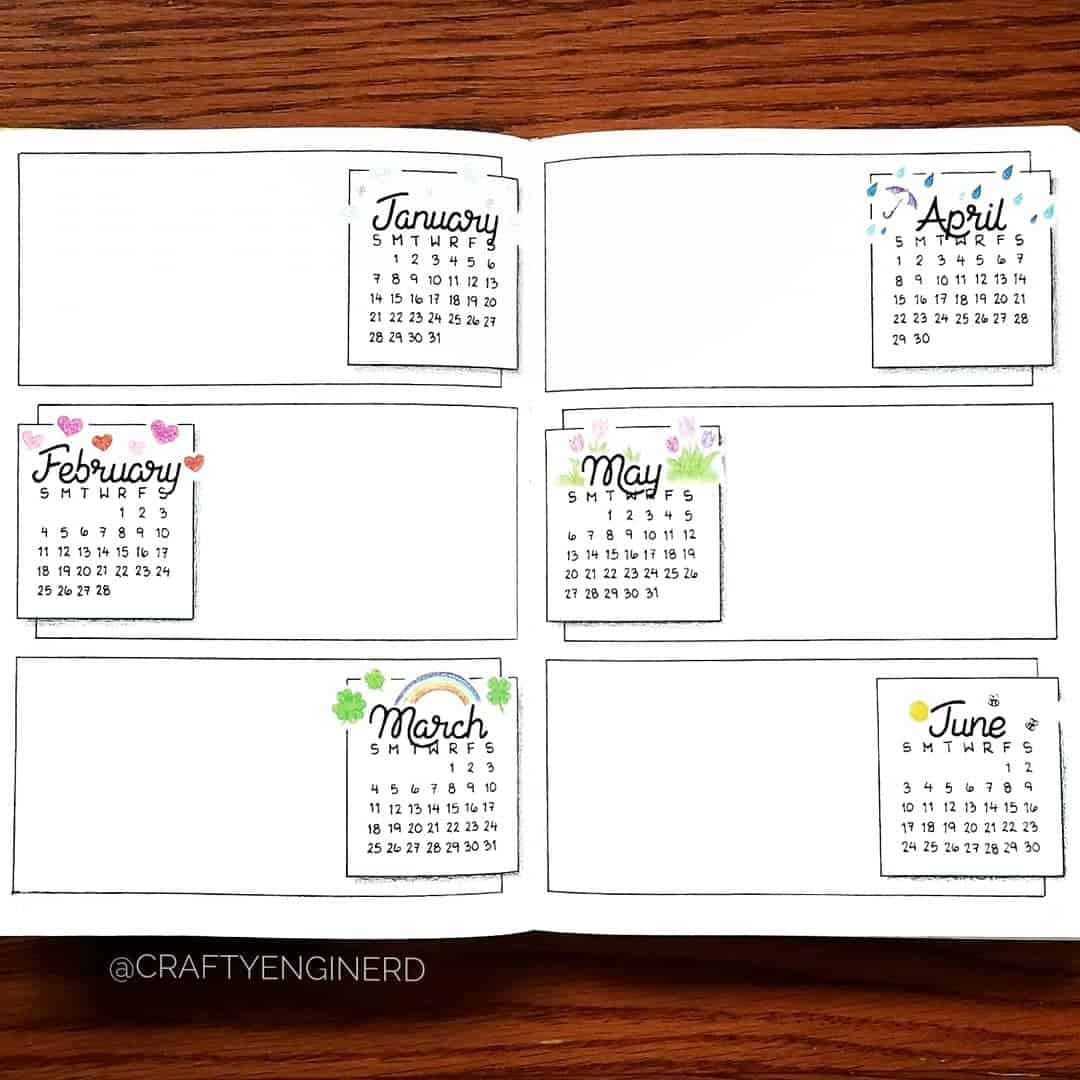
In this spread I love how the calendar squares have been offset to a different side each time and then decorated!
Illustrated future log
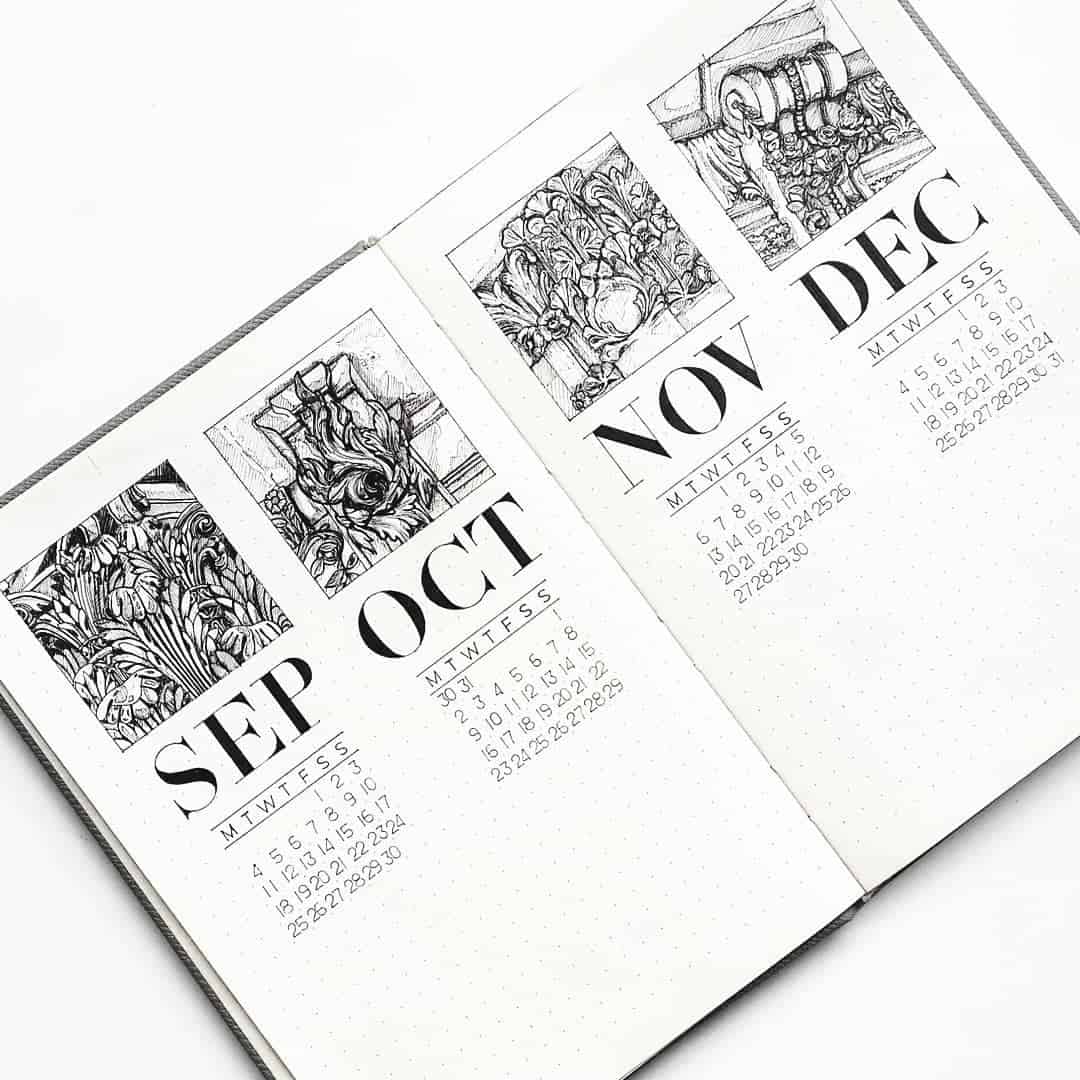
Here’s an example of how you can add some illustrations to your future log. Of course you could just skip the pictures and have more space for your entries!
How to cope with recurring events
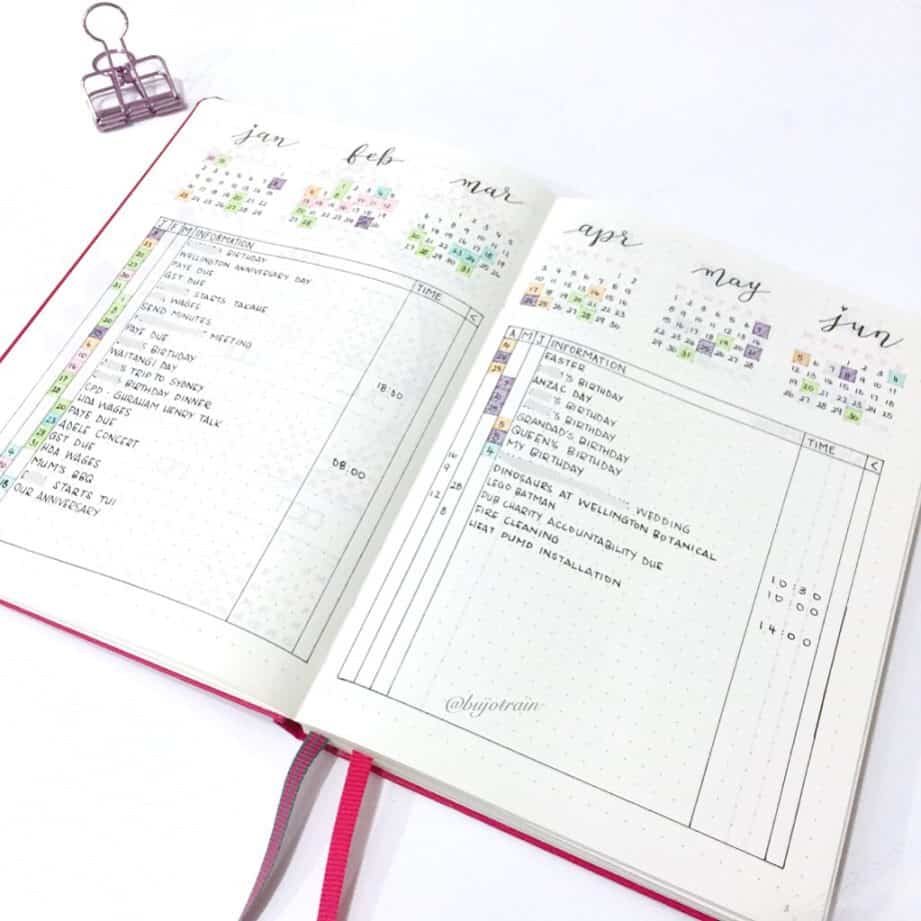
Or you can break the mould completely and try this future log spread which uses columns to show which event belongs to which month. This is useful if you have recurring events throughout the year because you don’t have to keep writing them out over and over again!
Future log on one page
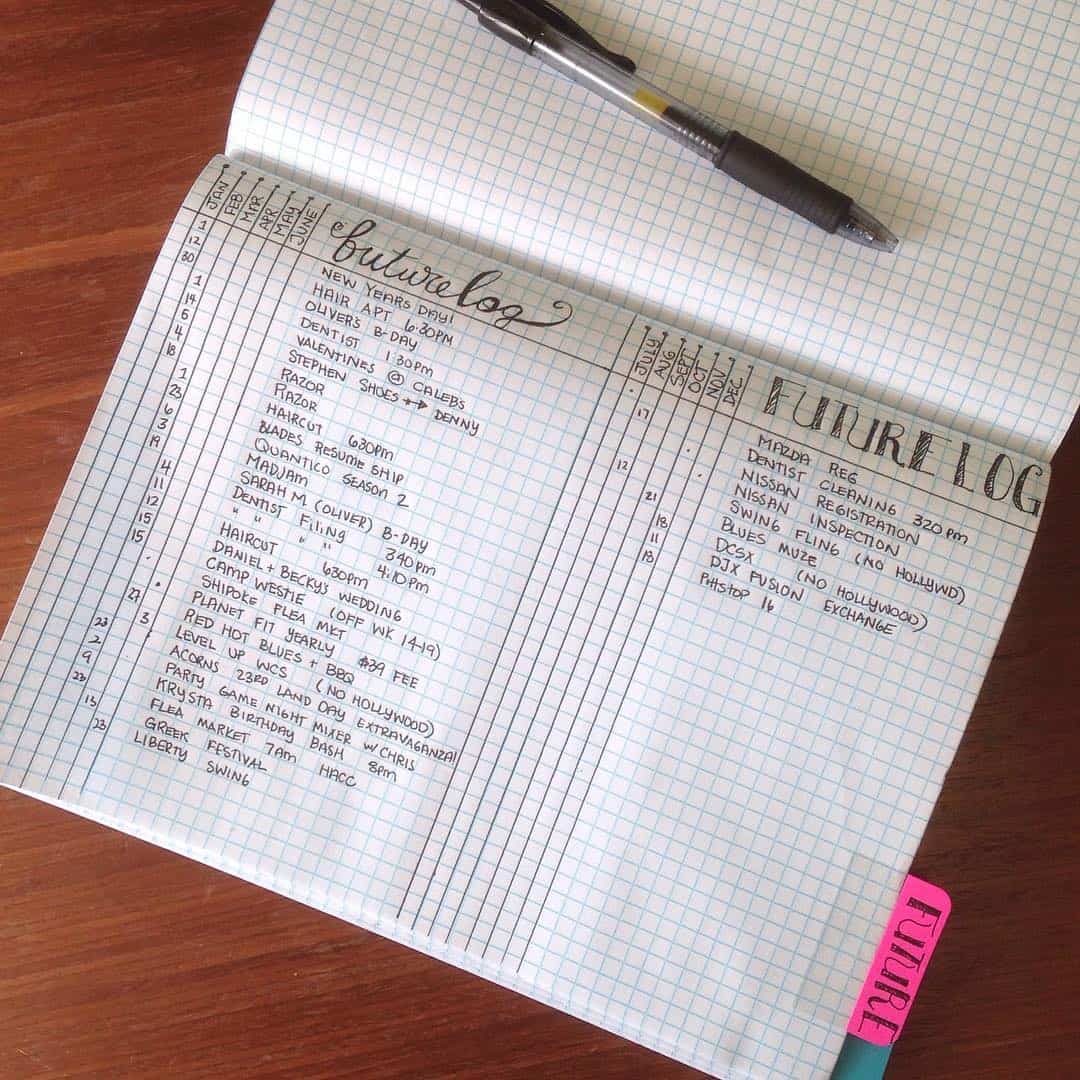
You can even fit the whole year on one page doing it this way!
Birthday tracker
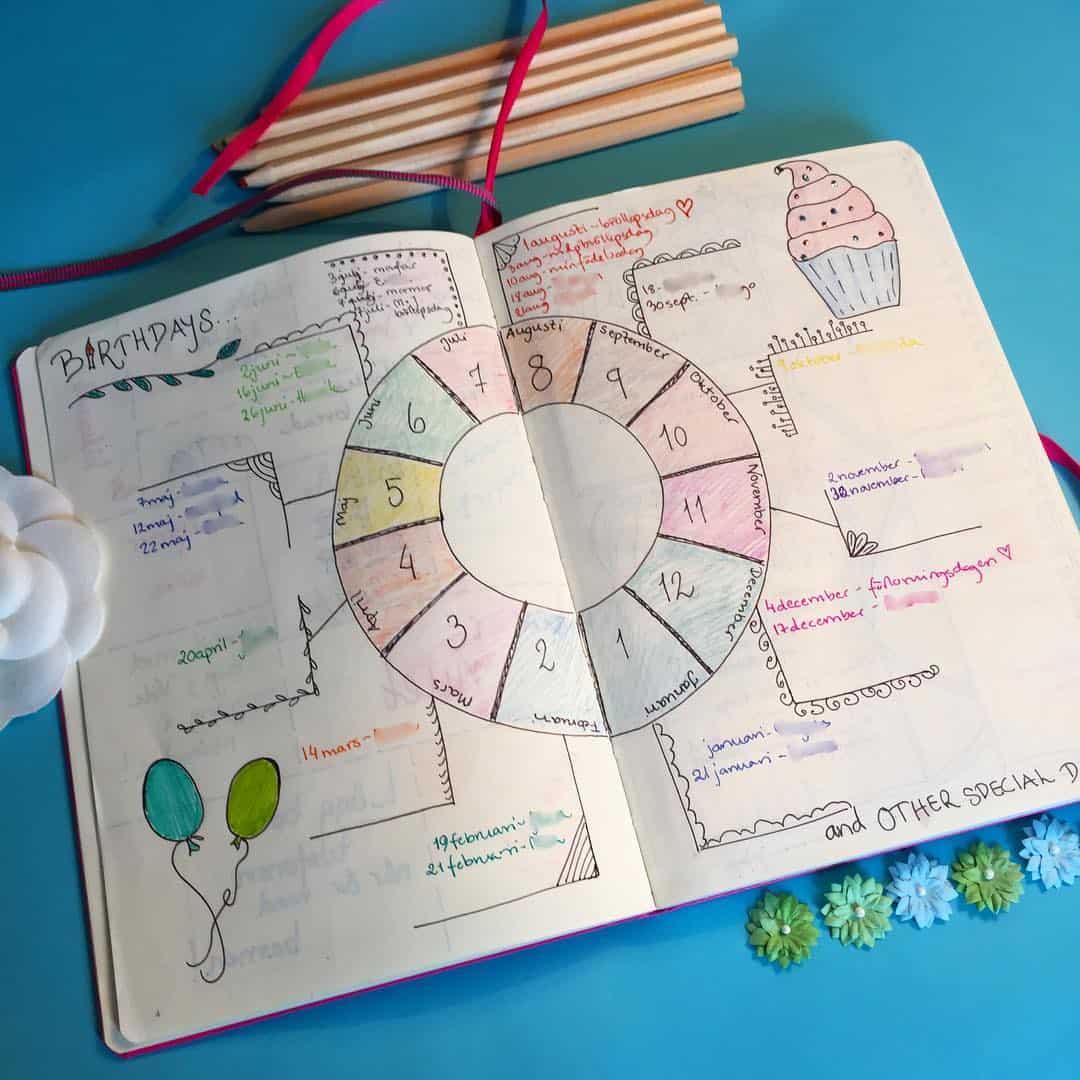
Here’s a creative way to keep all your birthdays on one spread outside of your future log.
Step 4: Set up your monthly spread for the upcoming month
Now it’s time to add your monthly spread, which is usually your calendar and to do list for the month ahead.
The quick and dirty way to set this up is to write the numbers 1-31 (or 28 or 30) down the left hand side of the left page so that this becomes you calendar. And then on the facing page write out your tasks in bullet form.
Or you can be more creative with it…
Monthly spread
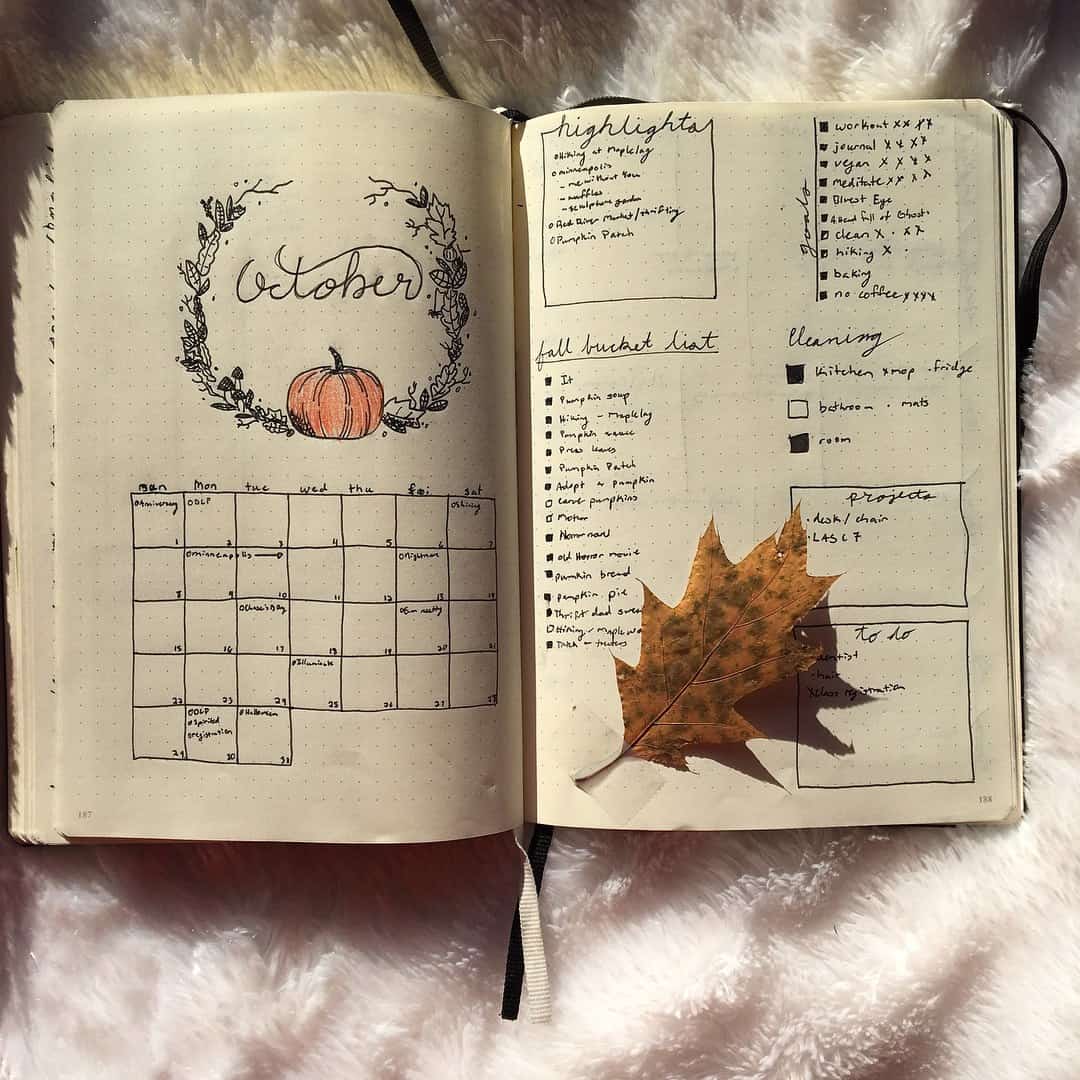
Use more traditional calendar boxes on the left, and then use the right side to track your bucket list for the month, note down highlights and remember what needs cleaning!
Use a calendar grid
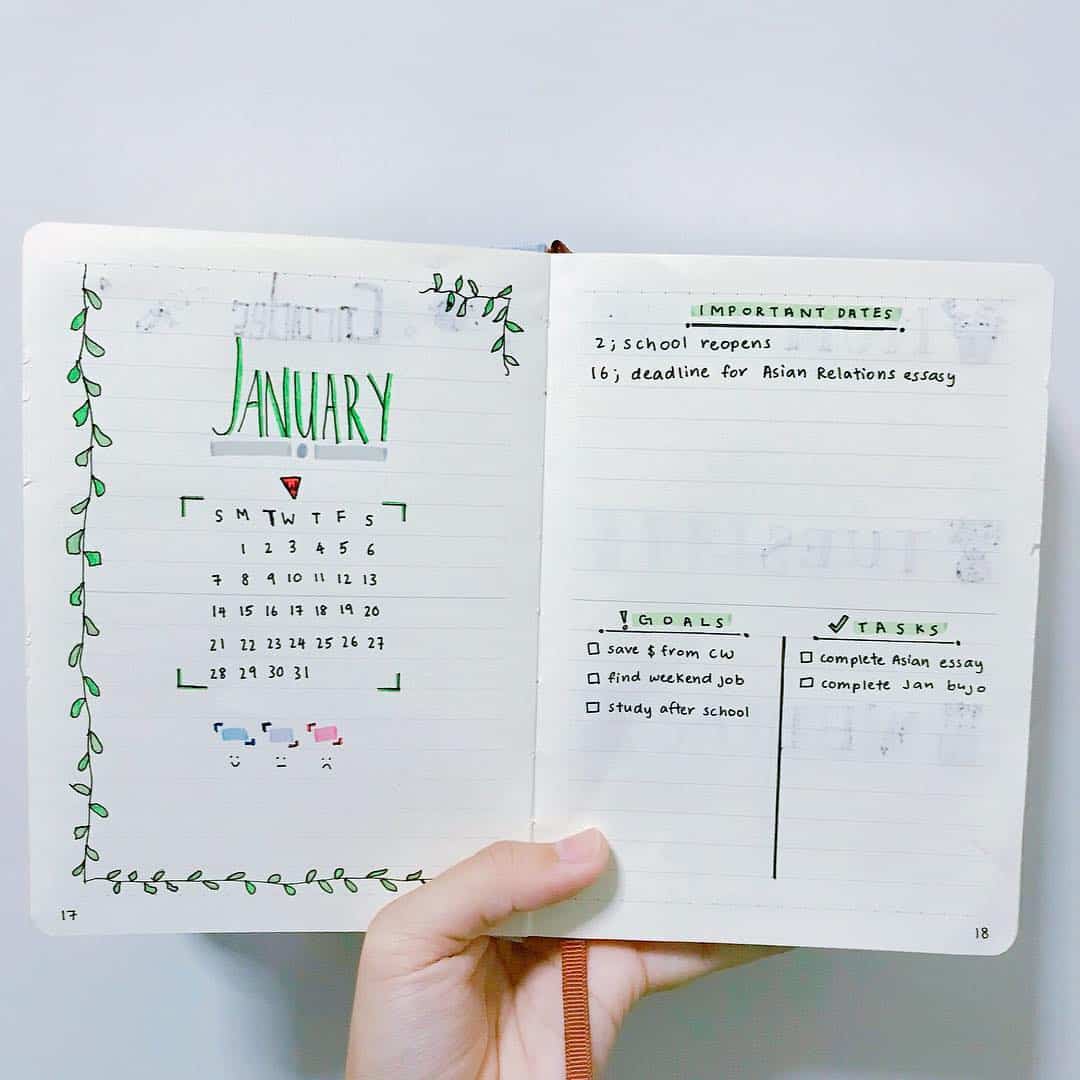
Use a calendar grid on the left and then on the right note down important dates, goals and tasks.
Make room for your habit tracker
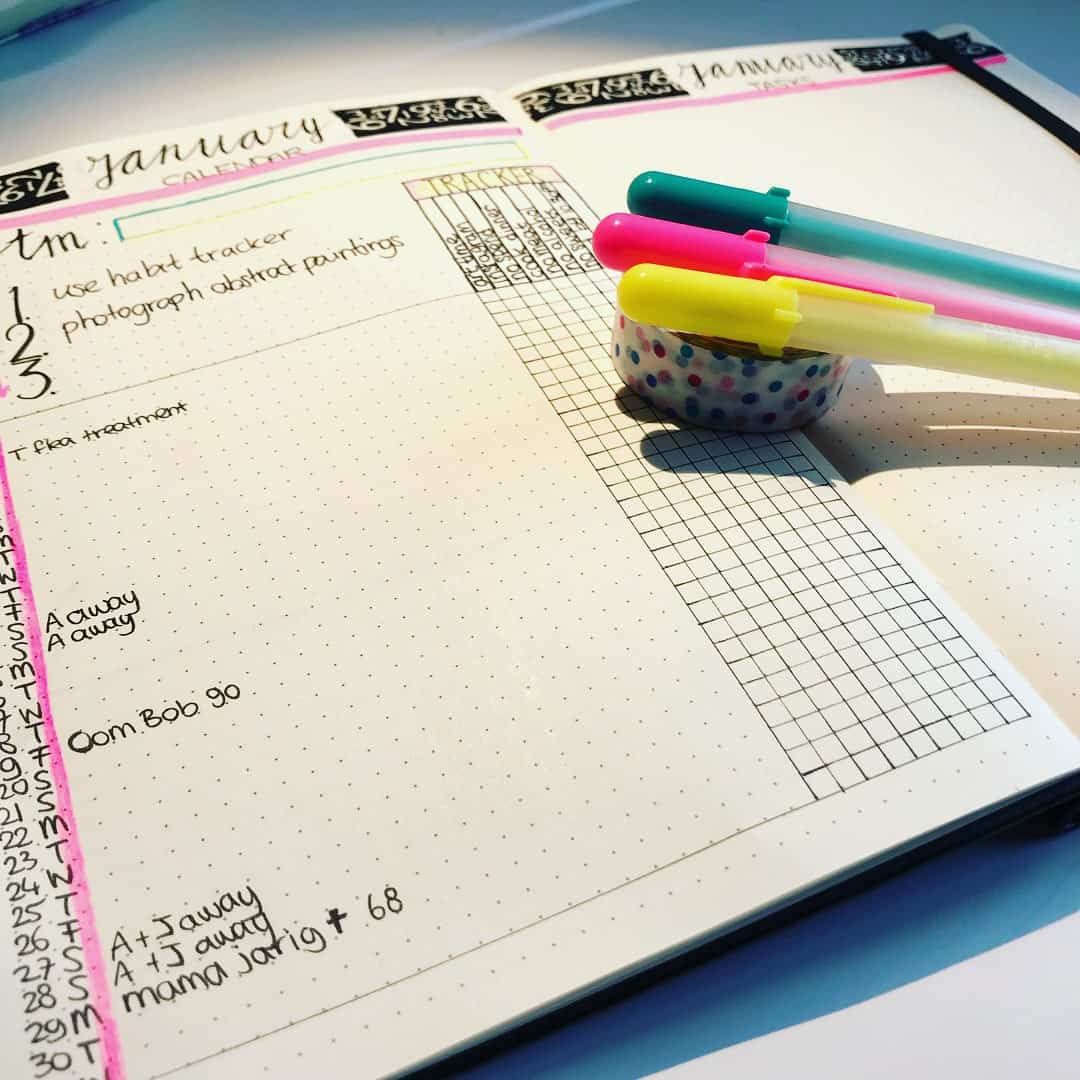
Set out the dates in a list but make room for your habit tracker by date too.
Two page spread
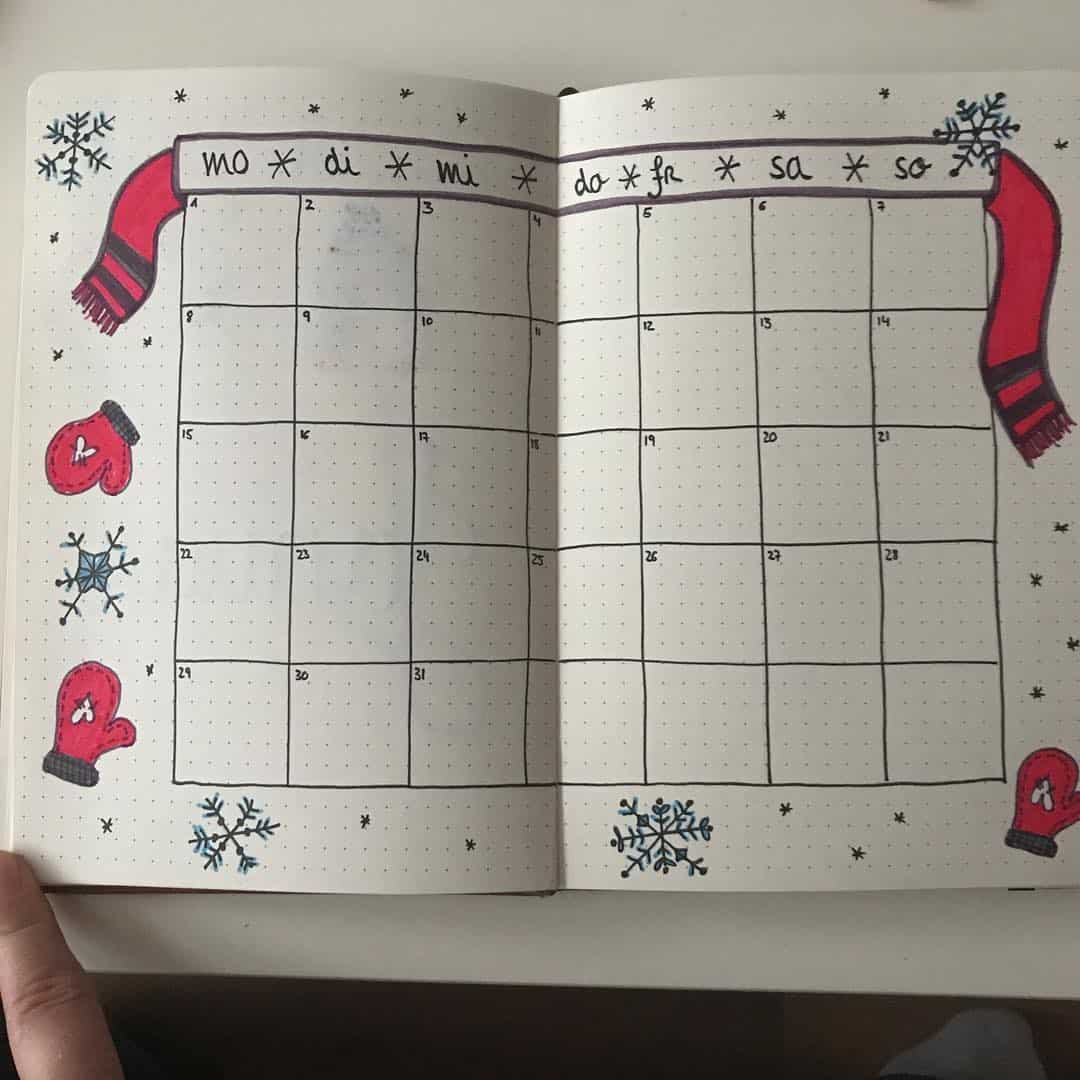
Use a two page spread for your box calendar layout.
Month at a glance
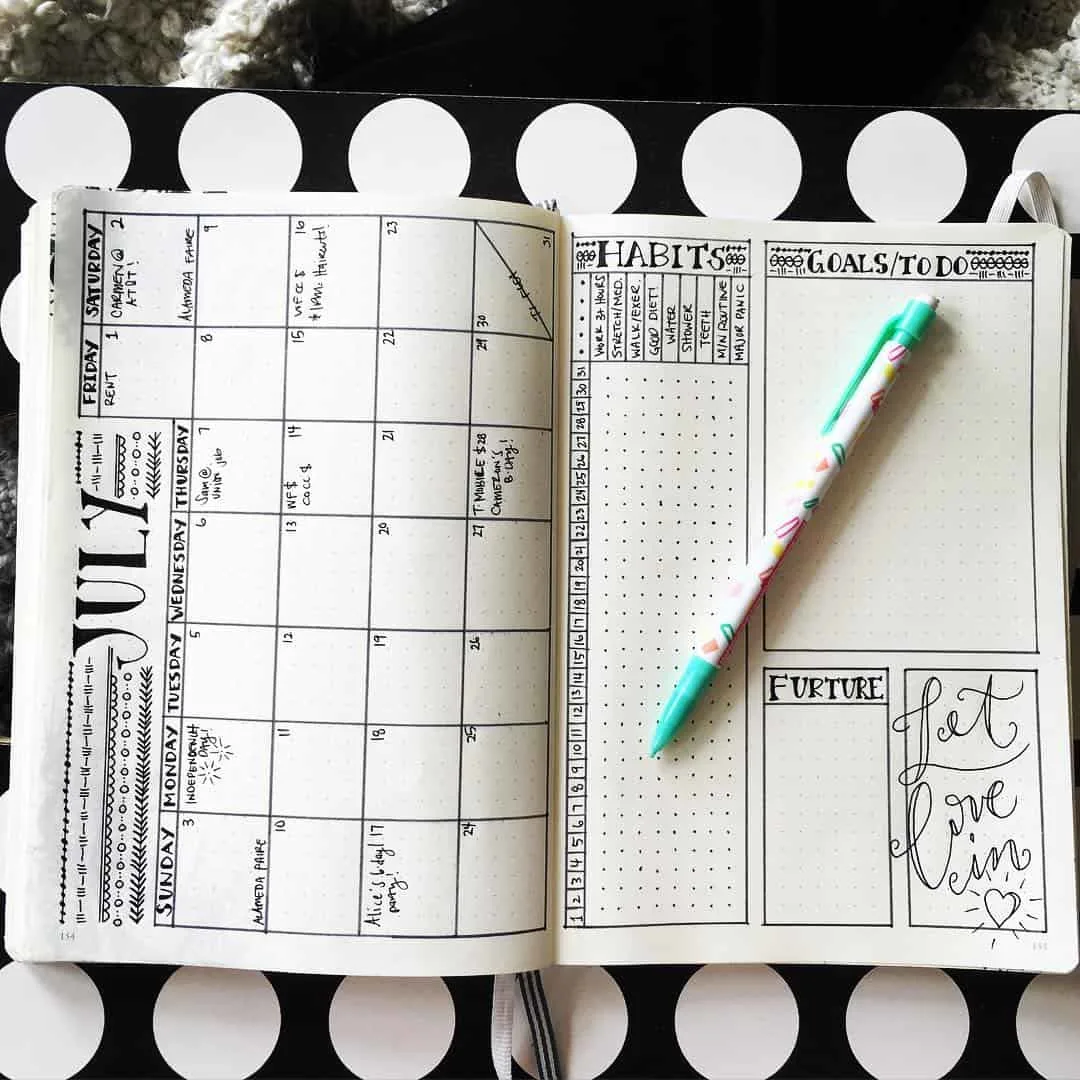
I love this one! Set out a box calendar on the left, but turn it sideways to make use of the space, and then use the right hand page for habits, goals and a quote!
Step 5 – Set up your weekly log
And now it’s time to set up your first bullet journal weekly spread. This is the real meat of your BuJo, the place where you keep track of all of your daily activities as well as ideas and events, and even things you just want to remember.
You can keep it really simple and just have a list of bullets for the first day, then at the end of the day write the following day’s date with bullets for the next day and so on.
Or you can plan out a week at a time so that you have boxes prepared to write in.
Here are some spreads to inspire you…
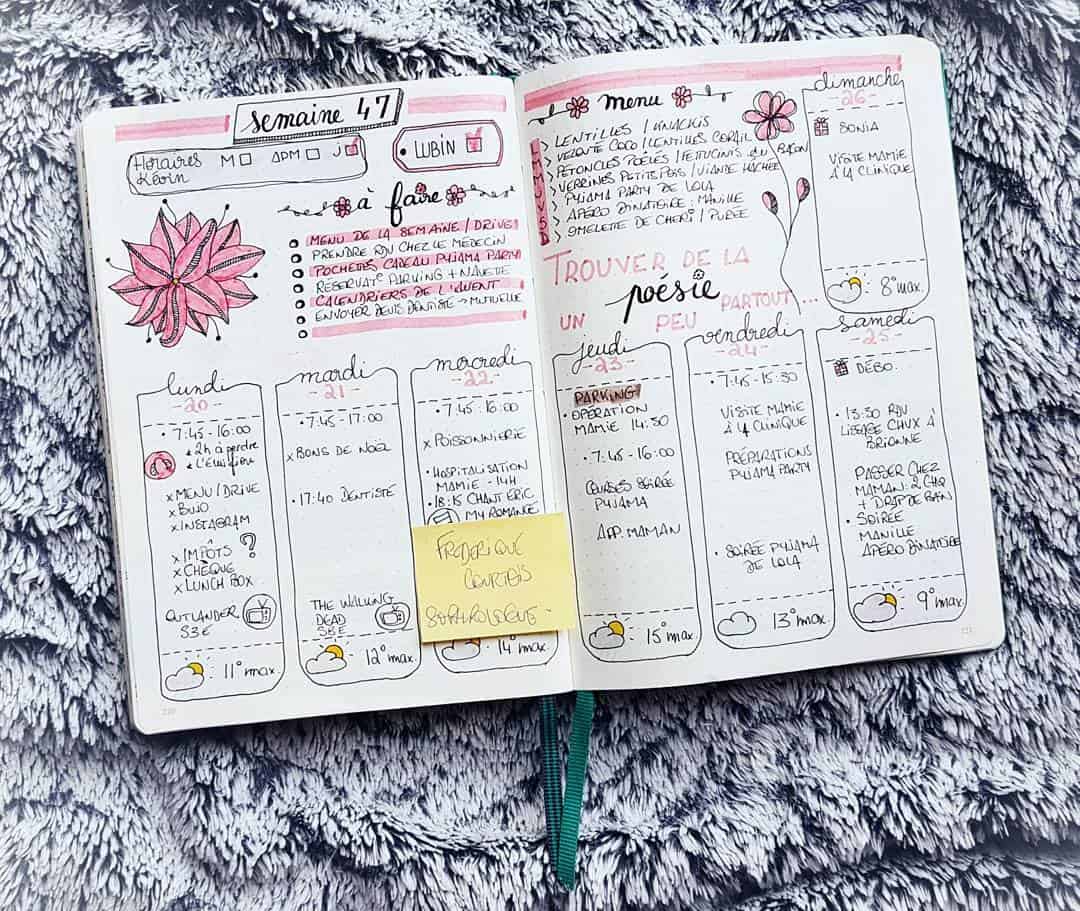
Ongoing list
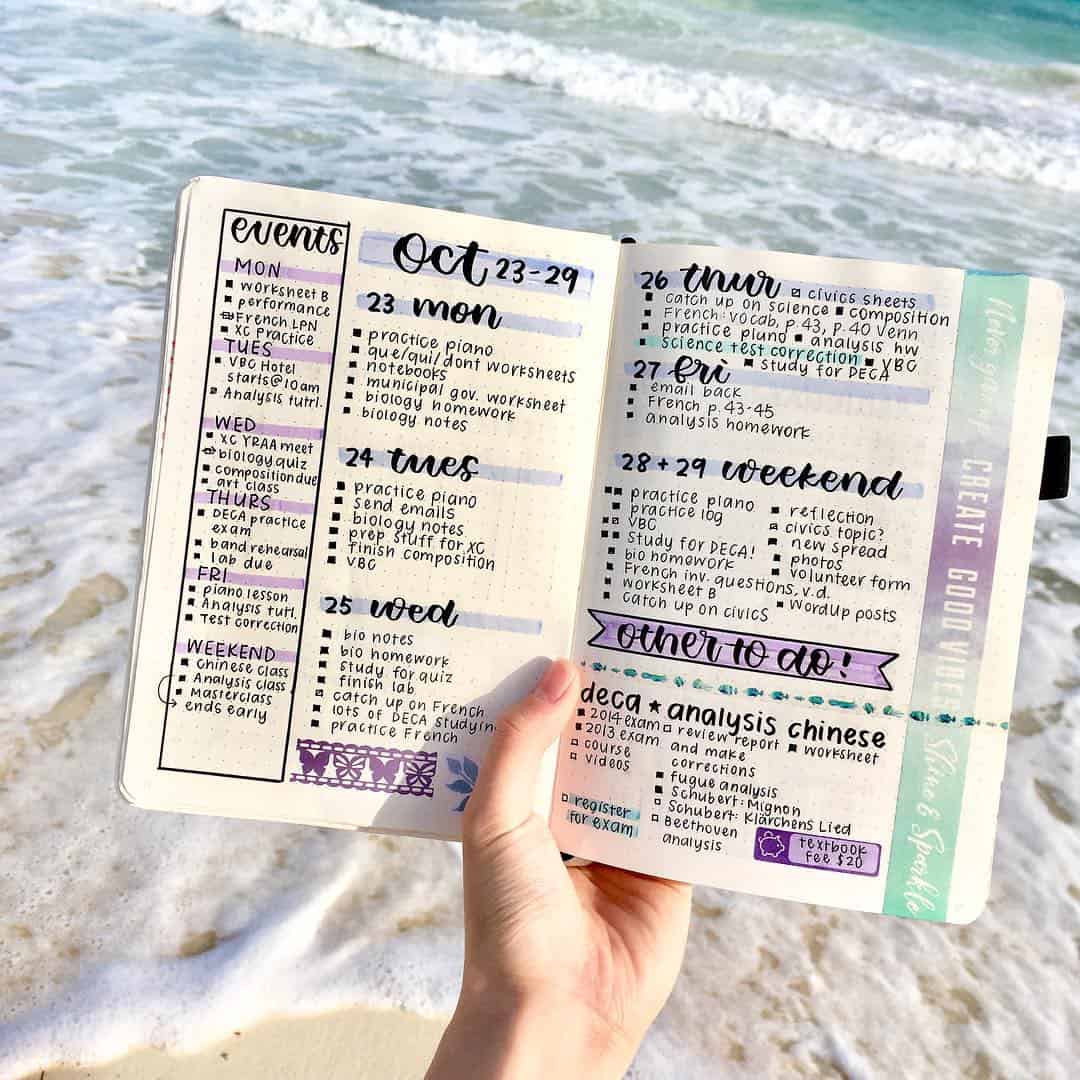
Here’s an example of an ongoing list, but there’s space on the side for events, and the spread is limited to the current week. Highlighting the dates adds a bit of colour and life to your lists.
Decorative daily log
Here’s another example of a running daily log with some decorative elements. Doodling banners and headers on your spreads is a really simple way to bring your bullet journal to life!
Planned out dailies
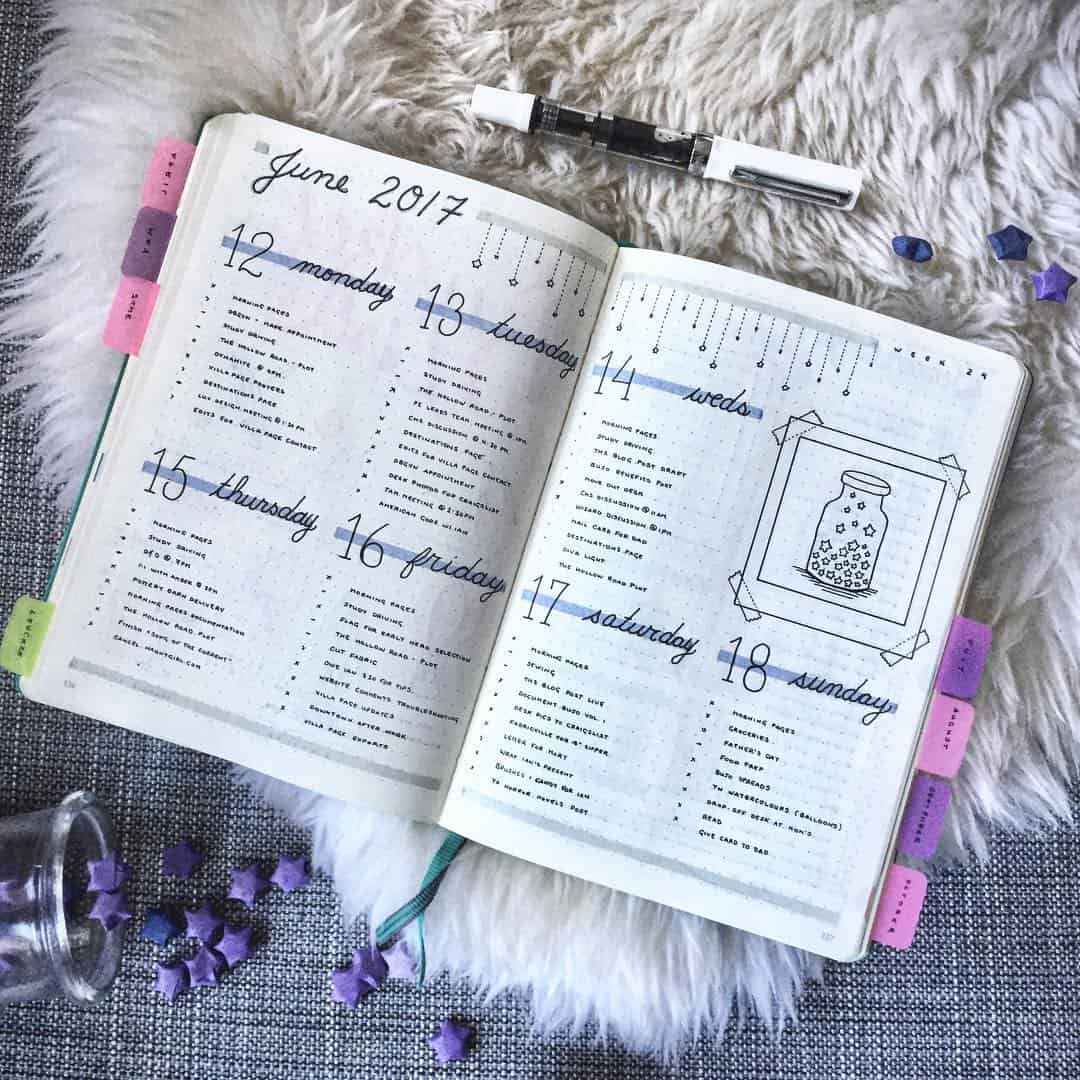
These dailies have been planned out in advance so that each day gets the same amount of space on the page.
A week’s worth of dailies
Here’s another example of how you can set your dailies up a week at a time.
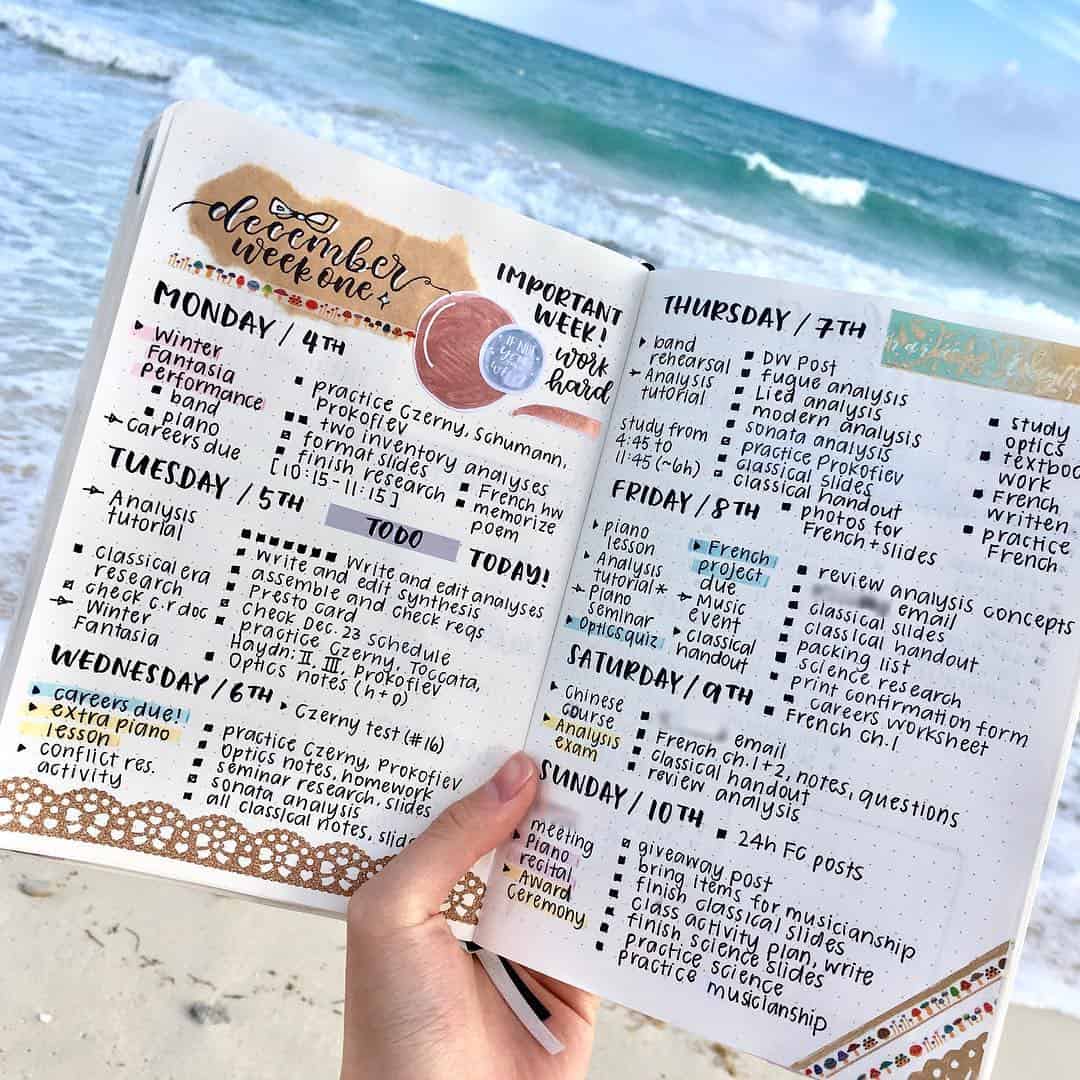
A day to a page
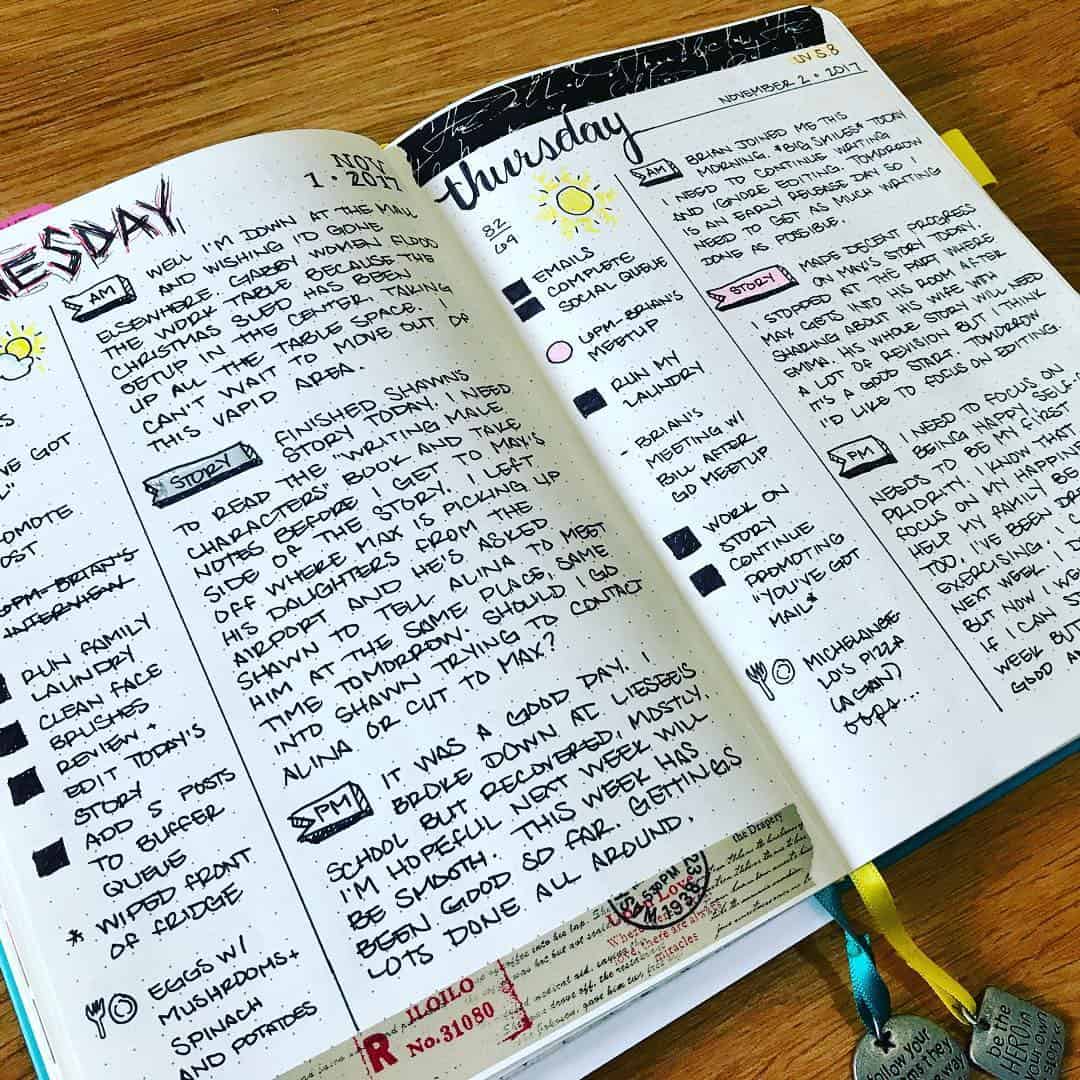
Or you can use a whole page for each day, incorporating your bulleted task lists with some journaling about the day. Oh and keeping track of the weather!
The great thing about your Bullet Journal is that you can try any number of these spreads until you find the one that suits your life best.
Step 6 – Set up your collections
Collections are pages where you keep track of related information all in one place. You might want to track the movies you have watched, books you have read, your weight loss journey, your capsule wardrobe or even your mood.
And your bullet journal is now ready to use!
Since this is the super simple bullet journal setup guide if you’re feeling a little overwhelmed right now because you don’t have time to draw everything out you can use some bullet journal printables instead!
Bullet Journal Setup Videos
If you want to watch someone else set up their BuJo before you take the leap into yours check out some of these bullet journal set up videos.
I love how she set up her birthday and special events page. It’s called a spiraldex and they’re super easy to set up with a stencil like this one!
It was also good to see someone mess up while setting up their bullet journal and how they fixed it! This definitely helped me when I got started because I admit for the first few days I was scared to write in my brand new journal in case I messed up and made it look terrible!
What a genius idea to use washi tape to make sure her design was nice and straight around her annual calendar! I really like how she set up her monthly log with the calendar at the top of each column.
Here’s a neat trick… go through your blank journal and use post its to plan out what you want to track on each page before you start drawing out your spreads!
I love her Trip Down Memory Lane tracker page for noting things she wants to remember throughout the year.
This video isn’t about setting up for 2019, it’s a flip through of her 2017 journal and it’s a really good example of how you can use your BuJo as a “journal” rather than just a task tracker.
I like how she sets up her monthly log using horizontal boxes but offsetting the calendar date box each time.
Check out this video if (like me) you’re a little intimidated by all the creativeness you seen Instagram. This is a minimalist bullet journal set up.